

I have always wanted to visit Princess Louisa Inlet, but have never had the right timing, boat, schedule, and everything else align until this year. It was an amazing experience that I will never forget, and I consider it one of the top 5 places I have ever visited – boat or not!
This is post 2 of 3 on getting to and returning from Princess Louisa Inlet.
Planning
One of the common jumping off points for a visit to Princess Louisa Inlet is Pender Harbour. We came up from Vancouver and the Gulf Islands, which I covered in my previous article. From Pender, our plan was to head up Jervis Inlet and the related reaches in one day, our longest distance day of the entire trip – 45 NM.
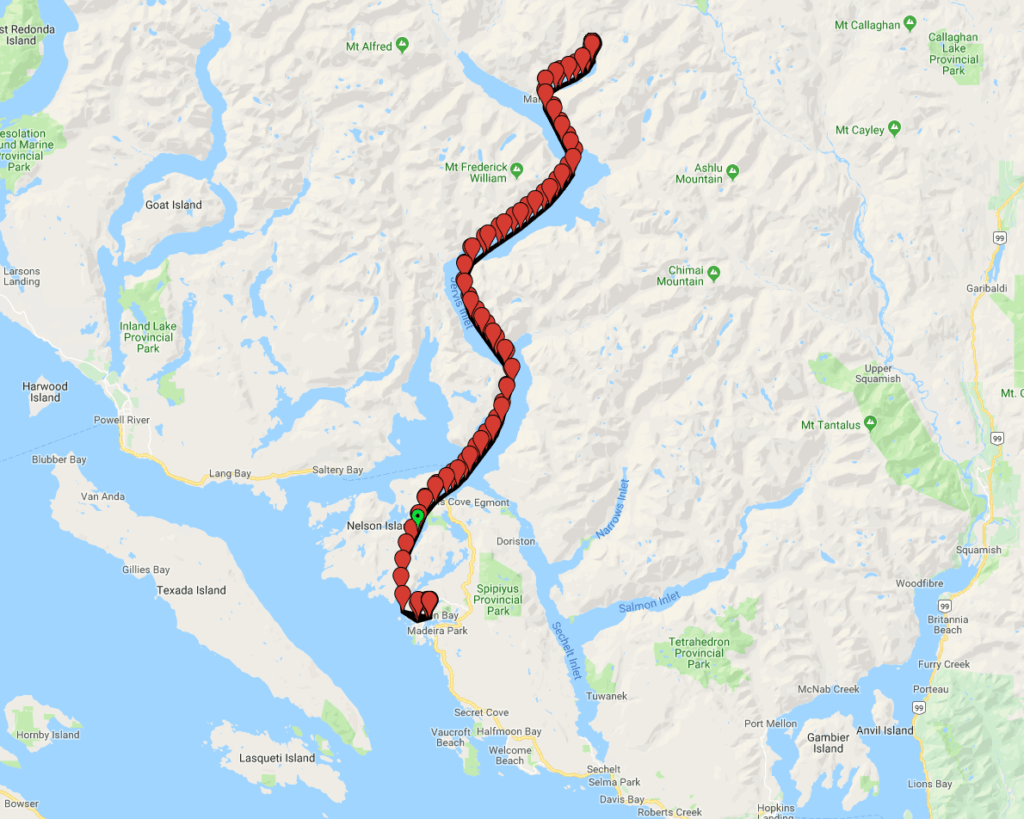
You can find the real map online here with GPS tracking points both up and back.
For Grace, doing 7 knots on perfect water would mean around 6.4 hours on the water. Realistically, I expected no more than 6 knots due to the tides and currents. Many people I talked to had said that the current was not much of a factor in the inlet and reaches, but I wanted to err on the side of caution. At 6 knots, that meant a 7.5 hour day on the water, which is a long time when you’re handling the boat alone.
To figure out when we needed to leave, we started with finding slack tide at Malibu Rapids, the narrow bit of water right before Princess Louisa Inlet itself. This is a hard one to get right – apps like AyeTides have “Malibu Inner” and “Malibu Outer” stations, which really aren’t stations per-se, but interpolations of tides based on something else. Many guides say to use X minutes before/after Pt. Atkinson high/low tides. Ultimately, what we found was most accurate was the latter – using the offset times based on Pt. Atkinson readings. It was still not exactly at that minute, but it was far closer than anything else we found.
The high tides on that day weren’t going to work for us – 5:51AM and 8:32PM. Trying to arrive by 5:51AM would require leaving in the dead of night and going up the inlets, which was not safe. Arriving at 8:32PM would mean dark with the tall mountains around the channel, and potentially arriving to a full anchorage. The only other choice was a low tide around 1:30PM, which is what we planned around.

Sea Bear behind Grace at about 6:30AM right after exiting Pender Harbour
This meant leaving Pender Harbour at 6AM, which was one of the earliest departures we had done. Nevertheless, I cast off right at 6AM, with Sea Bear following shortly behind. One or two other boats were ahead of us, and a few more started showing up behind us about an hour later.
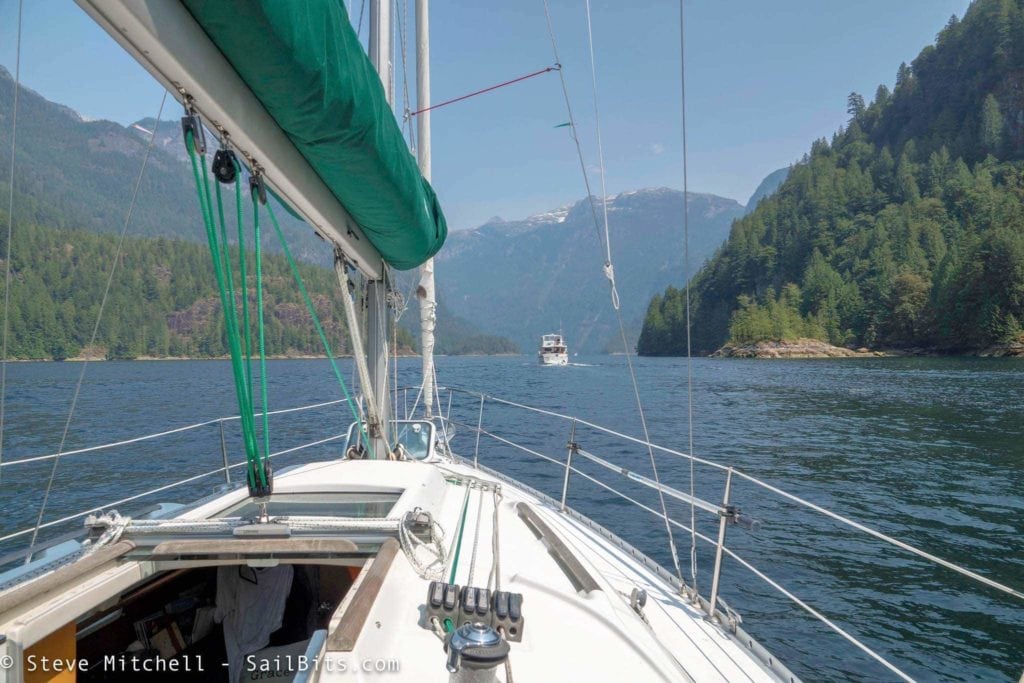
The Inlets and Reaches
Our path took us up a number of Inlets and Reaches before we made it to the Malibu Rapids, all with really interesting names, and absolutely stunning scenery. They were: Agamemnon Channel, Jervis Inlet (north part), Prince of Wales Reach, Princess Royal Reach, and Queens Reach.
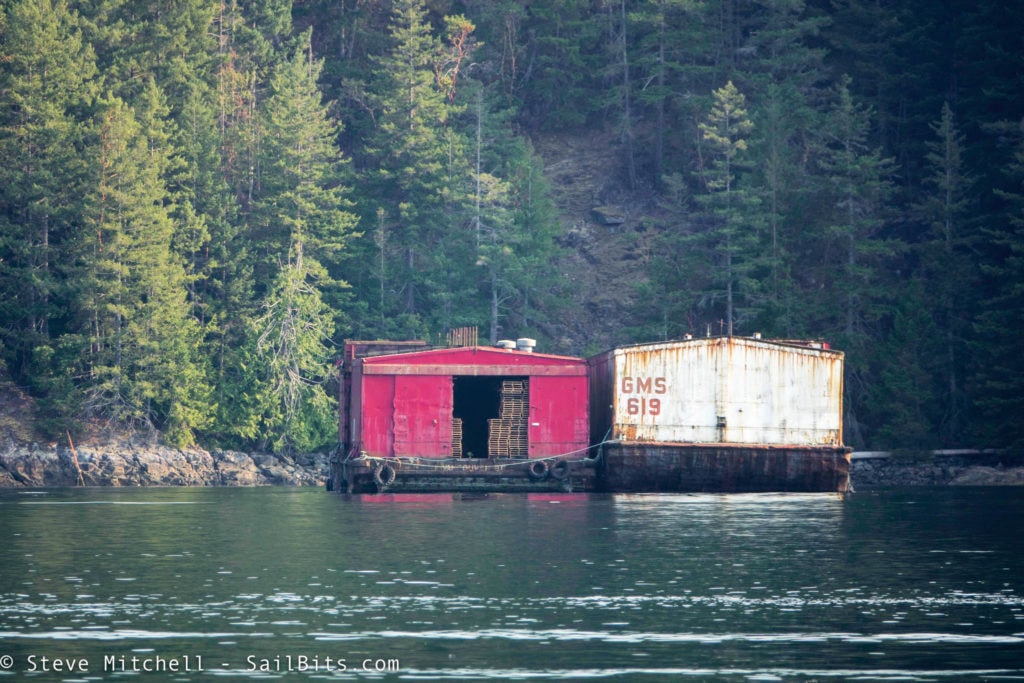
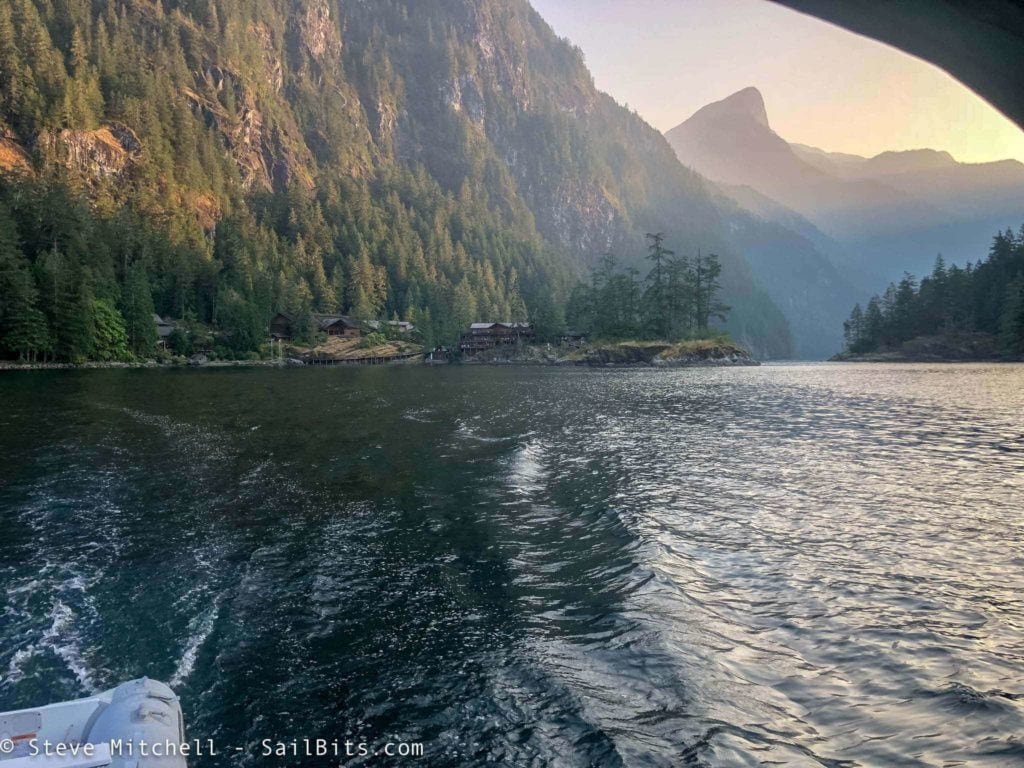
Along the way there was a lot to look at besides the stunning mountains – small towns and bays are tucked away around each corner.

I liked the house just after we exited Agamemnon Channel and passed by Captain Island – it had what looked like a wood fired hot tub right near the tide line – that’s my kind of place!
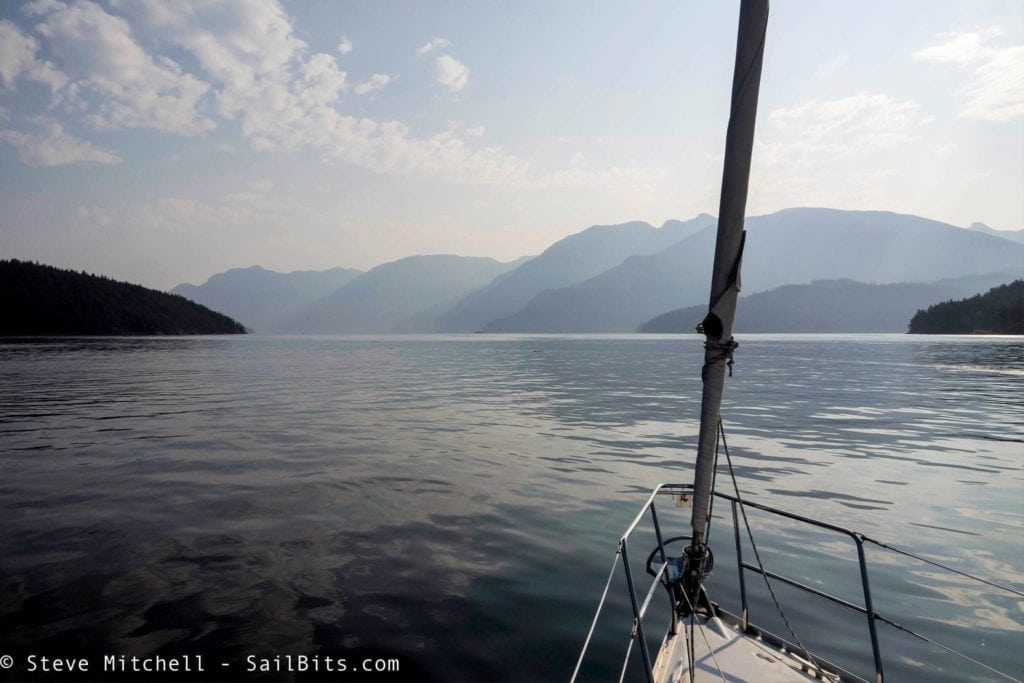
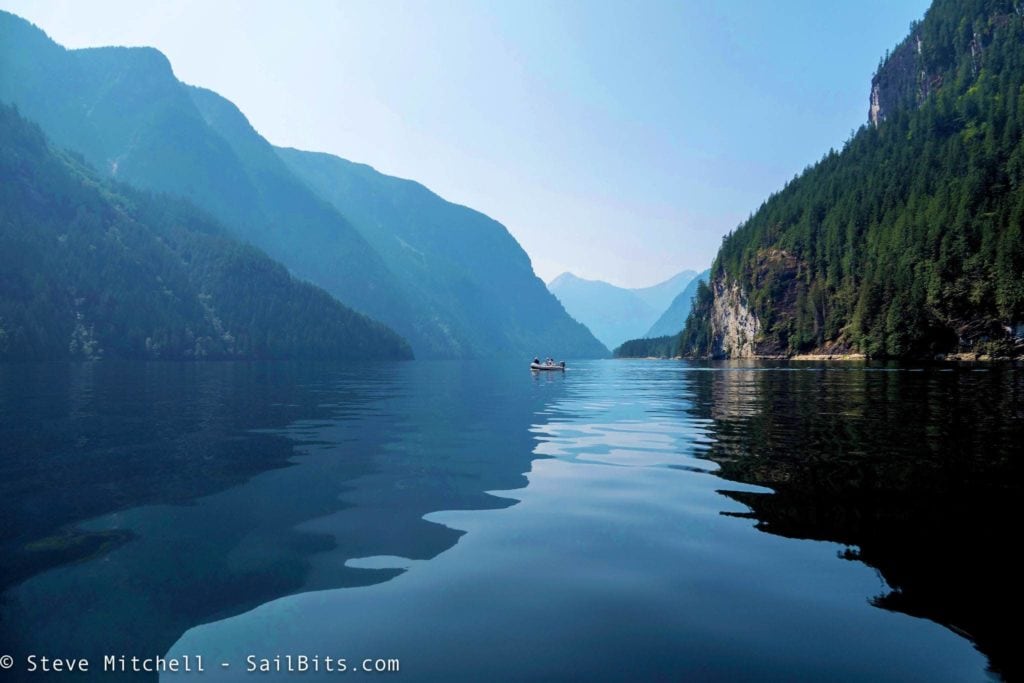
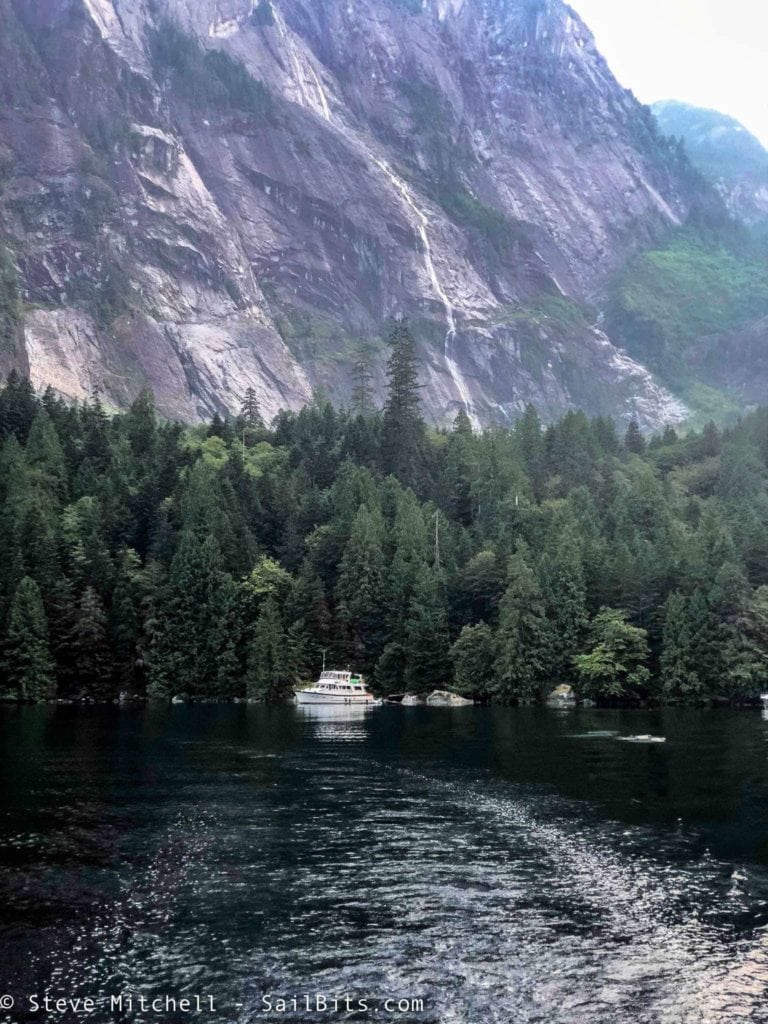
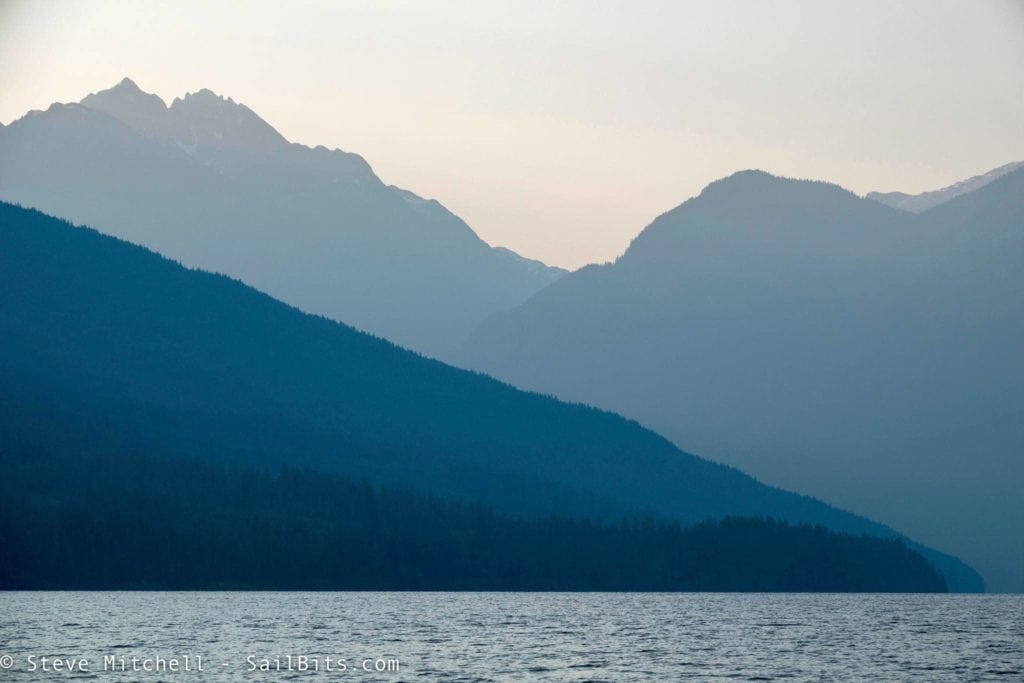
However, the star of the show was the inlets and reaches themselves, or to be more correct, the stunning mountains around them. I probably have more pictures of this particular part of the trip than anything else. Every time we turned a corner or went around a low hill, the view got even more stunning.
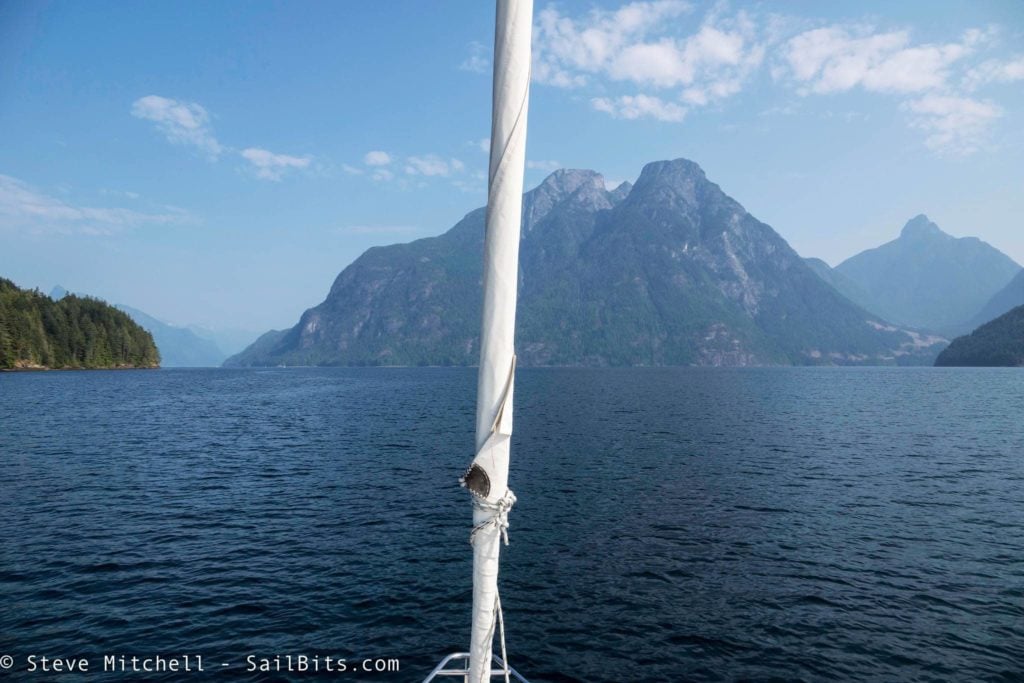
I felt like I was in a completely different world – the sheer size of the mountains coming right down to the water level was something I had never experienced before while sailing. I would definitely say that part of the experience of Princess Louisa Inlet is the reaches leading up to it!
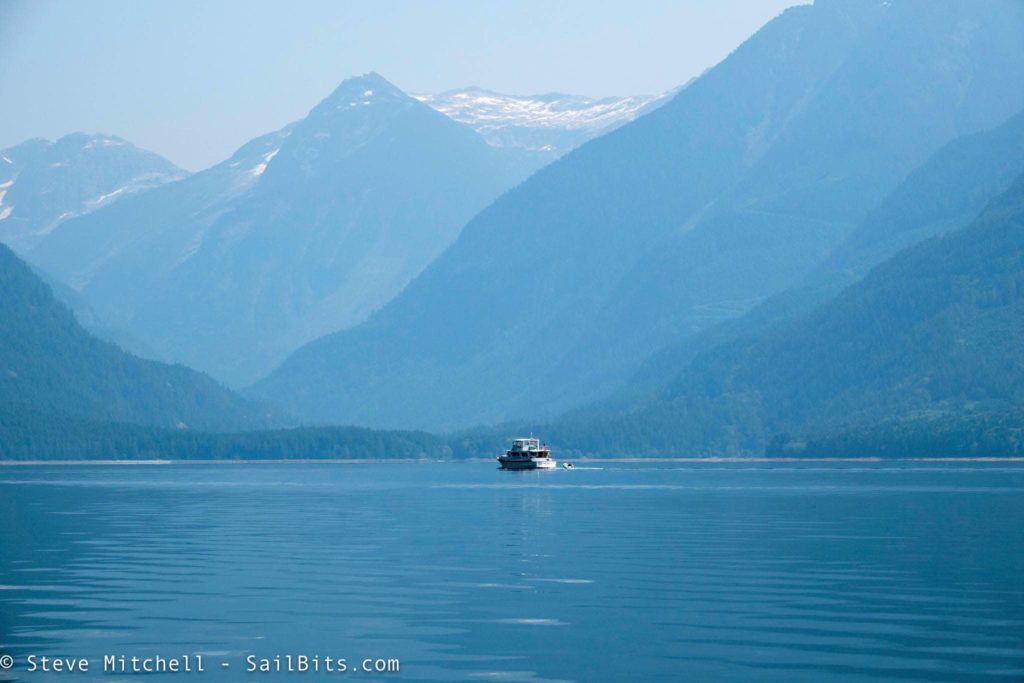
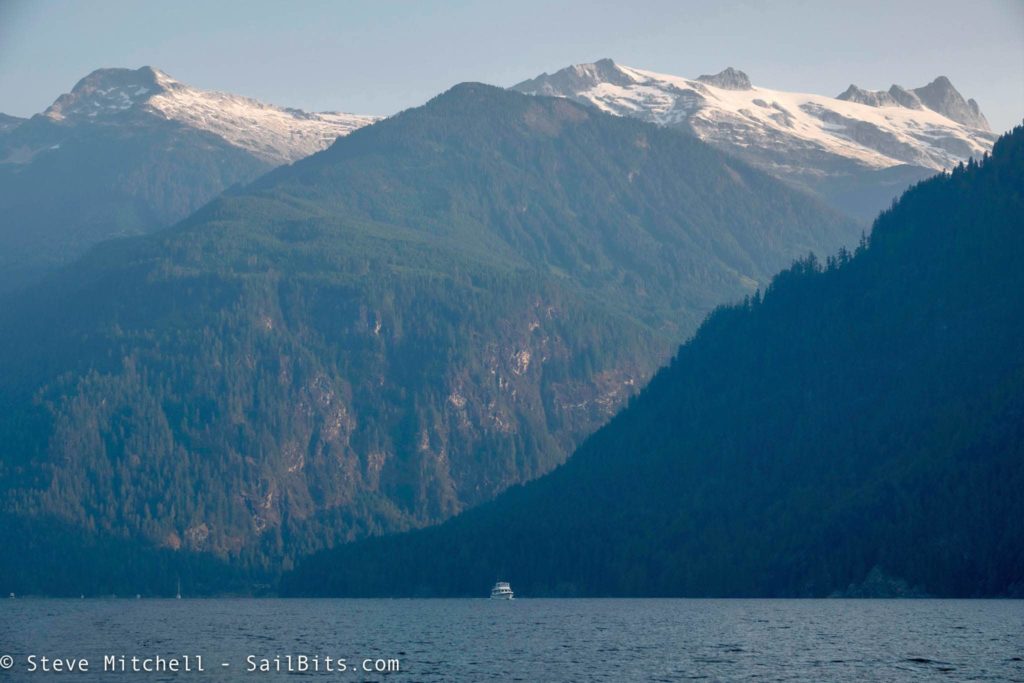
Just look at how many layers there are of hills and mountains all around!
One of the other interesting things is the depth in the inlets – we passed over one area in Prince of Wales Reach that was over 2100 feet deep! Imagining the creatures that live in those deep, dark, cold waters is always fun…
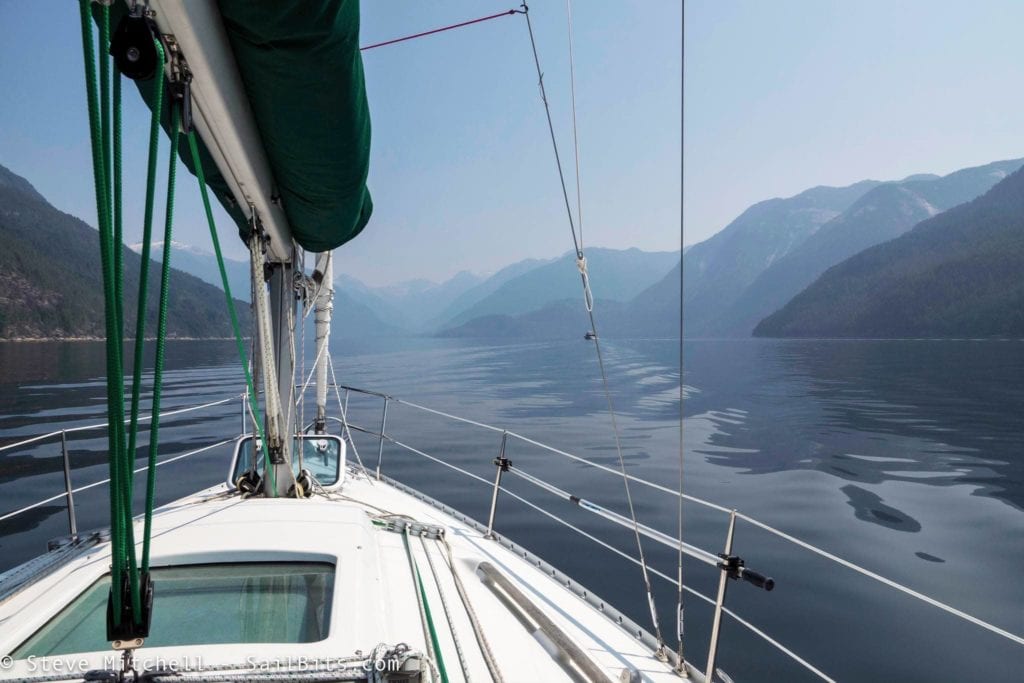
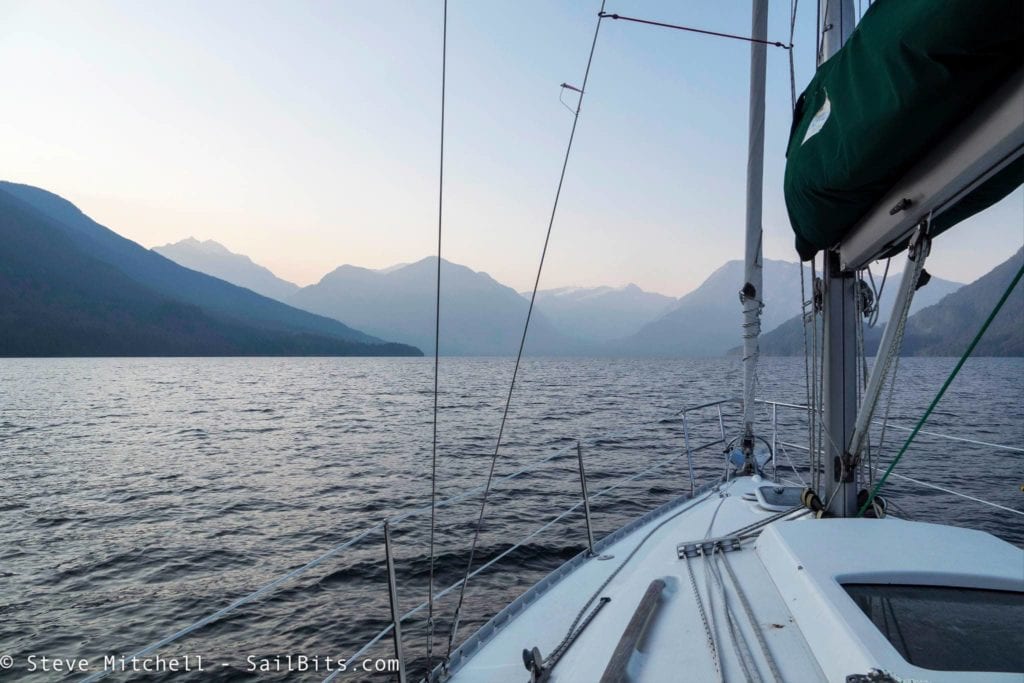
I spent most of the journey taking pictures, sitting sideways in the cockpit and staring up up up at the mountains around us. It was absolutely magical and I loved every bit of it.
The journey to the rapids was mostly uneventful – it took about what I forecast, as at times there was a 1 knot counter current. As I had been told, there was little to no wind, and very little waves, so it felt like we were on a lake most of the time.
The Malibu Rapids
The Malibu Rapids are one of the biggest challenges to getting into Princess Louisa, but they’re not as scary as a lot of people make them out to be. If you plan properly, and have updated charts, you’ll be just fine.
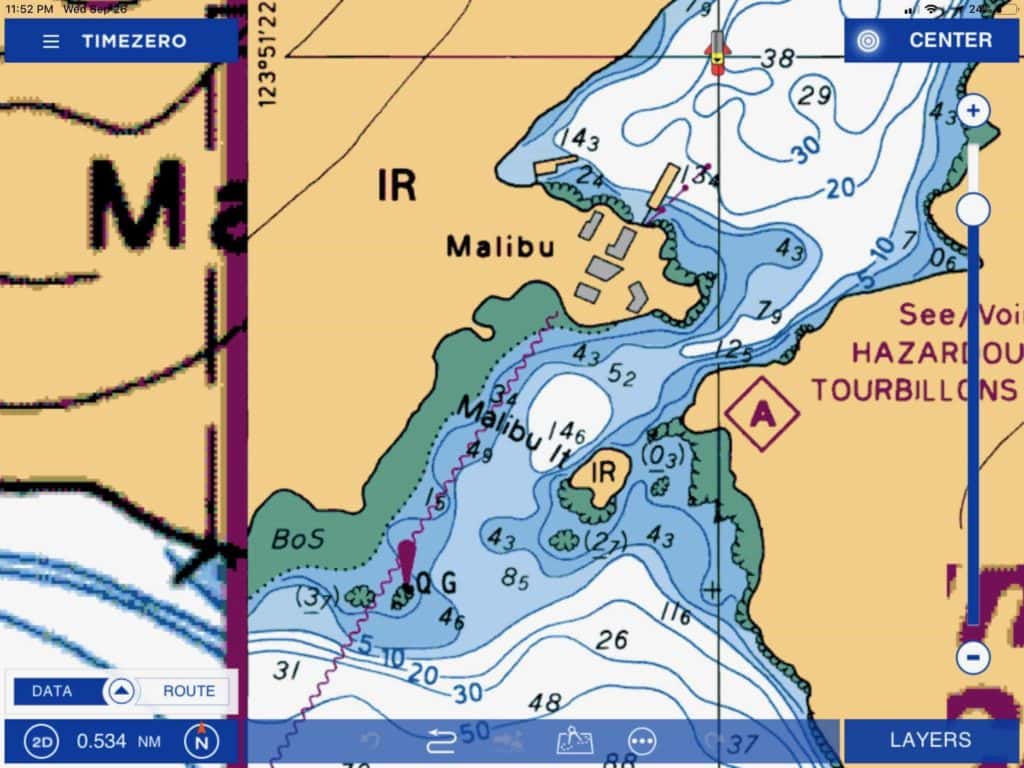
I think the best charts for all of the areas in Canada we traveled in are the official raster versions from CHS. As you can see above, there are quite a bit of things to avoid when moving through the rapids. You can see a marker on the port side as you enter, things you need to avoid on both sides with a bit of a jog turn, and then a mostly straight shot through the narrowest part, being careful not to turn out too early. The challenge is that it is very narrow, especially at low tide, and the current even at slack is moving quite a bit.

Navionics shows the path with a lot less scary parts, but I think you should be more cautious, and I preferred the raster charts for many of these tight passages.
When we arrived at the rapids, four sailboats and a tug had already gone ahead of us. I was about to make my VHF call when a boat called me named Nova Spirit. They had seen me on their AIS and asked if I was coming through, as they intended on exiting within 5-10 minutes – and they were a big 135′ yacht! I indicated myself and two other boats (someone else in front of Sea Bear we didn’t know) were coming through, and off we went. Another reason everyone should have AIS.
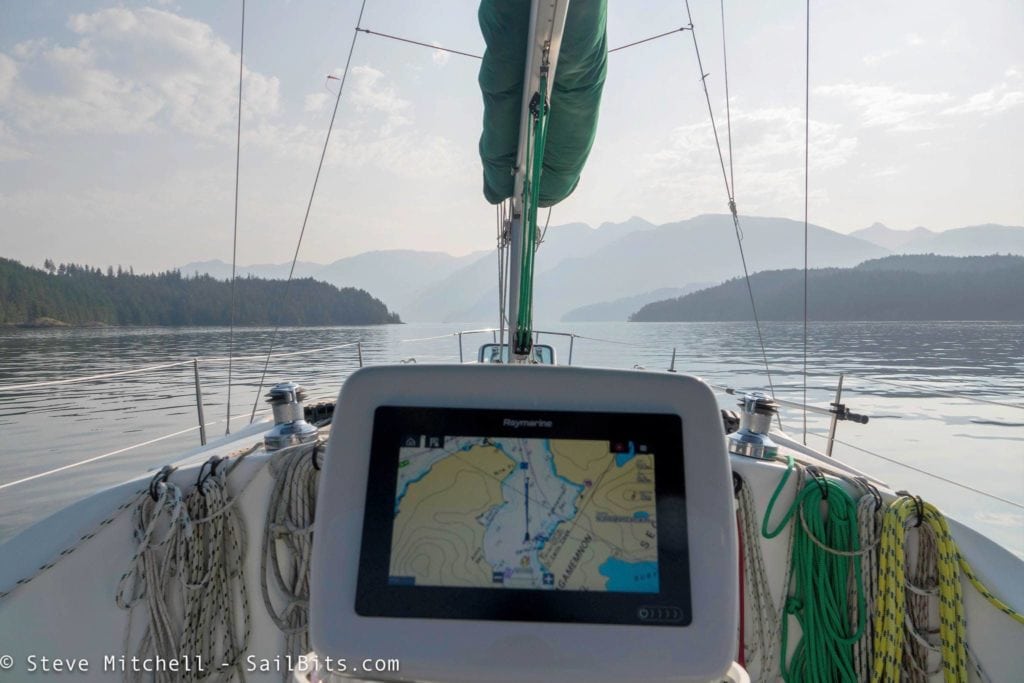
You can watch our progression to and through the rapids above. It was tense for sure, but at no point did I feel out of control. I had two different charts on my Raymarine chart plotter up – a Navionics chart and the Canadian raster charts – side by side, with a course plotted through and far away from the rocks. In addition, I had a backup iPad sitting in the helm with the same course plotted, and a paper chart – just in case I had an electrical system failure.
The current was running between 1 and 3 knots against us, even at slack, and the biggest challenge was counteracting whirlpools and eddies and weird water as we proceeded through the rapids. You can see at one point that Sea Bear, a 100,000 pound displacement hull gets pushed around a bunch even with all of that weight and power.
The Inlet
On entering the inlet, everything gets closer and narrower than the reaches we just left. Absolutely stunning mountains and views continue…
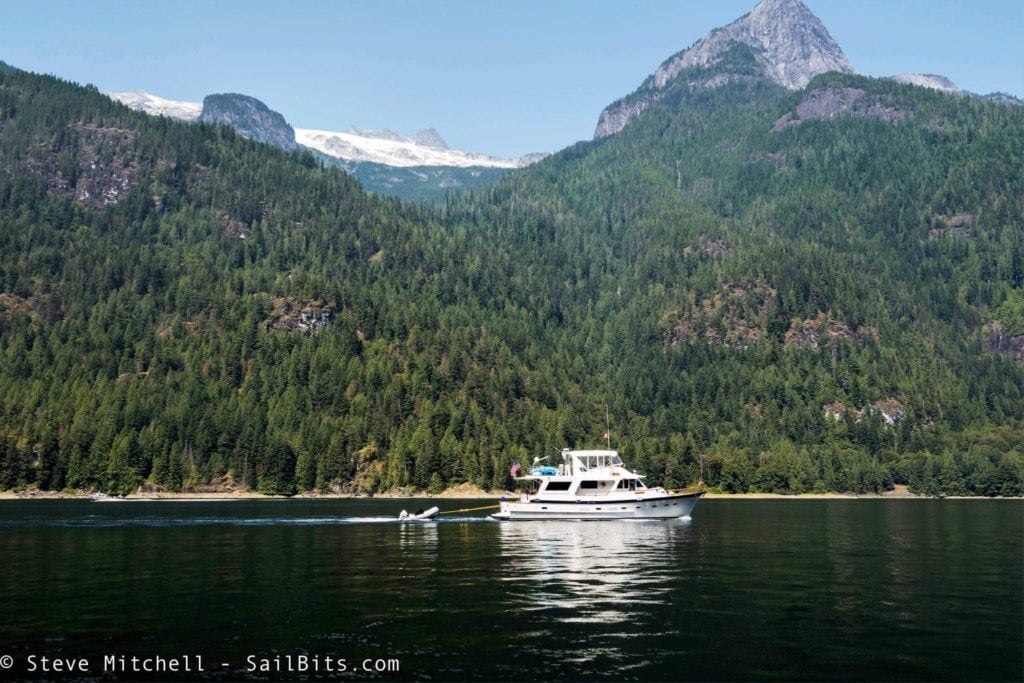
Sea Bear motoring along through the first parts of the inlet with stunning mountains and snow (in July!) in the background.
I brought my drone and had a great time filming the mountains, waterfalls, and inlet itself.
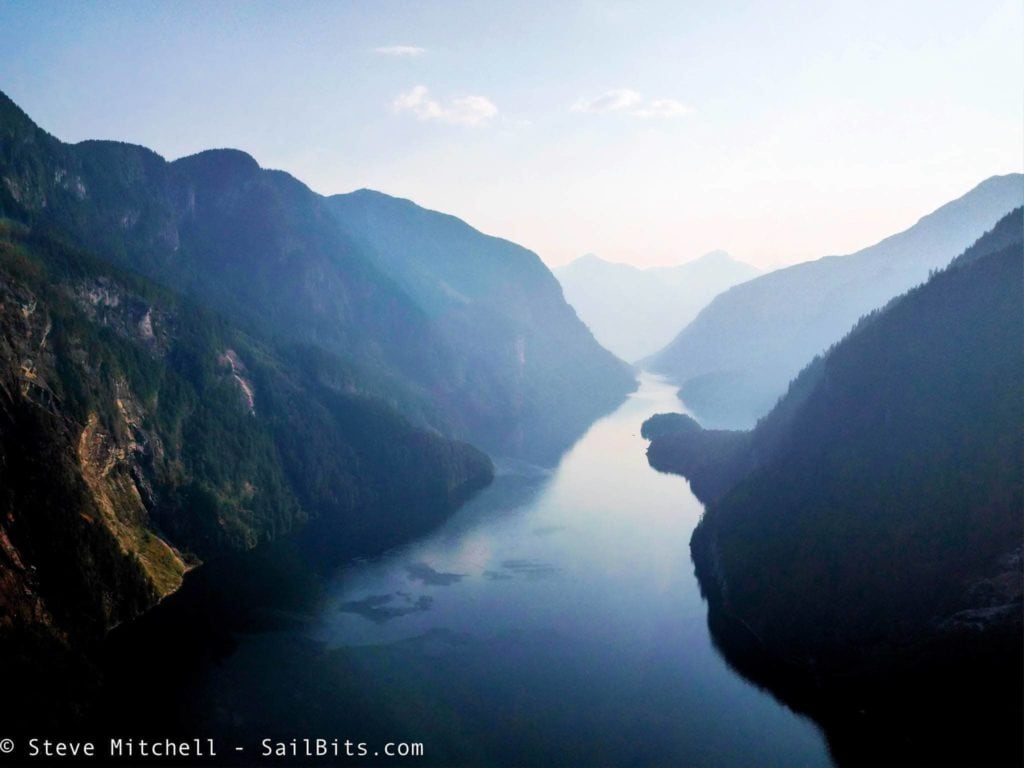
This is truly a magical place that everyone with a a boat should visit.
The Anchorage
One my biggest worries when visiting Princess Louisa Inlet was where to anchor or moor. I had read that you have two options – tying up at the small dock (potentially rafting on someone else) or anchoring around the rim near the falls with a lot of chain on your bow anchor, and a stern tie.
As we arrived, we scoped out the dock, and both Sea Bear and Grace were waved off by the ranger and others. I might have been able to find a spot on the inside of the dock, but I decided to wait to see what Sea Bear did. Also, it does not appear that you can raft up with other boats anymore at the dock – no one was doing this, even though boats came in every day looking – I’m not sure if this is a new policy by the park, or if it just happened to be a fluke while we were there.

The prime spot where Holly wanted to anchor Sea Bear was right in front of Chatterbox Falls, which you can see to the right. Unfortunately because it was such a hot summer, and we were visiting in late July, the outflow from the falls was not as high as usual, so anchoring close to the other boat there would not have been safe. Usually, you can anchor in the outflow of the falls, and it keeps you facing one direction at all times without stern tying.
I did circles for about 45 minutes while Sea Bear found an OK spot and anchored. Once their bow anchor was set, Holly had to take a stern line in which proved to be challenging with the rocks.
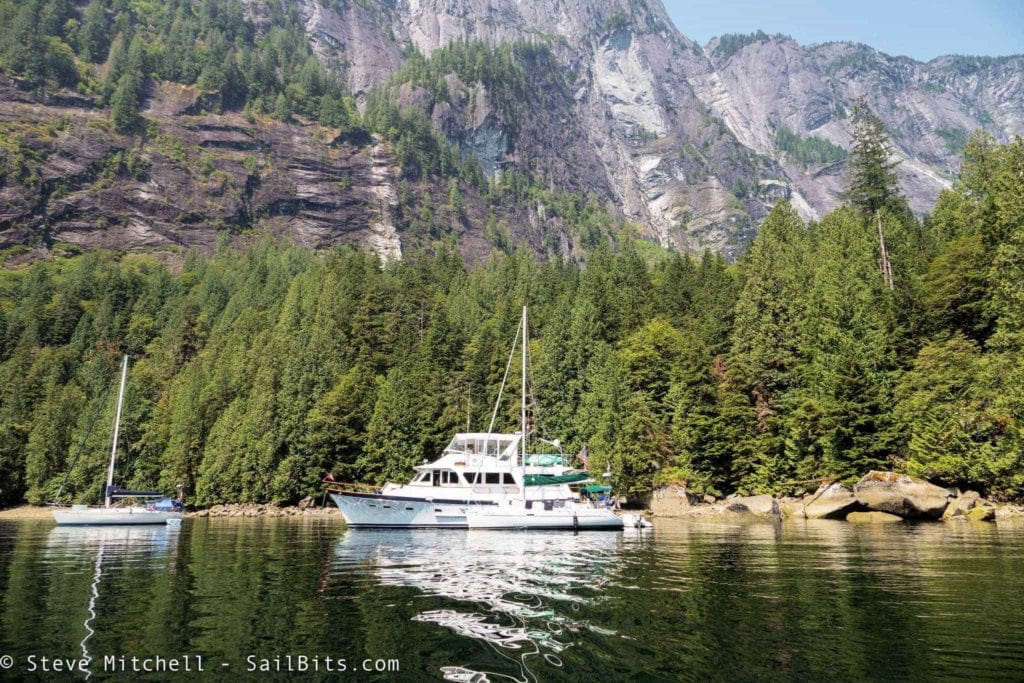
Since I had only 150′ of chain, and the anchorage was already filling up, we opted to raft together again as we had done in Clam Bay on our way up. Right after Sea Bear anchored, the sailboat next door showed up and anchored, but took their stern tie within a few feet of Sea Bear which was disappointing. Even though we were first, after rafting up, I jumped in my dinghy and moved our stern tie over to a rock much further away to make sure we were safer.
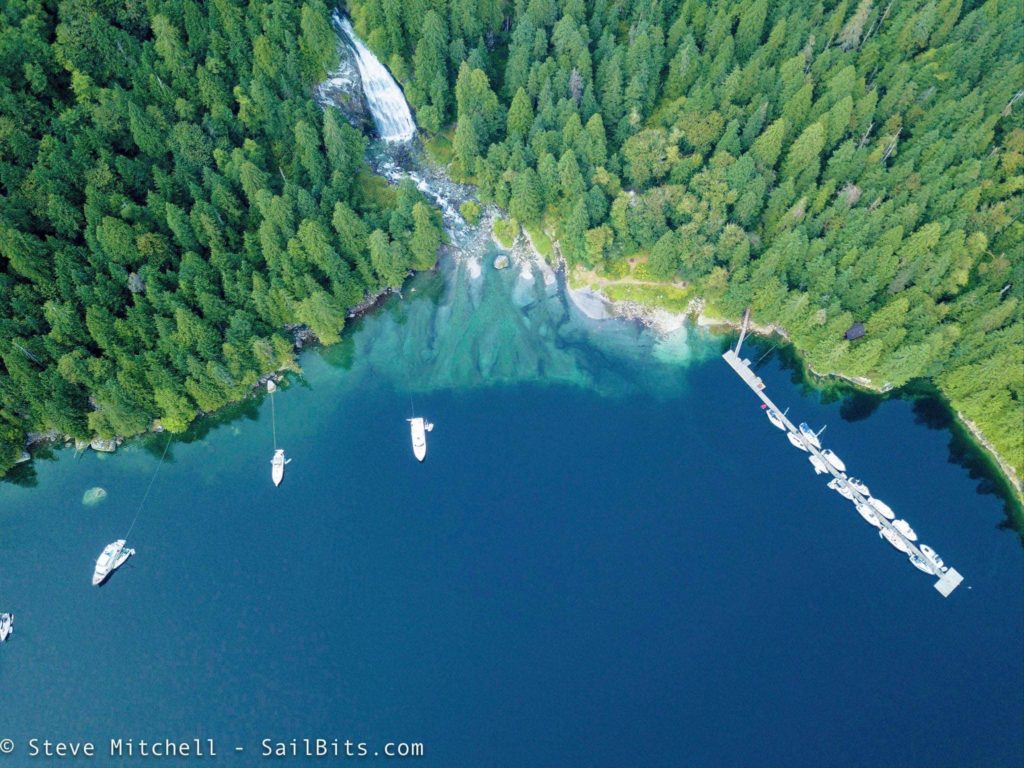
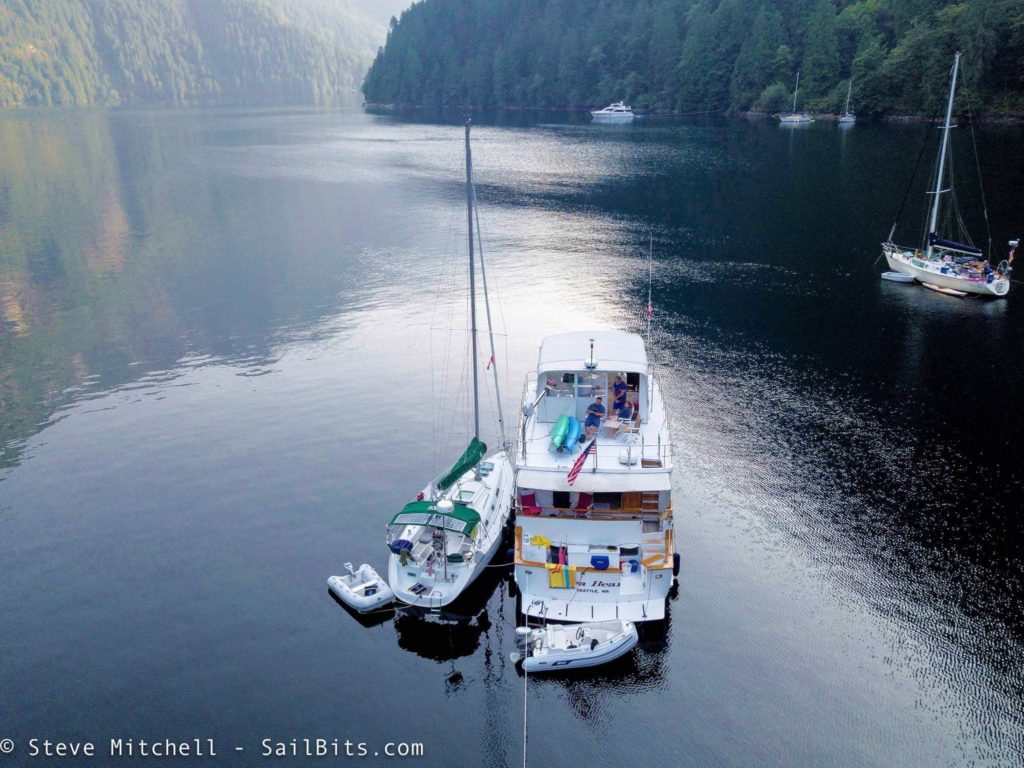
Here’s a birds eye view of our anchorage – we’re the two boats on the left hand side of the picture. You can see a big rock off of Sea Bear’s starboard stern quarter – we named this the Rock of Gibraltar as it was quite huge, and came out of the water with the tide changes. There was another boat to our right, and then a large yacht anchored right out in front of the falls. Further to the right you can see the dock is pretty full.
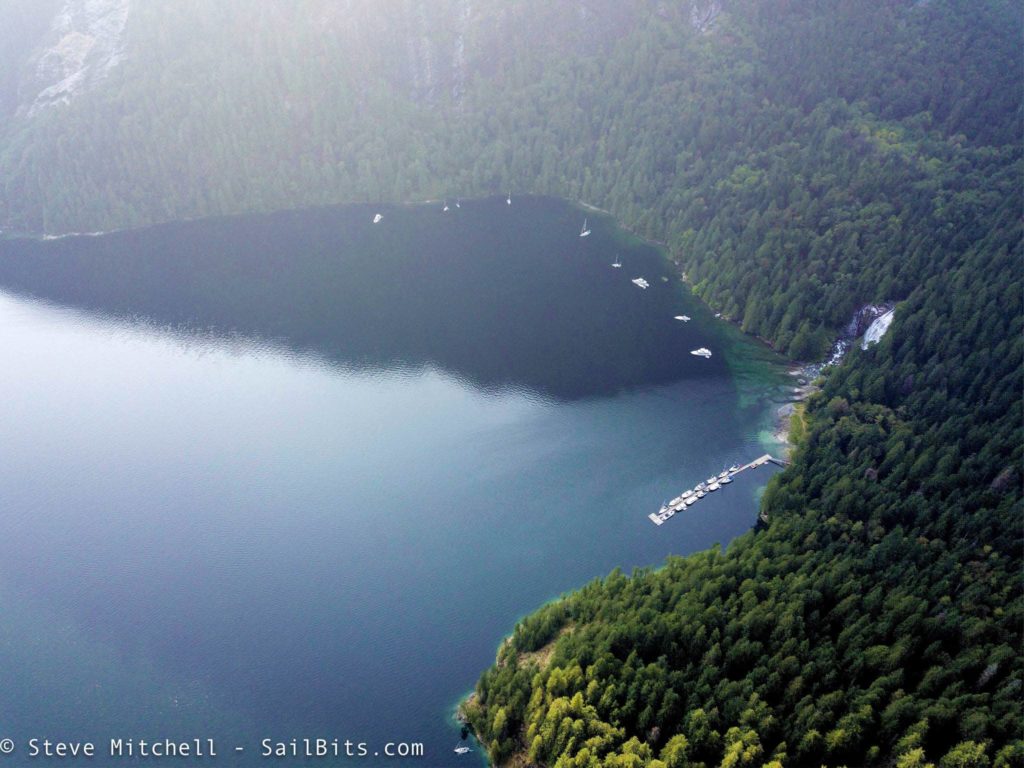
From a slightly higher vantage point, you can see that the majority of the anchor spots are tight in against the end of the inlet, with some around the edge at the top of the photo. The large yacht in the upper left eventually relocated later in the day, most likely because that spot was not very good holding-wise. In the very bottom center, you can see a boat anchored around a small point – there are actually mooring attachment points on the sheer rock walls all along that small cove as well, and we saw 2-3 boats (including the large yacht) use those while we were there.
In general, if you are going to anchor here, you need a decent length of rode, as you may be in 60-70′ of water off your bow, and a long stern tie or stern anchor setup. Stern ties are better here, and the park/someone has provided tie spots on rocks and other places in many spots around the edge of the inlet. Some are hard to spot, while others at low tide (like ours) are almost impossible to reach without major acrobatics.
Here’s another view of the anchorage, looking the other direction, from high up above the streams that feed Chatterbox Falls. You can see the dock on the left, and the cove around the corner from there.
There are other places to anchor earlier in the inlet, and even some mooring balls. Those were all taken as we came in, and they don’t give you a direct view of the end of the inlet, which I think has the best view.
Also, this is a Provincial Park of British Columbia, and there are rules and regulations that you should be aware of. Most notably, don’t discharge sewage anywhere in the inlet. Also, for the wonderful Sea Ray that was anchored right next to us and ran their generator all night long (and it was barely muffled) – don’t run your generator outside of 9:00am to 11:00am and 6:00pm to 8:00pm. We came here to enjoy the solitude and peacefulness, not your noisy boat.
The Water
One of the most shocking things to me about the inlet is the temperature and clarity of the water. Because so much of the water comes from fresh water falls, and the Malibu Rapids are so small that not everything can be flushed out with every tide, you end up with layers of salt and fresh water throughout the inlet. And as a result, you get super warm water!
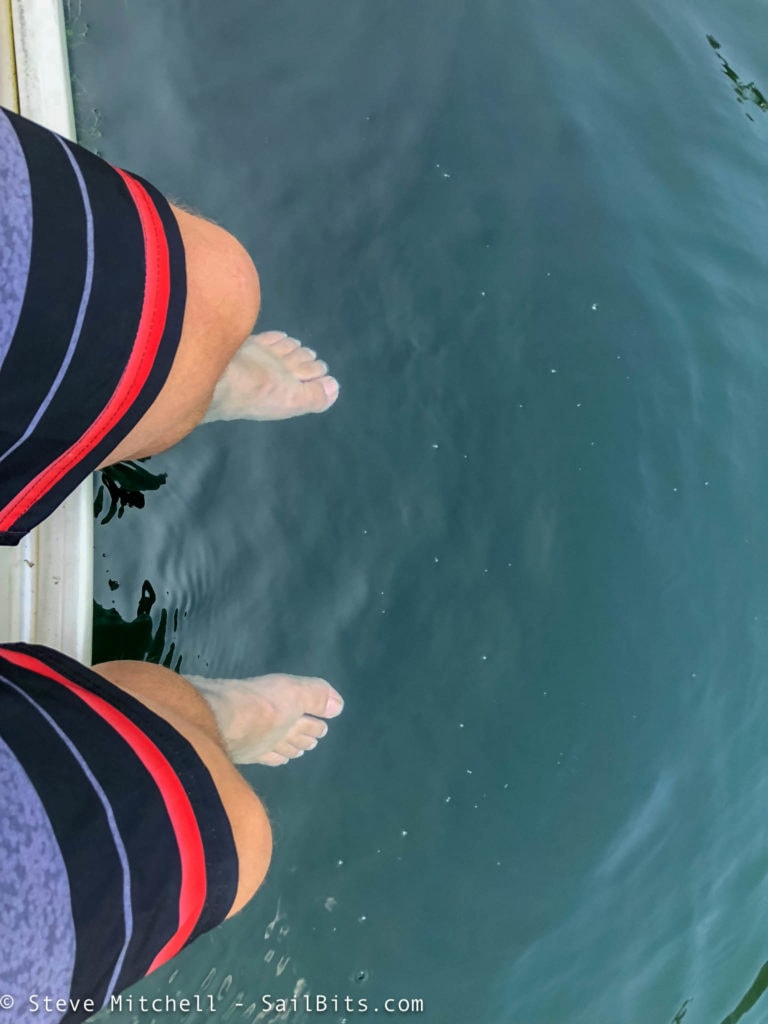
Grace’s temperature sensor in the water read 78 degrees, which I thought was a fluke, but it turned out to be correct! The weather was still giving us 90F plus days, so to cool off we jumped right in!
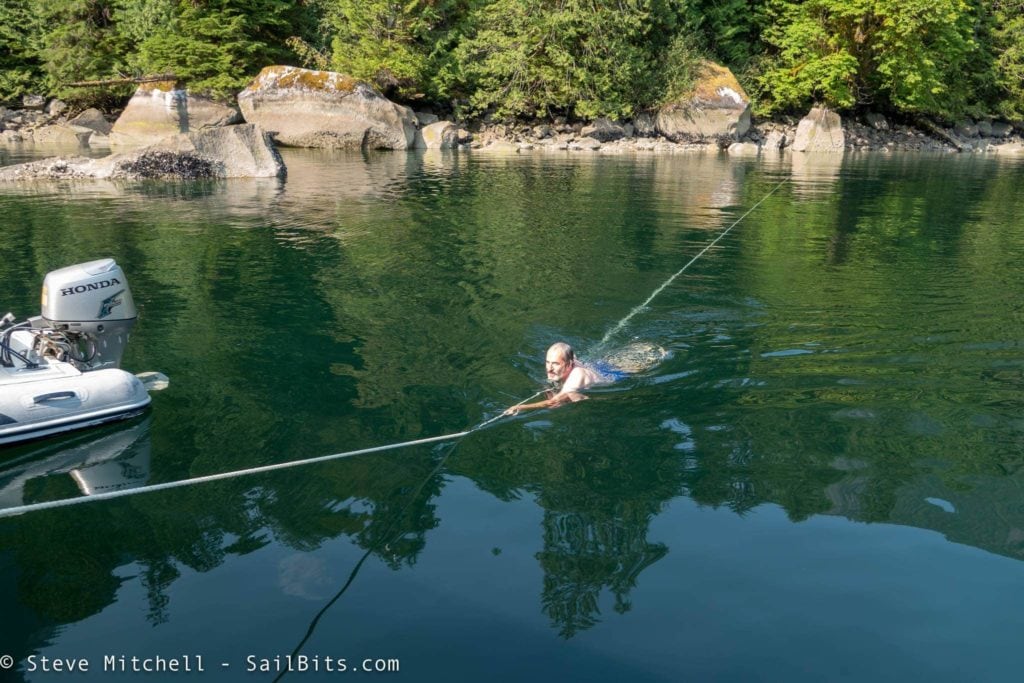
Besides just floating around, Steve Roberts found that our stern tie was an excellent way to get some exercise while not working too hard!
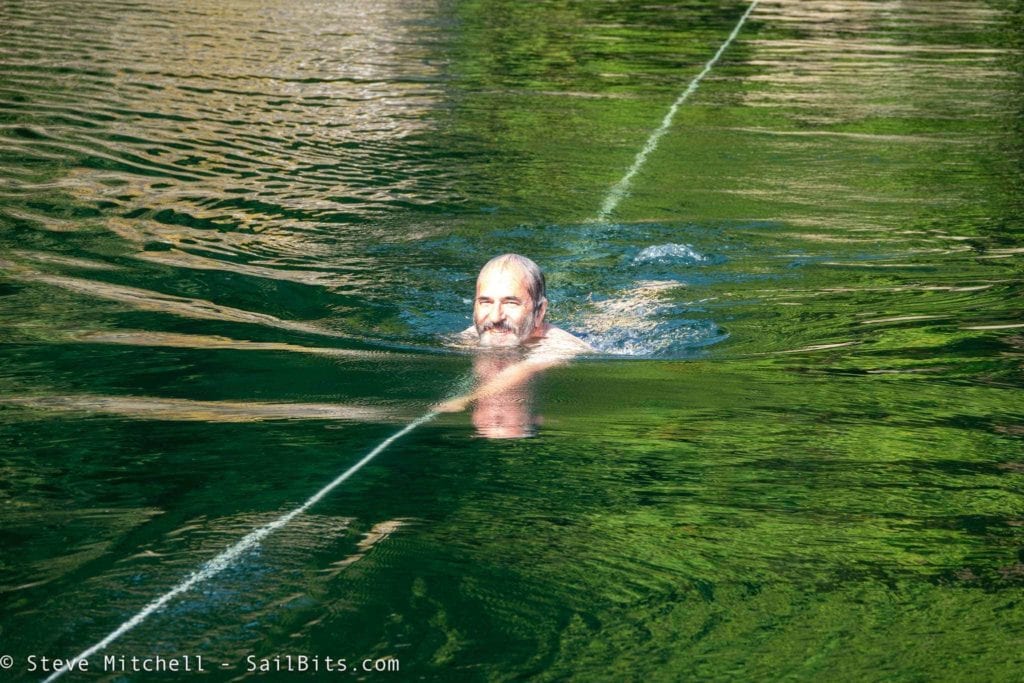
I think we all turned into kids for a while every time we got in the water! I’ve been in the water at many places off the stern of all of my boats, but it usually is something you do quickly given the temperature, or because there is a problem you’re trying to fix. I felt like I could float in the water for many hours here, and that we were in a warm lake. It was absolutely wonderful!
Exploring the Inlet
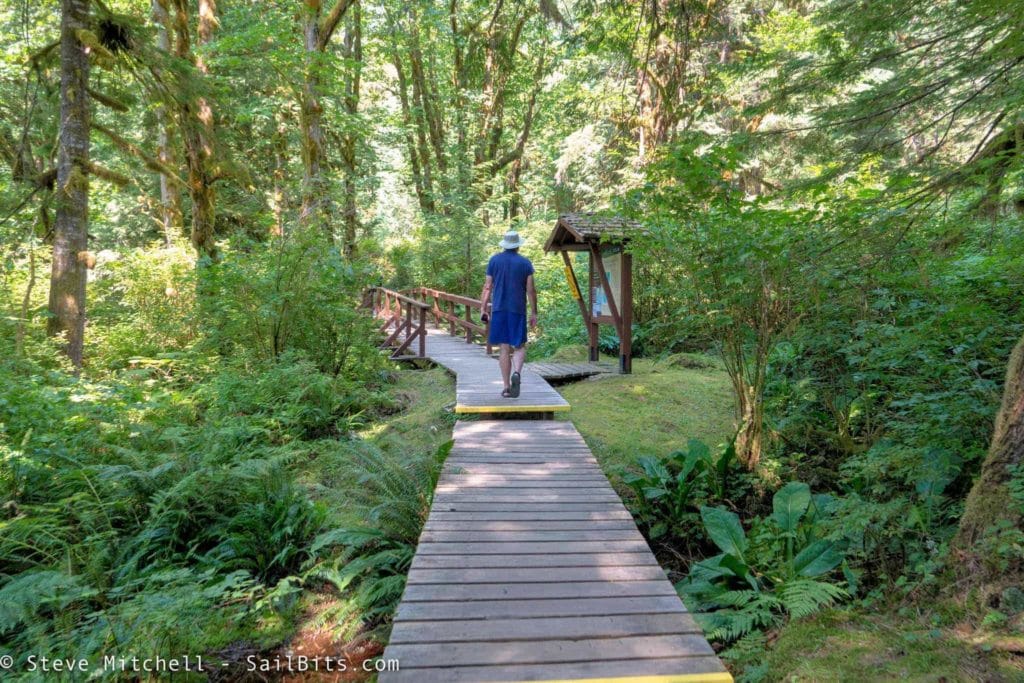
Around the backside of the main dock here is a small dinghy dock to tie up to. There are a network of trails that you can explore around the falls and general area. There are even more challenging trails that climb up into the hills, one of which ends up at an abandoned trappers cabin and can be quite challenging. We opted just to wander around on the lower trails near the falls.

Rainforest level moss on the trees with ferns everywhere
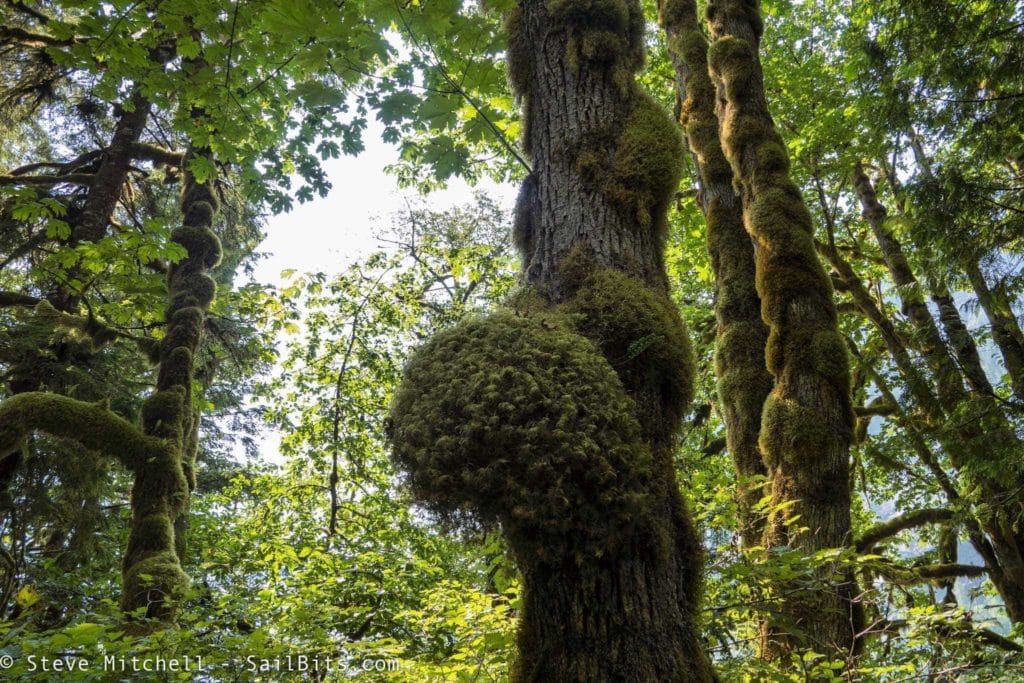
Beautiful filtered sunlight on a 92 degree day!
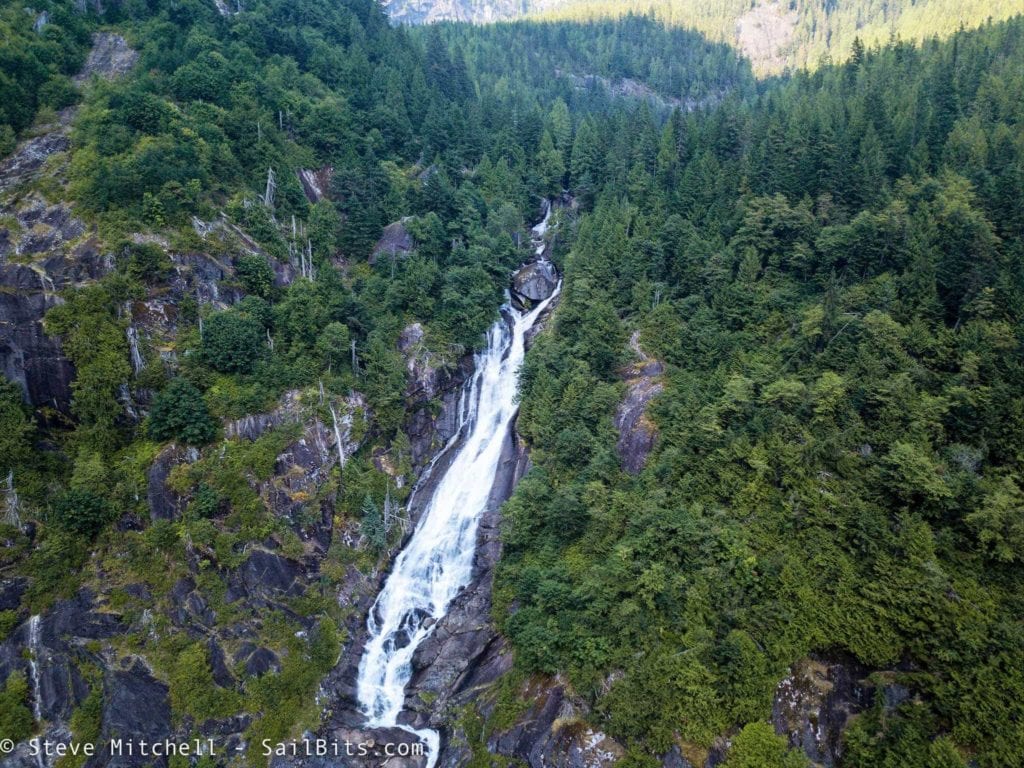
What we really came for, though, is to see Chatterbox Falls up close and personal.

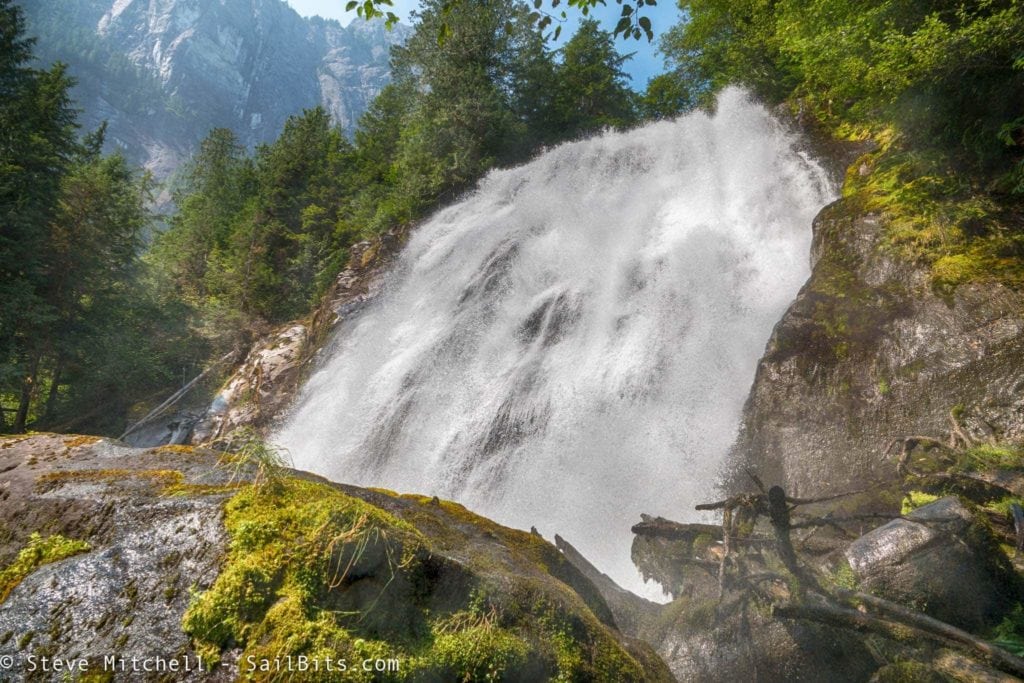
The pictures don’t do it justice – it was wonderfully loud, wet and beautiful all in one.
Part of exploring was also underwater. Both Steve and I brought our Trident OpenROVs and had them out and about looking for interesting things under the surface.
This is one of my favorite videos from the entire trip, watching Steve piloting his Trident, and especially at about :30 seconds in when his cat Isabelle wanders over to the edge of the boat to watch what is going on.
One of the best ways to explore is via dinghy. The water is so flat and calm you can not have to worry about the distances required to see everything.
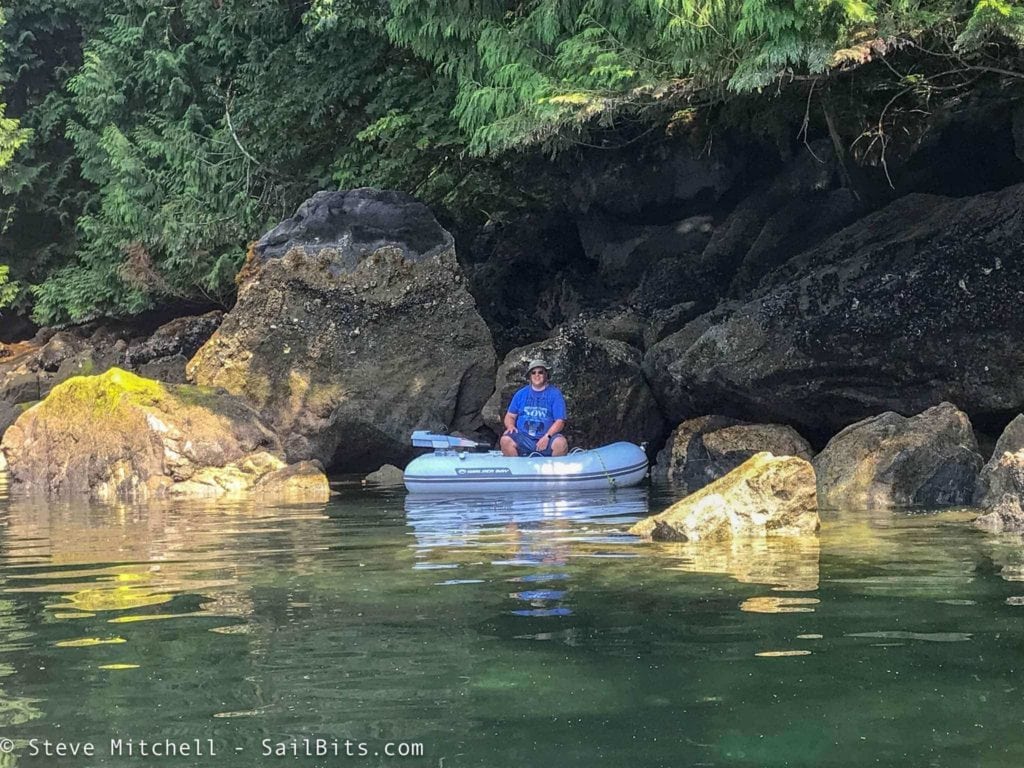
There are all sorts of great little spots to explore around the entire inlet. We spent several hours exploring.
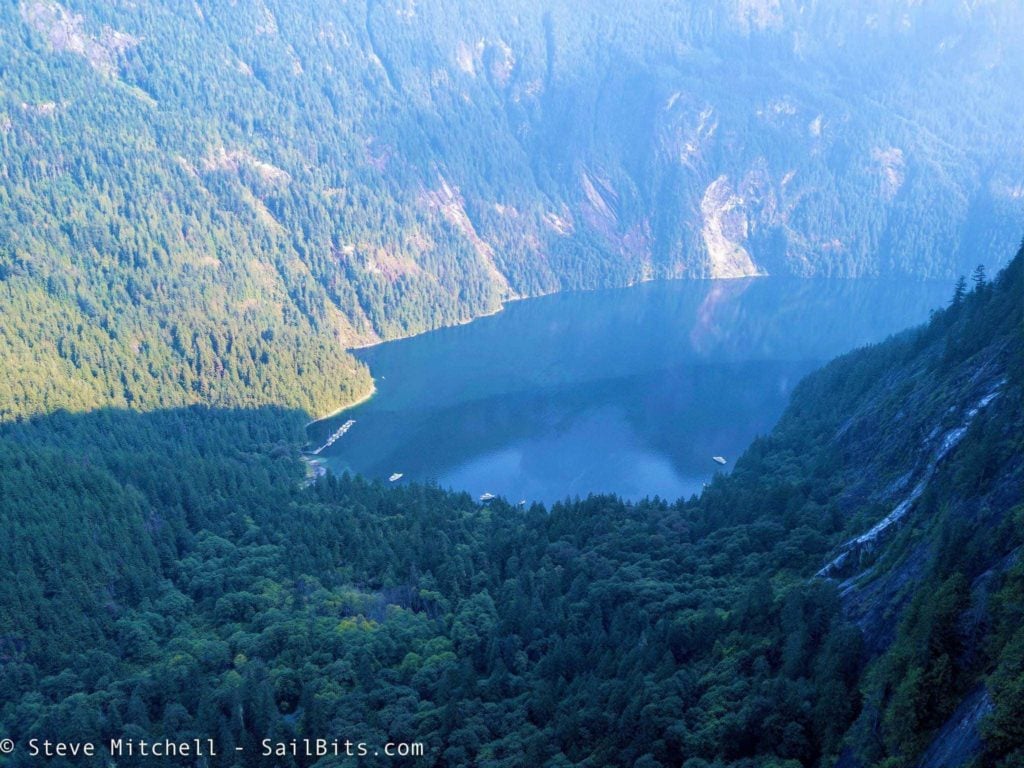
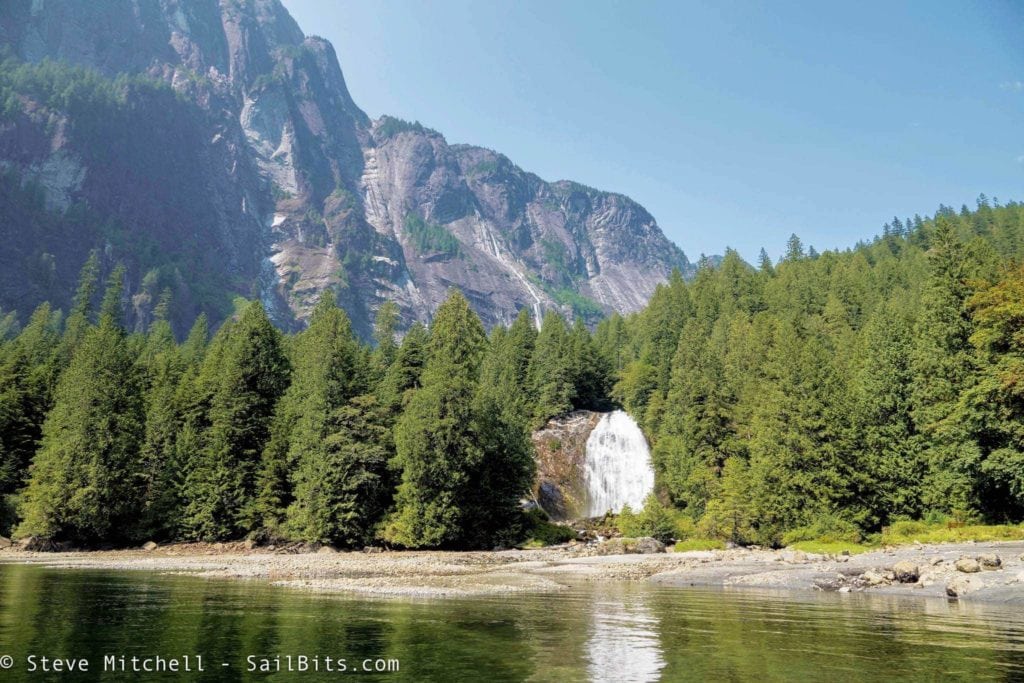
The scale of the mountains that surround the inlet is still awe inspiring even when I think about it now. It truly felt like we were in a far distant land with fjords.
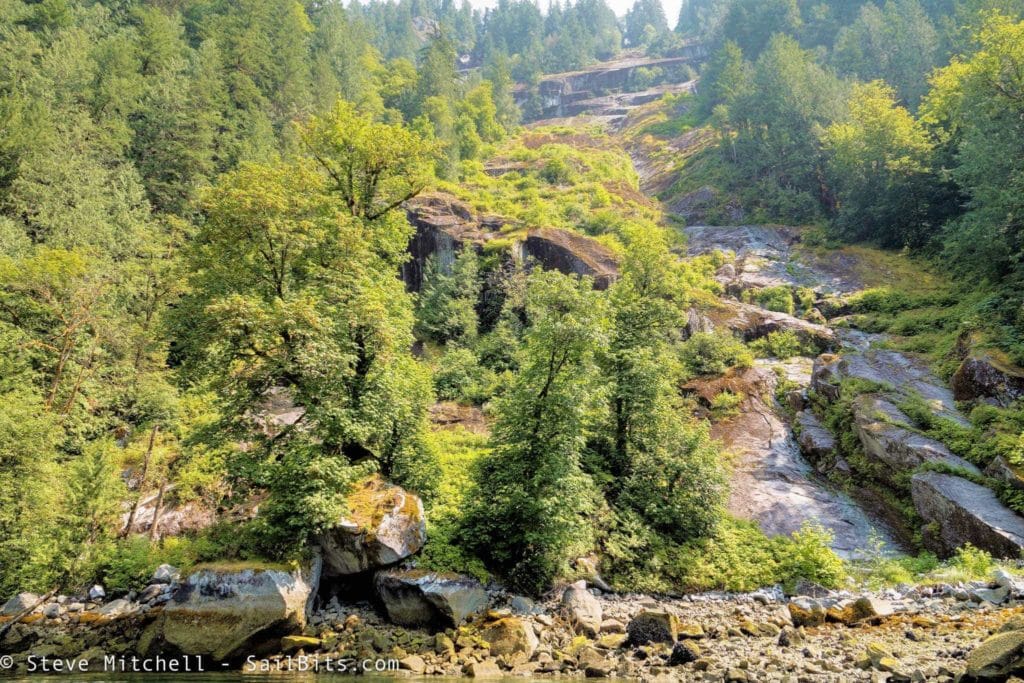
The mountains are so steep and usually covered in sheets of water and hundreds of waterfalls. British Columbia was having an unseasonably hot summer, and as a result the many waterfalls were just trickles in most cases.
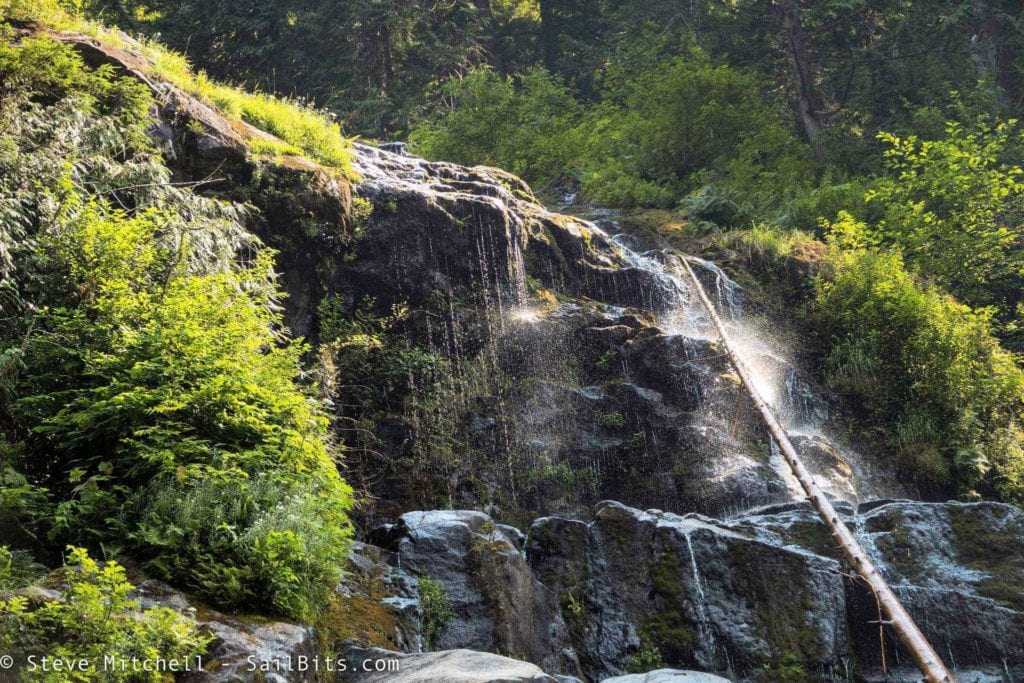
There were still some pretty ones.
I wish I could have spent a week here – there was enough to explore and experience to fill that week up. Additionally, being able to jump in the water several times a day to cool down was a treat for those of us used to the chilly waters of the Salish Sea. All too soon it was time to head back to Pender Harbour.
Princess Louisa Inlet truly is one of the most special places you can visit by boat. I had always wanted to do it, and I am very sorry I waited so long to make my first trip there! I will definitely be coming back as often as possible – it is a magical, wonderful, amazing place!
Back through the Rapids
The tides on the way back out were a bit kinder to us – high tide was at about 7:30AM, which meant leaving the anchorage around 6:45AM for me. Sea Bear followed about 15-20 minutes behind given their faster speed.
This a video of the southbound transit of the rapids. It was a completely different experience at high tide – very little current, and very little drama. You can hear me chatting with Sea Bear about midway through the video, and some fish and seal friends jumping around randomly throughout.
With the rapids astern, we headed back down the reaches and inlets towards Pender.
Back to Pender Harbour
I actually think the views and the light were better going this direction through the inlets. Because the sun still hadn’t made its way over the tall hills, the shadows and colors were amazing.
Sea Bear was dwarfed by the mountains surrounding the rapids.
This is one of my top 3 photos from the entire trip – it personifies the absolute splendor of the area – craggy mountains, deep colors right to the waterline, and all so remote and untouched.
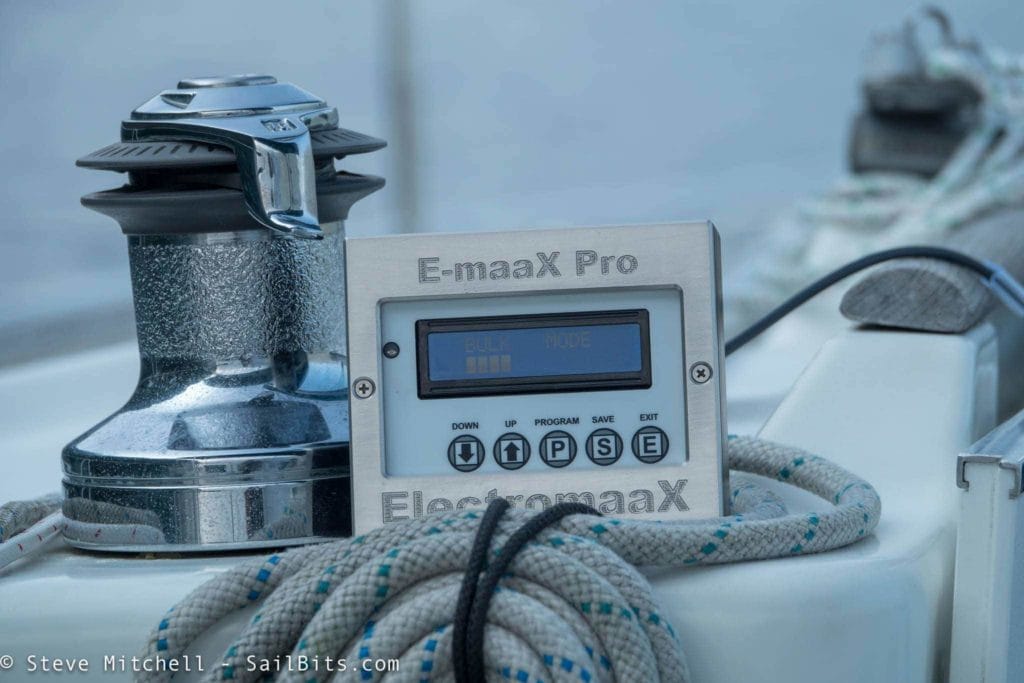
On my way back, with 6+ hours of motoring ahead of me, I did some intensive testing of the newer E-maaX Pro alternator control system that I had installed a couple of months back. This consisted of changing a lot of parameters that changed how the alternator behaved.
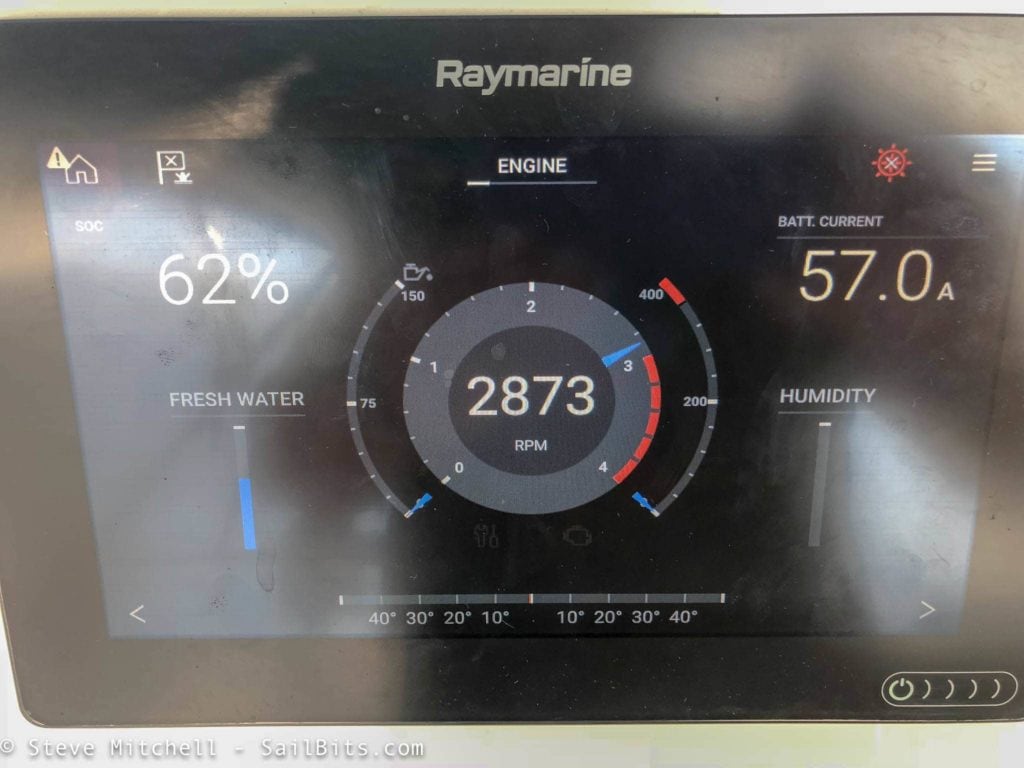
With a smaller 18HP Yanmar engine, changing these settings can impact the RPM significantly. I was able to balance things out to a charge rate of about 65 amps while under full cruising speed, and only lost about 150 RPM, which is pretty good. With the new LiFePO4 battery bank, this meant it was fully charged in only a few of hours of motoring, and I had started at less than 40% state of charge when we left the anchorage.

The rest of the motor south was pretty uneventful, other than some larger waves and wind in Agamemnon Channel which slowed me down a bit. By mid-afternoon we were back at John Henry’s Marina all tied up and plugged in. Good thing too, it was at least 95F and the air conditioners were necessary!
We relaxed most of the afternoon, and went to a local restaurant via dinghy for dinner. The harbour was very still and quiet that night, which was nice for a good night’s rest.
The next morning both Holly and I did some provisioning at the John Henry store, and got ready for our trip either south to a port, or across the Strait of Georgia. Little did we know this would turn out to be the most challenging part of our entire trip!
Part 3 will cover that drama as well as much more!
Archived Comments
These are read only comments from the old system. Scroll down to participate in SeaBits Discussions, our new interactive forum attached to each article.
Shawn torstveit
September 23, 2018 at 7:01 pm
What a wonderful blog on your Canadian voyage ! I absolutely love the spreadsheet for planning ! Super useful and efficient ! I will definitely be utilizing your example ! We hope to make the trip next spring !
Steve Mitchell
September 23, 2018 at 11:00 pm
It is a wonderful trip and I highly recommend it to anyone that has a boat! It takes some careful planning, which is where the spreadsheet really helped.
Bruce
September 28, 2018 at 11:39 pm
I’ve seen a lot of images of Princess Louisa, but the aerial footage was simply stunning.
I am surprised you got to swim, last time we were there their were Lions Mane jellyfish warning everywhere.
- Steve Mitchell
September 29, 2018 at 4:38 am
Thanks Bruce! The drone has allowed me to see views of many places that I could have only dreamt of before. It really was great to be able to fly it at Princess Louisa and see the stunning views from a different perspective!
We swam after we first arrived as it was 95F / 35C that day and we were dripping with sweat. We hadn’t be in to the ranger station and seen the warning. But a lot of other people were doing it too, and we were careful after we saw that warning.
Steve
October 16, 2018 at 12:59 pm
Planning my first trip up to Princess Louisa Inlet next May. I’m wondering if you have any additional thoughts on calculating the timing of slack at Malibu Rapids. You wrote that you entered at or near slack, but you had up to 3 knots of current against you! Do you think that there’s a better station to use? Doesn’t CHS have a prediction for Malibu?
- Steve Mitchell
October 16, 2018 at 6:13 am
Hi Steve,
From what we learned, there are tide apps like AyeTides and others that have stations for Malibu Rapids (Inner and Outer) which aren’t as accurate as you think. We used one for the trip through, and ended up showing up a bit late.
The most accurate is to use Pt. Atkinson and the offsets that CHS publishes in their tide chart book. I think around the time we were going it was 30 or 35 minutes off one way, and 20-25 the other. I can’t remember which one, and those books are packed up while I move boats, but I can check in a month or so.
The other thing to keep in mind is even at slack, there is so much water trying to get in/out of that huge, deep inlet, and such a small entrance, that there are times where there never is a no current slack. The early morning when we left, you can see that there was very little current, but even before we got through on our way up, others reported 1-2 knots.