In the last couple of months, I've made some improvements to my fresh water system in a number of areas. It started with the toilet, and progressed into filtering, pumping, and the shower itself.
Bidet
A few years ago on Grace, the crew's favorite upgrade was the electric Raritan push-button head.
Within the first few months of owning Rendezvous, I knew I wanted to replace the Vacu-flush units on board with the same Raritan setup for simplicity and maintenance reasons, and did that to both heads in late 2018.
With the crazy toilet paper run earlier this year due to COVID, and because we have had one at home, I wanted to look into a bidet option on the boat. Not only does it require less toilet paper, but it is less waste in the tank overall, and just more comfortable in general.
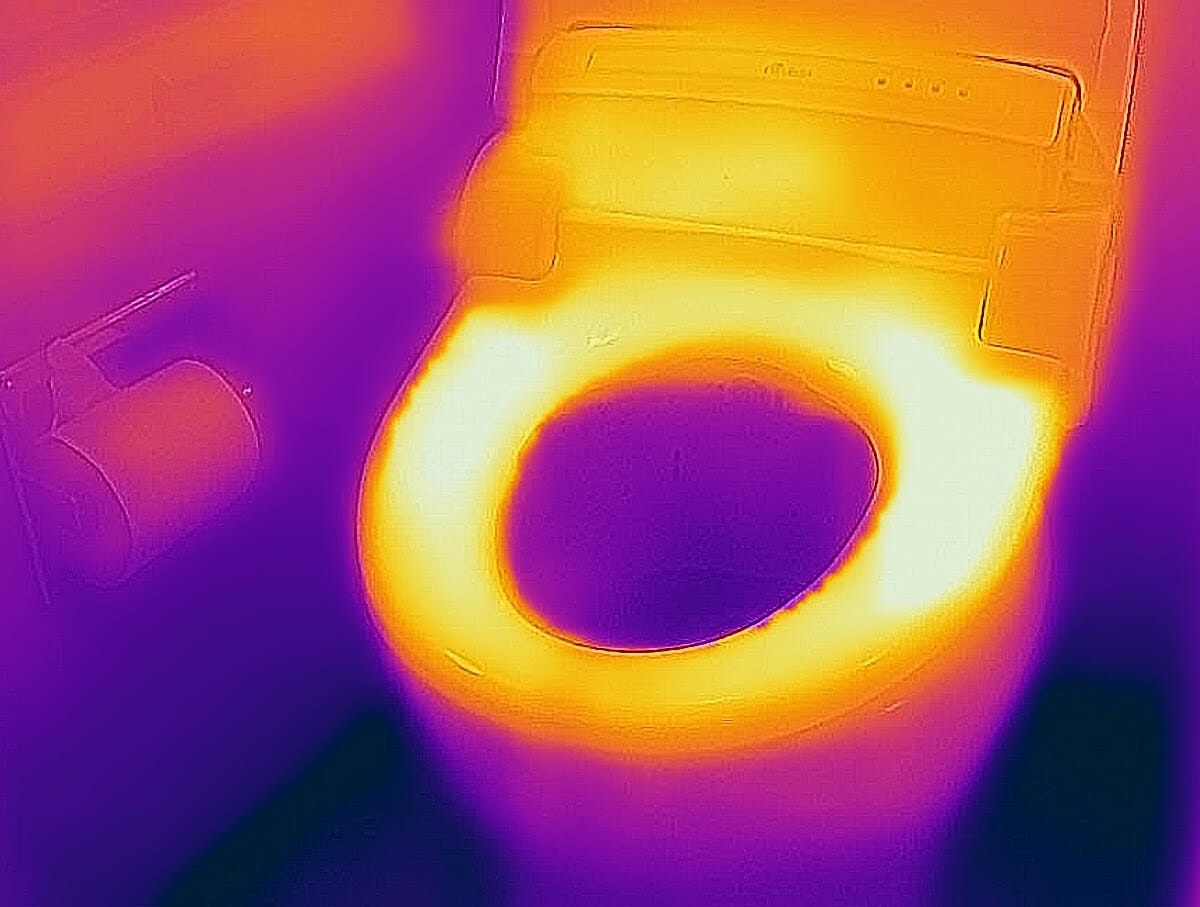
My friend Steve Roberts installed a solution but had the advantage of a mostly full-sized toilet to install it on, which is not as easy to find with most marine models. I also have had excellent luck with Raritan toilets the last 8 years or so, and that weighed heavily in my decision. I think many of us, if not all of us, have had some horrible story related to the head, and choosing things you can rely on is very important to avoid additional stories!
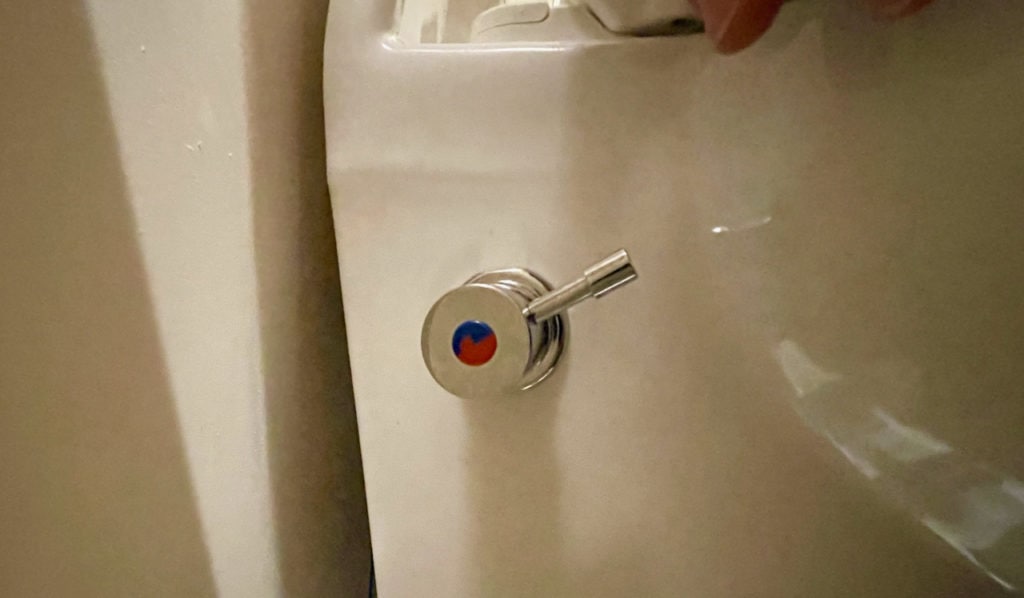
I was able to find a model that Raritan makes with a bidet, but it required a special order directly from the factory and some delays due to COVID. It has both hot and cold water inputs, and a control handle on the side to adjust it on the fly. The cold water is sourced from the same cold water input pipe for the rest of the toilet, which is easy to connect. The hot water is a small 1/8″ hose with a plastic NPT connector – something that was very difficult to find, and that I've never seen in the marine world. It required finding some adapters to get it to 1/4″ and then up to 1/2″ NPT to connect into my water system – slightly annoying.
Besides the piping, the bidet itself is wonderful to have on board. I highly recommend if you are replacing a toilet to consider one.
Fresh Water Pump
I have had simple to complex water systems on all of the boats I've owned in the last 20 years. Some had expansion tanks and used fancy big old Groco or Jabsco brass pumps that will last forever, and more recently, I've tried 3 different manufacturers of “water system” pumps both with and without tanks.
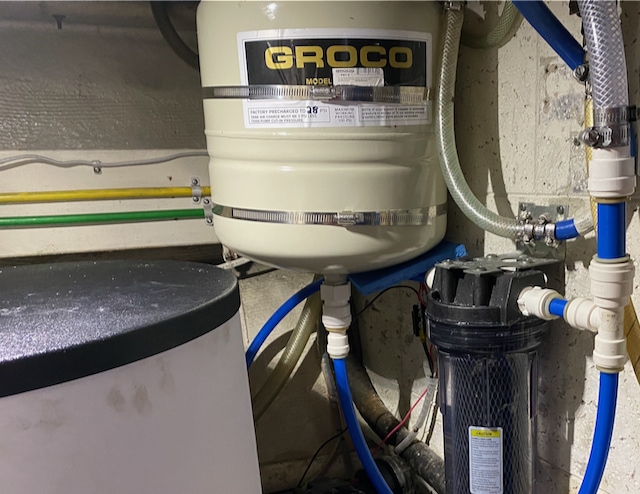
The most traditional setup is a water pump combined with an expansion tank. The tank is pressurized, and keeps the water at a specific pressure all throughout your system. This gets rid of weird pulsing or low pressure when you first turn on a tap, and prevents the pump from running constantly and wearing out faster.
Water system pumps pair a slightly different pump that can be run at different speeds with an integrated pressure switch or electronics. They can also operate without an expansion tank in most cases, saving complexity and space. I tried brands like Johnson SPX and Shurflo and always had something with the electronics fail within a few months. Many of them were also extremely loud – in many cases louder than their non-electronically controlled counterparts – which was irritating.
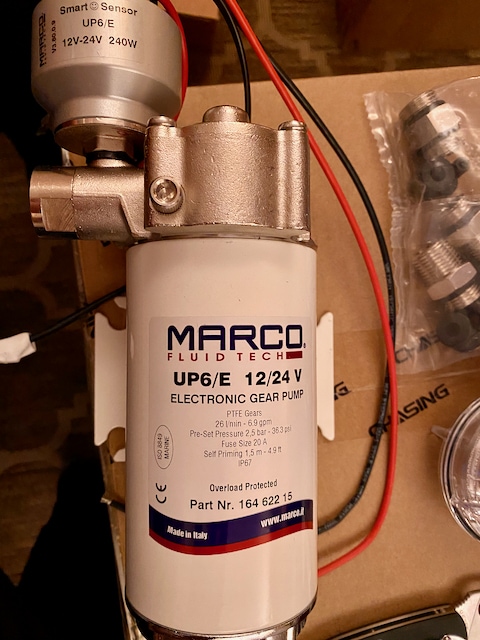
I had heard of pumps made my Marco, an Italian company, and in fact had owned several that were included in oil change pumps/systems made by Reverso.
After some investigation and conversations with a couple of folks I knew who had them, including Tom Tidyman on Alexandria who had wonderful things to say about his pump, I decided to purchase the UP6/E model.
The benefits of the Marco pump over other similar models:
- Better electronic control system
- LED that displays colors to indicate status of pump & failure modes
- Helical PTFE gears instead of a diaphragm
- Nickel-plated brass body plus a stainless steel shaft
The UP6/E is a 6.9 gallon per minute / 36 PSI pump. That is a bit bigger than the 5 gallon water system pumps I had been using prior to this time, and much larger than the 2.5 gallon per minute standard pump the boat came with, which failed within a month of buying Rendezvous.
The PTFE gears have chamfered teeth to reduce sound and wear. To me, using gears seems like a lot more logical way to provide a variable level of pressure and flow. Other systems I tried used a standard pump with bladders or diaphragms that could be staged on and off in sections.
The pump itself is built like a tank and weighs a ton. I like that – it means there is a lot of metal involved in the design which will likely last longer than the cheaper plastic models, and it just feels like a better made system.
The electronic control system is much better than any of the other systems I've had. There's little to no lag or notice when opening a tap, it ramps up and down smoothly, and the LEDs are super convenient. They indicate a number of states with the pump and water supply to help troubleshoot issues:
- Blue solid – pump is pumping and liquid is detected
- Blue flash – pump is priming – will shut down after 5 attempts
- Yellow solid – pressure is below desired amount, pump is attempting to reach it
- Gren solid – pump has reached target pressure, liquid is still being demanded, but pump will not increase speed because demand is being met
- Green flashing – pump has reached target pressure and there is no liquid demand, standby with motor off
- Red solid / flashing slow – motor has been short circuited
- Red flashing fast – pump overload
There are a number of safeties and steps the pump goes through to prevent any damage or heat issues, all outlined in the manual. There are a few more warnings that use both LEDs:
- Red + Blue blinking alternatively mean the pump has run for 1.5 minutes without liquid and will shut down
- Yellow + Blue blinking together indicate the power supply is providing the wrong voltage
- Steady Red + Blinking Blue means the pump has run for more than 2 hours at very low speed and has been shut down to prevent heat damage.
I think having this sort of info about the state of your pump is fantastic. While most of them shouldn't happen without you hearing or seeing something, such as no water (which should be obvious), some of the others might happen intermittently while you're asleep or away, and having the LEDs showing what happened could really help prevent long days of troubleshooting.
There are two downsides to the Marco that I've found. First is the price, which is easily double than a similar sized pump from Johnson or Shurflo. But you definitely get what you pay for here – the pump is quieter, better pressure, and should last longer based on the design. One could argue that if you wanted the “gold standard” Groco Paragon pump, which is around $1500 for the junior model, or $3000+ for the senior, that the Marco price seems cheap in comparison.
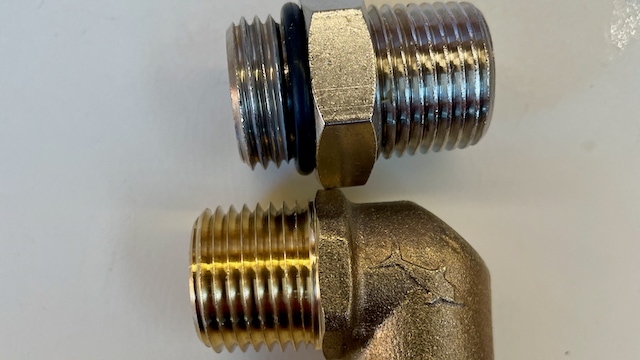
The second challenge is the pump hose connection points. They include two 1/2″ NPT adapters (the silver one pictured above) that screw into the pump. There is an o-ring that seals it, but the thread depth is very short. I'm a big fan of simplifying things, and hate seeing adapters double and triple stacked on top of each other, even though they probably won't leak if properly installed. I would prefer to be able to screw in my own pipe connections to things like PEX or a hose barb instead of having to use their stainless steel connectors, and then something else on top of that. The depth of the connector on the pump is only deep enough to handle the provided adapters without damage or other challenges. But that is a minor complaint.
I have been extremely happy with the pump for the last few months it has been in place. It is much quieter, I have far better flow, and it seems way better engineered and built which should translate into much longer life. You can listen to it while I test all three sinks, the shower, and a combination of those things above.
Fresh Water Filtering
The quality of drinking water aboard has always been a top priority on all of my boats. On the sailboats, that meant treating the tank regularly, using a filter on the hose filling the tank dockside, and then using a Brita pitcher aboard.
With Rendezvous, I've been experimenting with various filters directly after the pump and at the galley tap and have settled on a two part system that has been working very well. Even though I filter any water I put into the tank from a dock, and the rest I generate using my watermaker, I still feel filtering and processing the water results in a better tasting water. It might seem like overkill, but it's made a difference to both me and my husband in terms of stomach issues when aboard.
Part 1 – Whole System Filtering
The first part of the system is a set of filters right after the main water system pump and before water goes into anything else. I had tried a few different combinations of filters, but there were two problems I continued running into – gallons per minute limits, and not granular enough filters, which were both directly related.
I could find 4GPM filters, but they really didn't filter out much, or I could find really good filters that filtered out just about everything, but would only flow a max of 1.5 GPM on a good day. For the sinks or icemaker, the lower GPM filter with more protection would work OK, but the shower would not be great, and trying to use more than one thing at a time would be impossible with that GPM.
I finally found the Pentair Big Blue series of filter housings and two types of filters that could get me to my requirements.
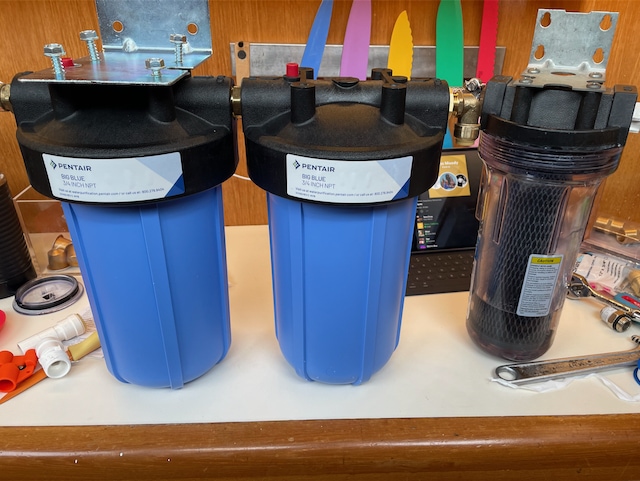
The Big Blue filter housings are much larger than the standard filters I had been using before, and use 10″ tall and 4″ around filters instead of 10″ by 2″.
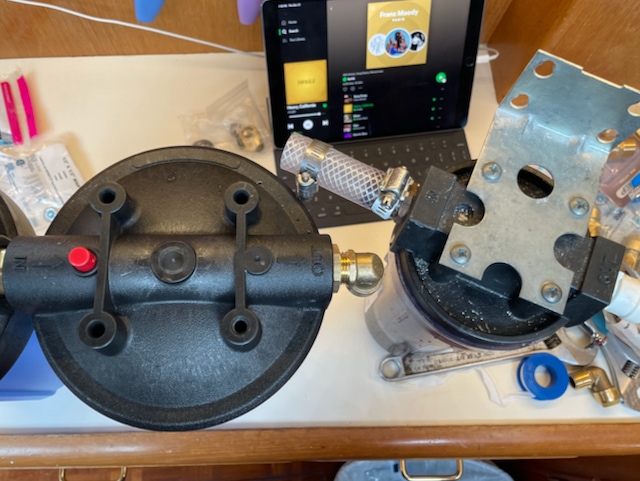
You can see how much larger around they are with this view from the top. They also have pressure relief valves for easy filter changes (the red button). The Big Blue housings also have much larger inlets and outlets available, up to 1 1/2″. I chose 3/4″ NPT since I already had those connections available. They also make clear versions of these housings, but not in 3/4″ NPT.
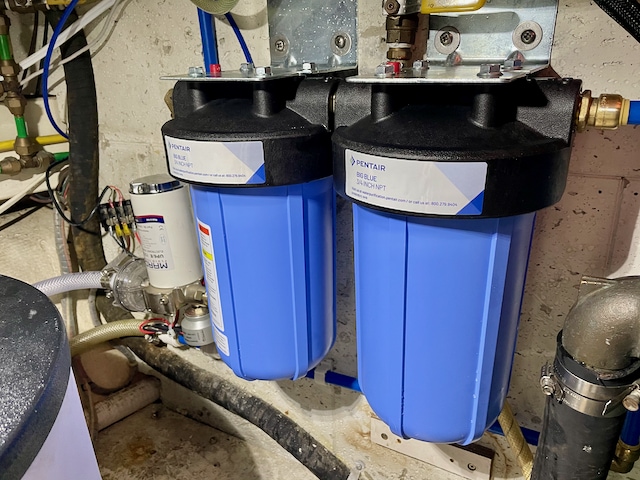
The bigger housings provide more space for bigger filters and more water, which means more GPM. That also allows me to use better filters that filter out more junk, yet still meet my GPM requirements. I used a 3/4″ union connector between the two filters to connect them, and various PEX ends on either side to connect to the pump and the rest of the water system. They are pretty beefy housings and weigh quite a bit, and the brackets are quite sturdy.
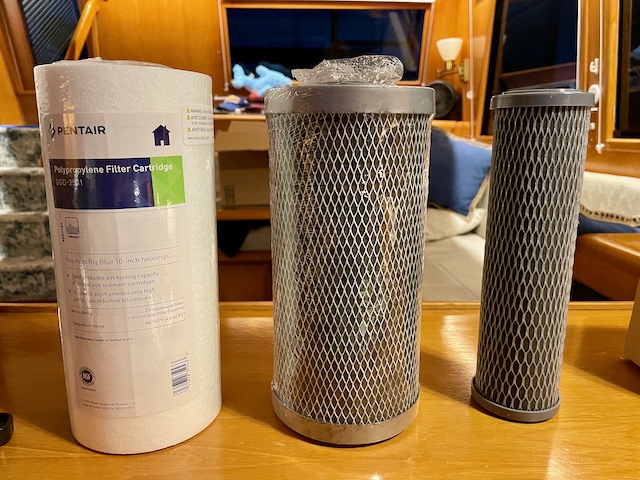
I chose two different filters for my system. You can see them above compared to the smaller, more standard sized filters.
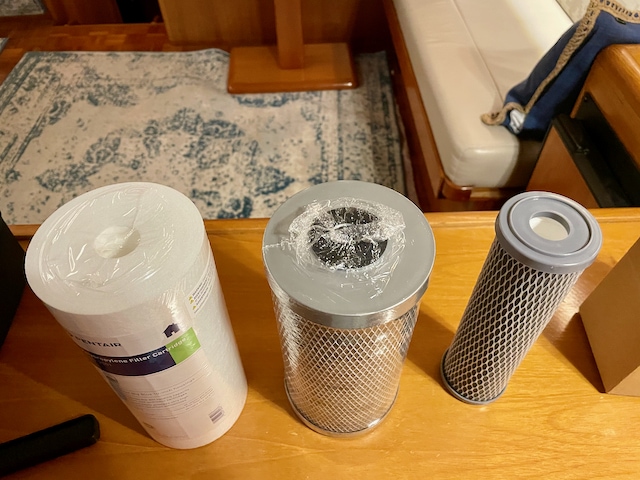
Here's another view comparing the sizes.
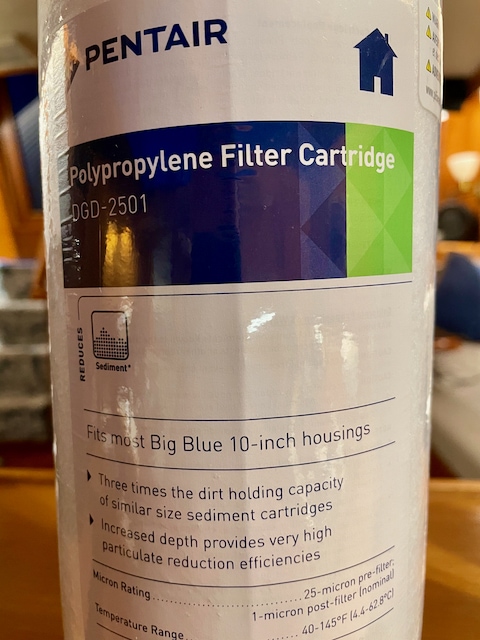
After a lot of research, I decided to use a sediment filter first and a carbon filter second. The first filter is a Pentair DGD-2501 (part number 155359-43) which is polypropylene and is designed for a high flow rate of 10GPM. Poly filters are more resistant to bacteria than cellulose, and are pretty inexpensive. This filter is to get rid of the larger particles (if any) and much cheaper than the secondary one. I may end up switching to a different filter here – I shouldn't be seeing much sediment given that I filter the water coming into the tank either at the dock or from the watermaker, but this is how most home water systems are setup, and I decided to start with this filter. If anything, I might put another carbon filter here that is not as restrictive as the second one.
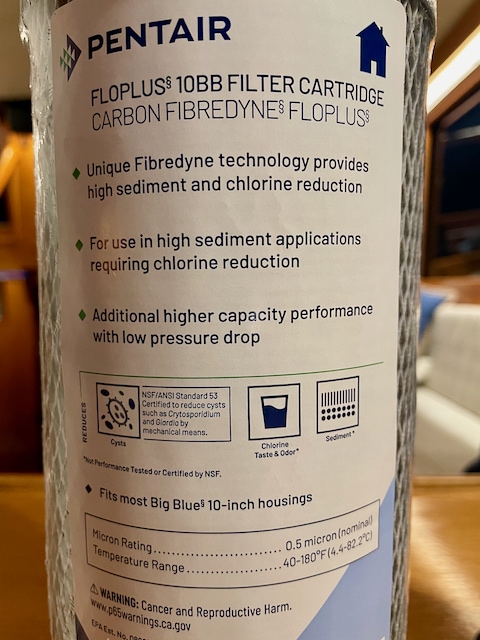
The second one is a FloPlus 10BB 0.5 micron higher capacity filter (part number 455905-43). These are quite a bit more expensive than the previous filters, but they have a much higher filtering quality with a fairly high flow rate. This is the filter that will really make a difference in protecting the water supply and removing tastes and odors.
So far this filter combination has met my requirements where about 6 different others did not in terms of flow alone. I have no pressure or GPM issues running the shower, and I can actually use one other location while the shower is on, or multiple taps simultaneously. In addition, I can taste and smell (in the shower with hot water in particular) the difference in the water.
Part 2 – UV Water Filter
The second part of this system is something I've wanted to install since I saw the Wynn's use it on their catamaran Curiosity a few years ago – UV-LED water filtering. I chose the Acuva Eco NX-Silver UV-LED Water Purifier with Smart Faucet which they just switched to as well after their boat sat during COVID restrictions.
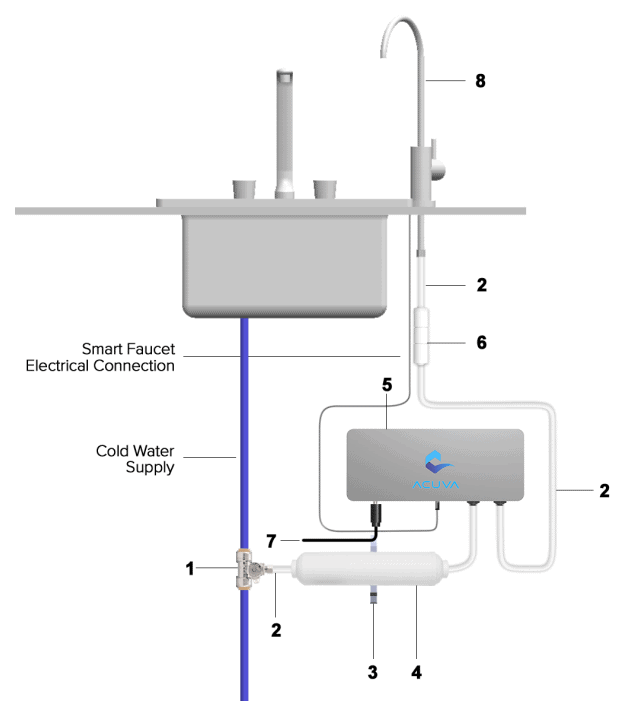
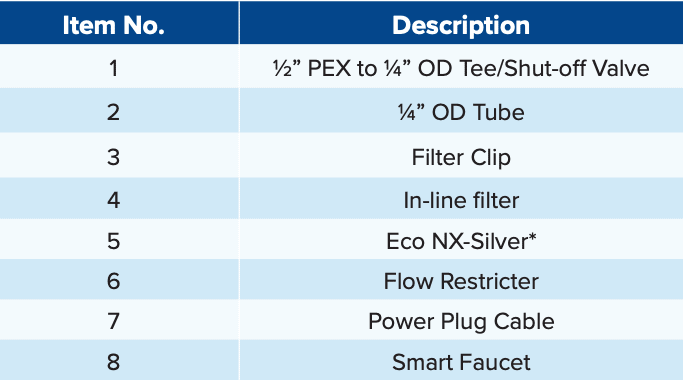
The system consists of a piping, valve, pre-filter, UV-LED unit, cables, flow restrictor and the counter top faucet.
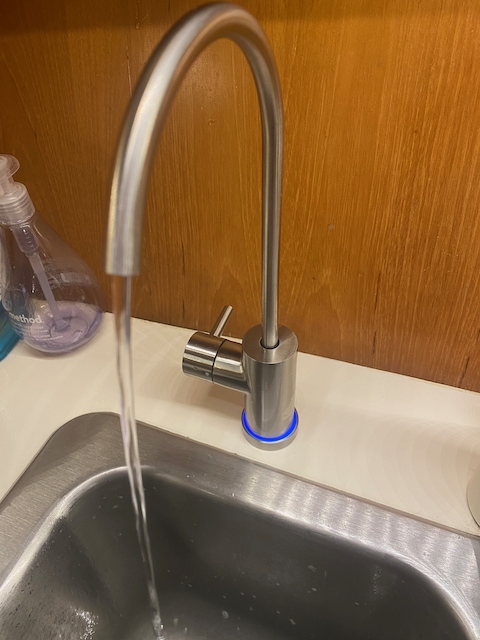
The installation was relatively easy since there was already a fuse block through a hole in the wall that the water system pump was on for power to the UV-LED unit. The plumbing part was all PEX piping, and since I had replaced that near the main pump and filter area, easy to tap into. The hardest part was the hole for the counter top faucet.
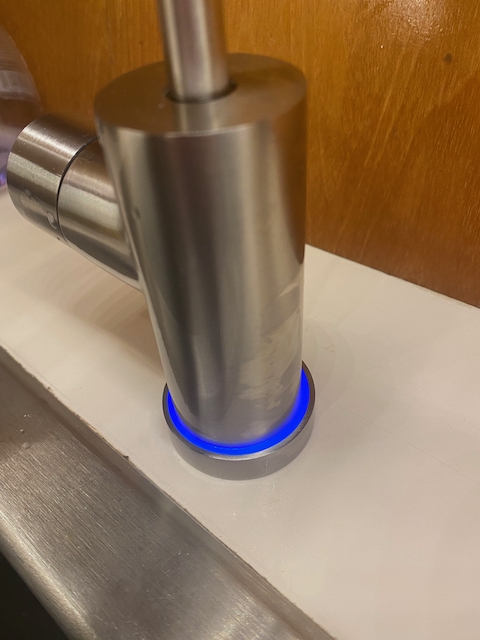
I really like the circular light around the base of the faucet that lets you know if things are working right. The only downside to this system is its flow rate – it's extremely slow, but I suspect that is due to the pre-filter and UV-LED process.
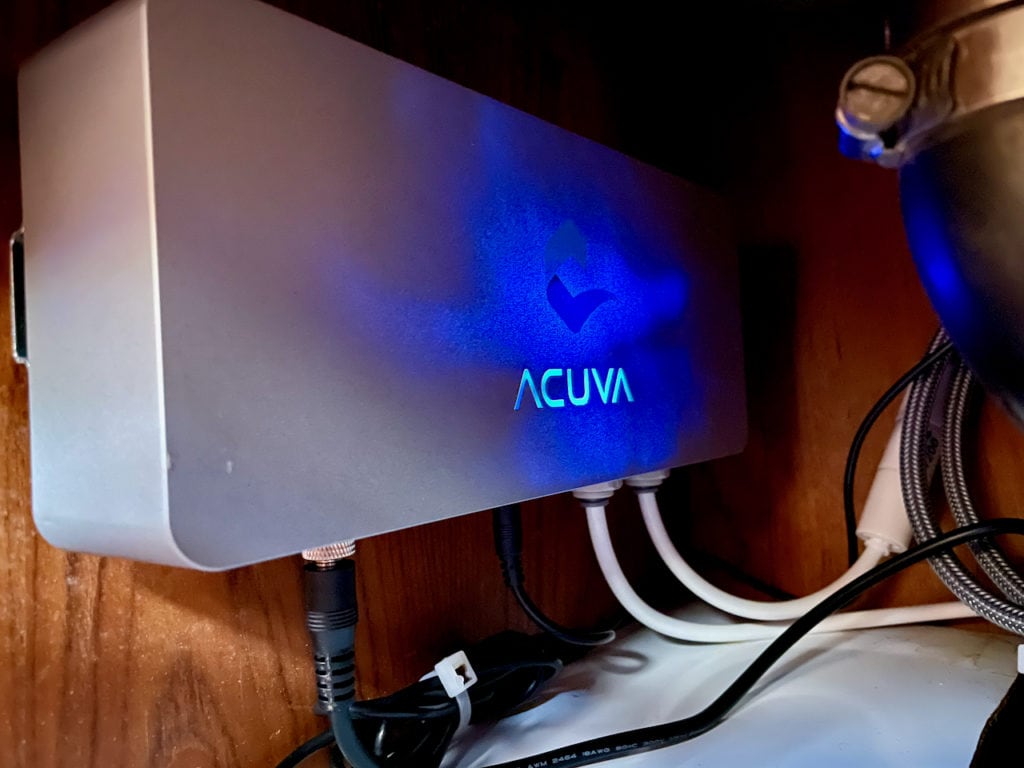
My husband has had issues with the water aboard messing with his stomach for the last year or so, and that has completely gone away with this unit being on board. Whether it's the aggressive filter or the UV-LED or both, it has made a big difference in his comfort on board, and well worth the investment.
Shower Mixer
While all of the above improvements were nice, the single best improvement in the plumbing system this year was the addition of a thermostatic mixer for the shower.
A thermostatic mixer is a device that takes both hot and cold water, and using a thermostat device inside of it, ensures the same temperature of water is coming out the other end as consistently as possible. Most modern home showers have these built in – behind the wall of the shower and attached to the handle.
Many boats have a thermostatic mixer right at the hot water tank, but that is designed to ensure the hot water in your pipes never exceeds a specific temperature so that someone can't burn or scald themselves with just hot water alone. This is common in houses as well to be installed right at the hot water tank.
So why couldn't you just use one central one? Well, you could, as long as you had pretty stable output, and set the temperature of the entire system, at the hot water tank, to be essentially what you want in the shower. If someone or something else comes on, then you're still manually adjusting things in the shower. That's sort of limiting.
In bigger boats, and some more modern ones, you may actually have home-style shower fixtures, and in that case, already have a thermostatic mixer. For those of us with older or smaller boats, what I found might be more useful.
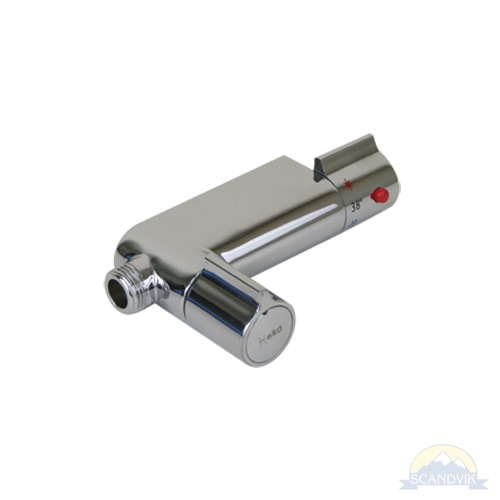
I found the Scandvik Mini Compact Thermostatic Mixer, part number 16204 and I special ordered it through Fisheries Supply in Seattle. It is not inexpensive, but I think it is 100% worth it if you keep reading….
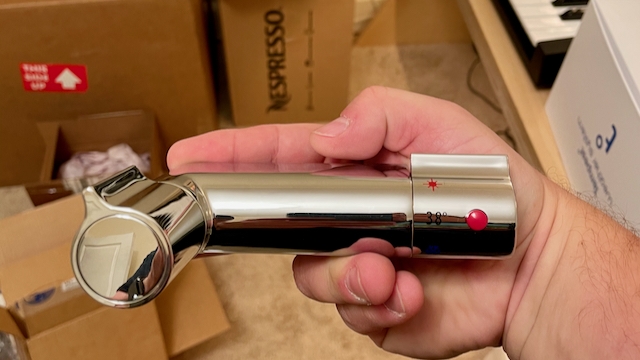
Scandvik also had a couple of documents they sent to me that were helpful:
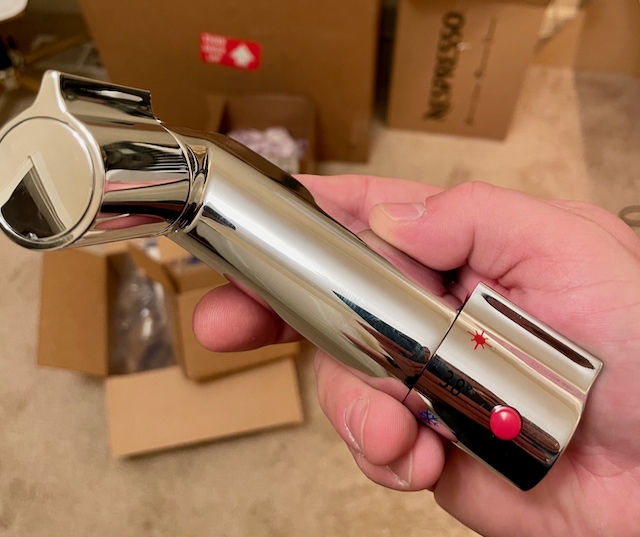
This thing is really well made and weighs quite a bit. It has a temperature control dial on the right, and a flow dial on the left.
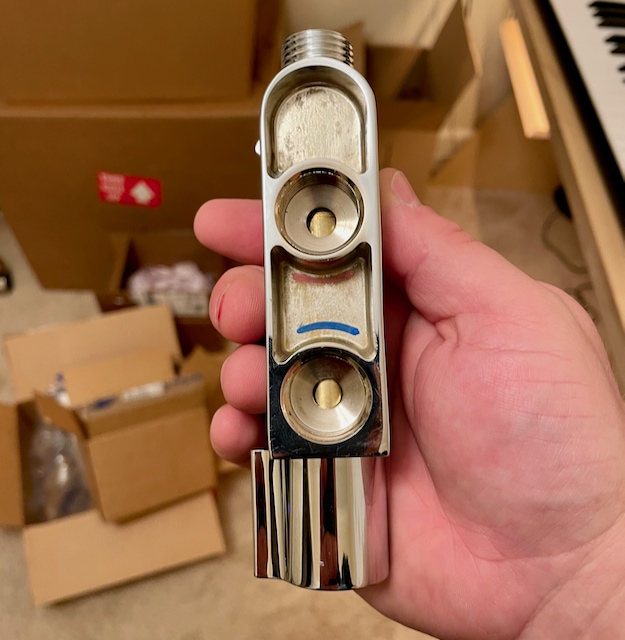
The back has two 1/2″ NPT threaded inlets for the water source. Unfortunately these weren't the same width (they were narrower) as my existing shower, so I had to do some repairs to close off one hole, and drill a new one.
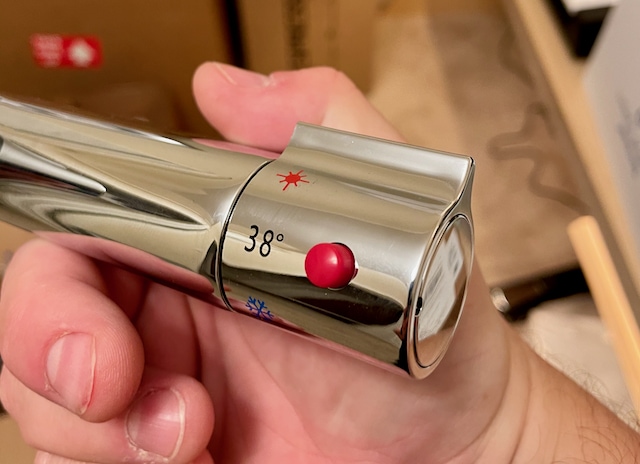
This unit is clearly made in Europe as it has temperatures in centigrade. The temp adjustment is really well thought out, and has a red push button that you can press to go beyond 38 C / 100 F, but I find that I rarely do that. Pushing the valve up against the hot water stop before you have to push the button has resulted in perfectly warm showers.
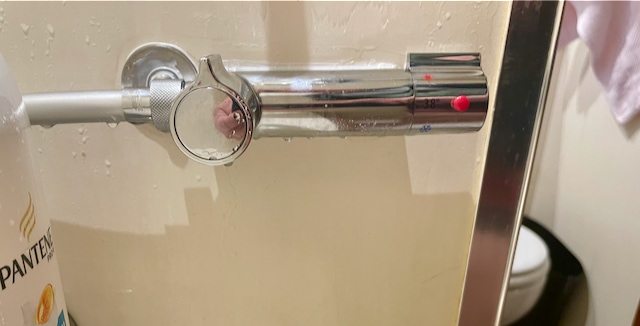
Installation wasn't that complicated, other than making a new hole for the narrower spaced connections.
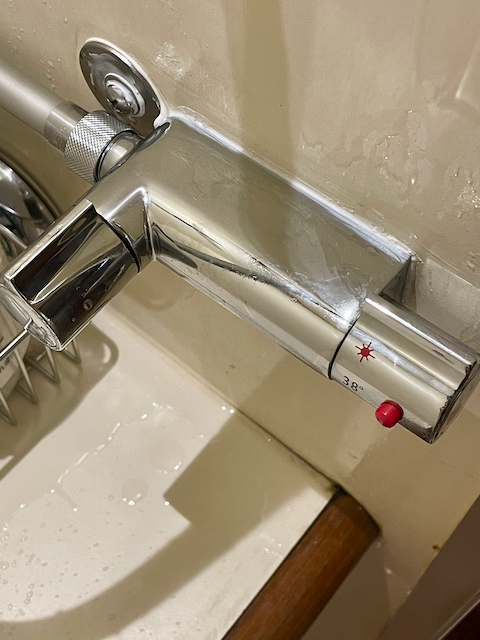
The old hole I plugged temporarily until I can do a more elegant permanent repair.
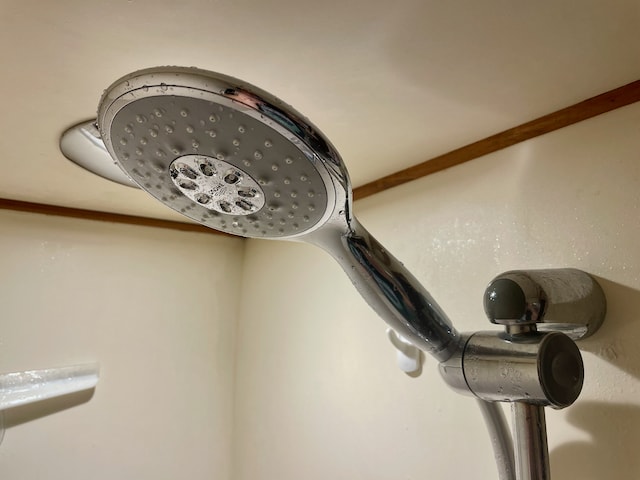
One of the benefits of this unit is that it uses standard home fittings for the shower head. I picked a nice unit from Grohe that fit in my existing holder, and has various different spray patterns which I will not likely use.
My husband is used to me having 10 projects going on simultaneously, and changes and upgrades happening constantly. It is often very difficult to get feedback out of him on some part of something that I've changed. However, in the case of this change, it wasn't hard at all. In fact, he said this was probably the single best change I've made to any boat we've owned in a very long time. Being able to enjoy a shower aboard and not worry about futzing with the temperature, or worry about running out of water has made a big difference in his comfort. That sort of unsolicited response about a simple change like this is significant, and I agree with him as well.
Prior to this unit, with the standard marine dual handle shower setup with shower head, you would get about 4 minutes of shower time, mostly because you had to futz with the temperature as the hot water ran out slowly. I have an 11 gallon hot water tank, so at about 3 gallons per minute, a 4 minute shower sounds about right.
With the new thermostatic mixer and home shower head, I can get around 8 minutes of shower time if I run the output at about 1/2 the volume. That's double the shower time, and no hot/cold dance, messing with handles, etc. The unit delivers very consistent temperature water, and even if you mess with the output rate, or someone else turns water on, it only takes about a second or two for it to adjust. For someone who needs a shower and an espresso to start their day, this is music to my ears.
The benefit of this system is that you don't have to mess with the water temperature, and you can run it at a lower GPM and get longer times without having to waste time adjusting things. I highly recommend if you value a good shower like I do, to look into some sort of thermostatic mixer for yours.
All of these projects were designed to improve the quality of our fresh water system aboard. The better tasting and safer water, more comfortable bidet, and the amazing shower experience have added even more levels of comfort and safety aboard, and I'm glad I completed the projects.
Archived Comments
These are read only comments from the old system. Scroll down to participate in SeaBits Discussions, our new interactive forum attached to each article.
Carol
January 30, 2021 at 4:43 am
Our pressure tank has bit the dust so this is timely for me. Any reason you didn’t use one in this upgrade? Flojet 2840 Series Booster System is currently installed, 40psi, 4.5gpm. Pump seems fine, so thinking of just replacing the tank for the moment.
Will definitely go with the Big Blue filters as we are having a lot of water pressure problems with the current smaller one. We installed a Seagull filter in the galley and like that quite a bit. Very interesting choices here, and we are going with the Marine Elegance without the bidet feature.
- Steve Mitchell
January 30, 2021 at 10:07 am
Hi Carol,
I chose not to put a tank in after having one for a couple of years off and on depending on what I was testing or using. I like having the consistent pressure that the tank provided, but the Marco pump is pretty close to that, and without the extra space and hoses and connections.
The Seagull is an excellent system – I considered that too but ultimately chose the Acuva.
The bigger filters are definitely a must have for proper flow and GPM if you’re running everything through them. - Carol
February 6, 2021 at 5:51 am
Just pulled the trigger on the Marco pump. Also going to go with the Pentek filters. Eventually will add a Viqua 5gpm UV unit just after the filters. Thanks for the ideas.
Wolfgang
February 7, 2021 at 3:28 am
I completely agree with your findings on the Marco pump. I have the exact same pump since last summer, should have installed one long long before. No need anymore for a pressure tank, simplifying things that way.
Next thing are water filters, I will take advantage of your sourcing. Thank you and keep up the good work.
- Steve Mitchell
February 7, 2021 at 9:55 am
Thanks for the kind words!
I love my Marco pump and am very happy with the purchase. It seems like it will last a long time and provide very good service.
Jim Buchanan
April 24, 2021 at 12:13 pm
Having the Headhunter Xcaliber pump in our current and 3 previous boats it seems is about the same cost as Marko with many more management and safety features, including power draw options, and deadly silent.
Also. I’ve found a whole boat UV system an absolute requirement to eliminate bacteria before it can take hold in a water heater anode and complete water system distribution system.
Did you exclude these products as not sponsoring you?
- Steve Mitchell
July 17, 2021 at 1:26 pm
The Headhunter X-Caliber is at least double what the Marco costs in my research. I’ve found it for about $1600, while the Marco is around $700 for the size I have. I’ve worked on a few boats with Headhunter systems and they are definitely nice, but quite a bit more expensive.
No one sponsors me, I buy these products myself. - Donald Joyce
July 17, 2021 at 2:27 pm
I have both a Marco pump and a Headhunter pump. For whatever reason, the Headhunter pump was unavailable when I bought the Marco pump. In the past I had difficulty finding parts for the Headhunter pump. Perhaps there was a gap in distribution. Somehow, I lucked out when a megayacht ripped one out and threw it in the dumpster. The motor windings were burned but all else was good. I don’t know why the windings were burned.
Both pumps are quiet, are computer controlled, and appear well made. My Headhunter is used as a saltwater washdown pump and is working fine after 12 yrs.
Hartley
May 8, 2021 at 5:32 pm
Hi Steve, regarding the Marco pump, how exactly does it respond to a tank running dry? On Atsa, when a tank runs dry (generally when I’m in the shower), the pump starts pulling air. Changing tanks means the pump has to pull usually a large amount of air through before it will prime & pull water again. The tank tops are maybe 3′ below the pump.
- Steve Mitchell
July 17, 2021 at 12:26 pm
The pump actually will stop running if it has not detected liquid. From the manual:
Red and blue LED that blink alternatively signal that the pump has run one and a half minute
without liquid and the motor has been stopped for this reason. To reset this warning you have
to reboot the circuit or press the Reset button on the control panel, if present.
The Marco pumps have a bleed screw that you open when you run dry and makes priming pretty simple.
Donald Joyce
May 13, 2021 at 6:26 pm
I installed a 10 GPM Marco pump on Cats Meow and love how quietly it runs. The only thing we don’t like is the pressure is pretty low compared to the pumps we’ve had in the past. I had to play with the fittings for a while to keep the suction side leak free under the partial vacuum of lifting water about 6 ft up from the tanks. Ended up using bonded sealing washers and “lock nuts” to compress the sealing washers instead of the adapters Marco provided.
- Steve Mitchell
July 17, 2021 at 12:10 pm
Good tips! I haven’t seen that on my setup, but I’m not lifting as much as you are.


