

If you’ve done any wiring on your boat, you know how much wire size is emphasized in manufacturer specifications, and there is a very good reason for it. If the batteries are the heart of the system, the wires are the arteries and veins. Having a perfect heart won’t matter if your delivery system is compromised – you need adequate sized wire to carry the necessary current.
Part of my power system redesign was to replace almost all of the core critical wiring in Grace as I had found the existing wire had damage, and was too small for my expected loads.
This is the second in a series of posts on my power system upgrade which will cover design, install, and specific implementation challenges.
Measurement
My first step, after the design was completed, was to rip things apart and start examining and measuring wires and locations. This took several days of concerted effort, and opening spaces I had never been in.
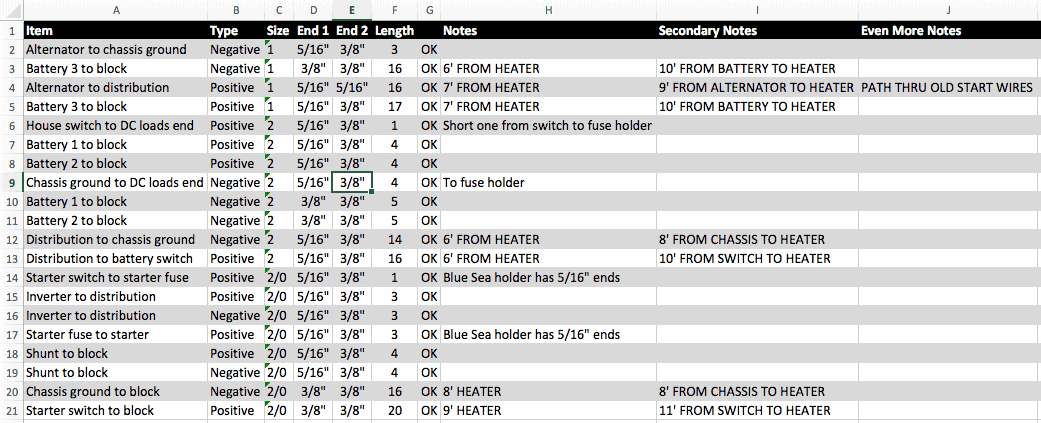
I chose to track each wire in a spreadsheet so I wouldn’t mess anything up. I recorded the purpose, type, end sizes, wire size, and other notes. Besides just replacing existing wires, I was also changing the way the system worked at a base level – having no start battery, having three batteries instead of 2, adding an inverter, etc. – so this wasn’t just as simple as making a list of existing wires.
In many cases I had to lay out paths for new wires and devices that I did not have in hand yet. In that case, I used a trick from my friend Steve Roberts and mocked up various things in cardboard so I could get an idea of wire routes and distances.
Pay for it!
I’ve made my share of wires for both Grace and Jammy over the years – I have all of the necessary tools including appropriate large cable strippers, big hydraulic crimpers, ends and the like. However, I have also had my share of failed crimps and problems, and I am the worlds worst soldering engineer, so if it requires tinning things, you might as well light it on fire and throw it in the garbage.
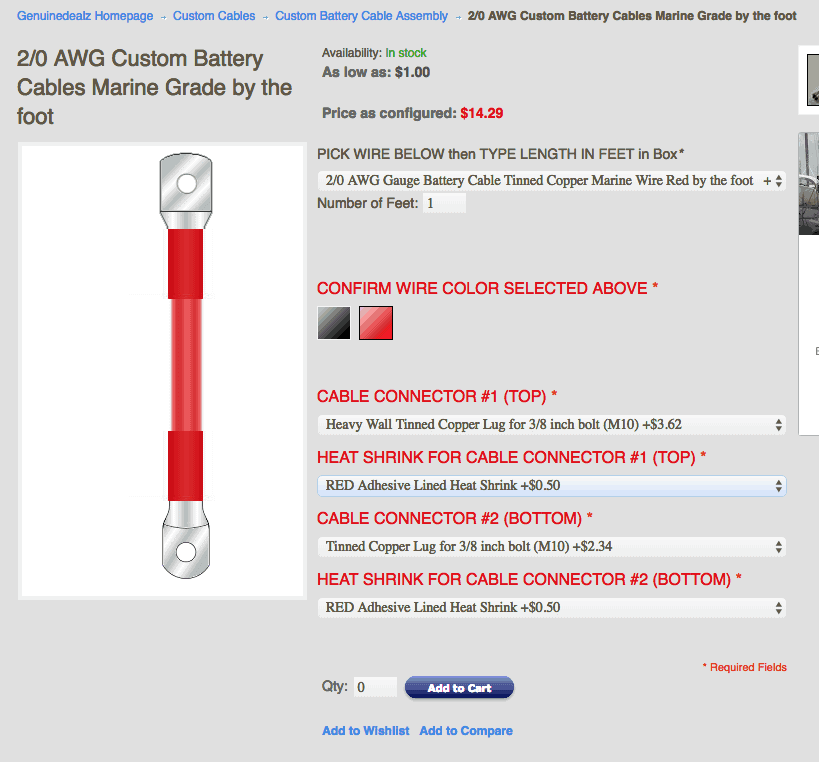
For this project, I chose to use a 3rd party to make all of my wires, and chose GenuineDealz.com, another recommendation by Steve Roberts. Their site name is a bit weird, but their site is clear and fast, and you can build your wire step-by-step with a number of choices and options.
I chose heavy wall tinned copper lugs and shrink wrap for both ends. I felt that the thicker walled lugs would last longer and be more robust. I oversized my cables everywhere I could, and of course used marine grade wire.
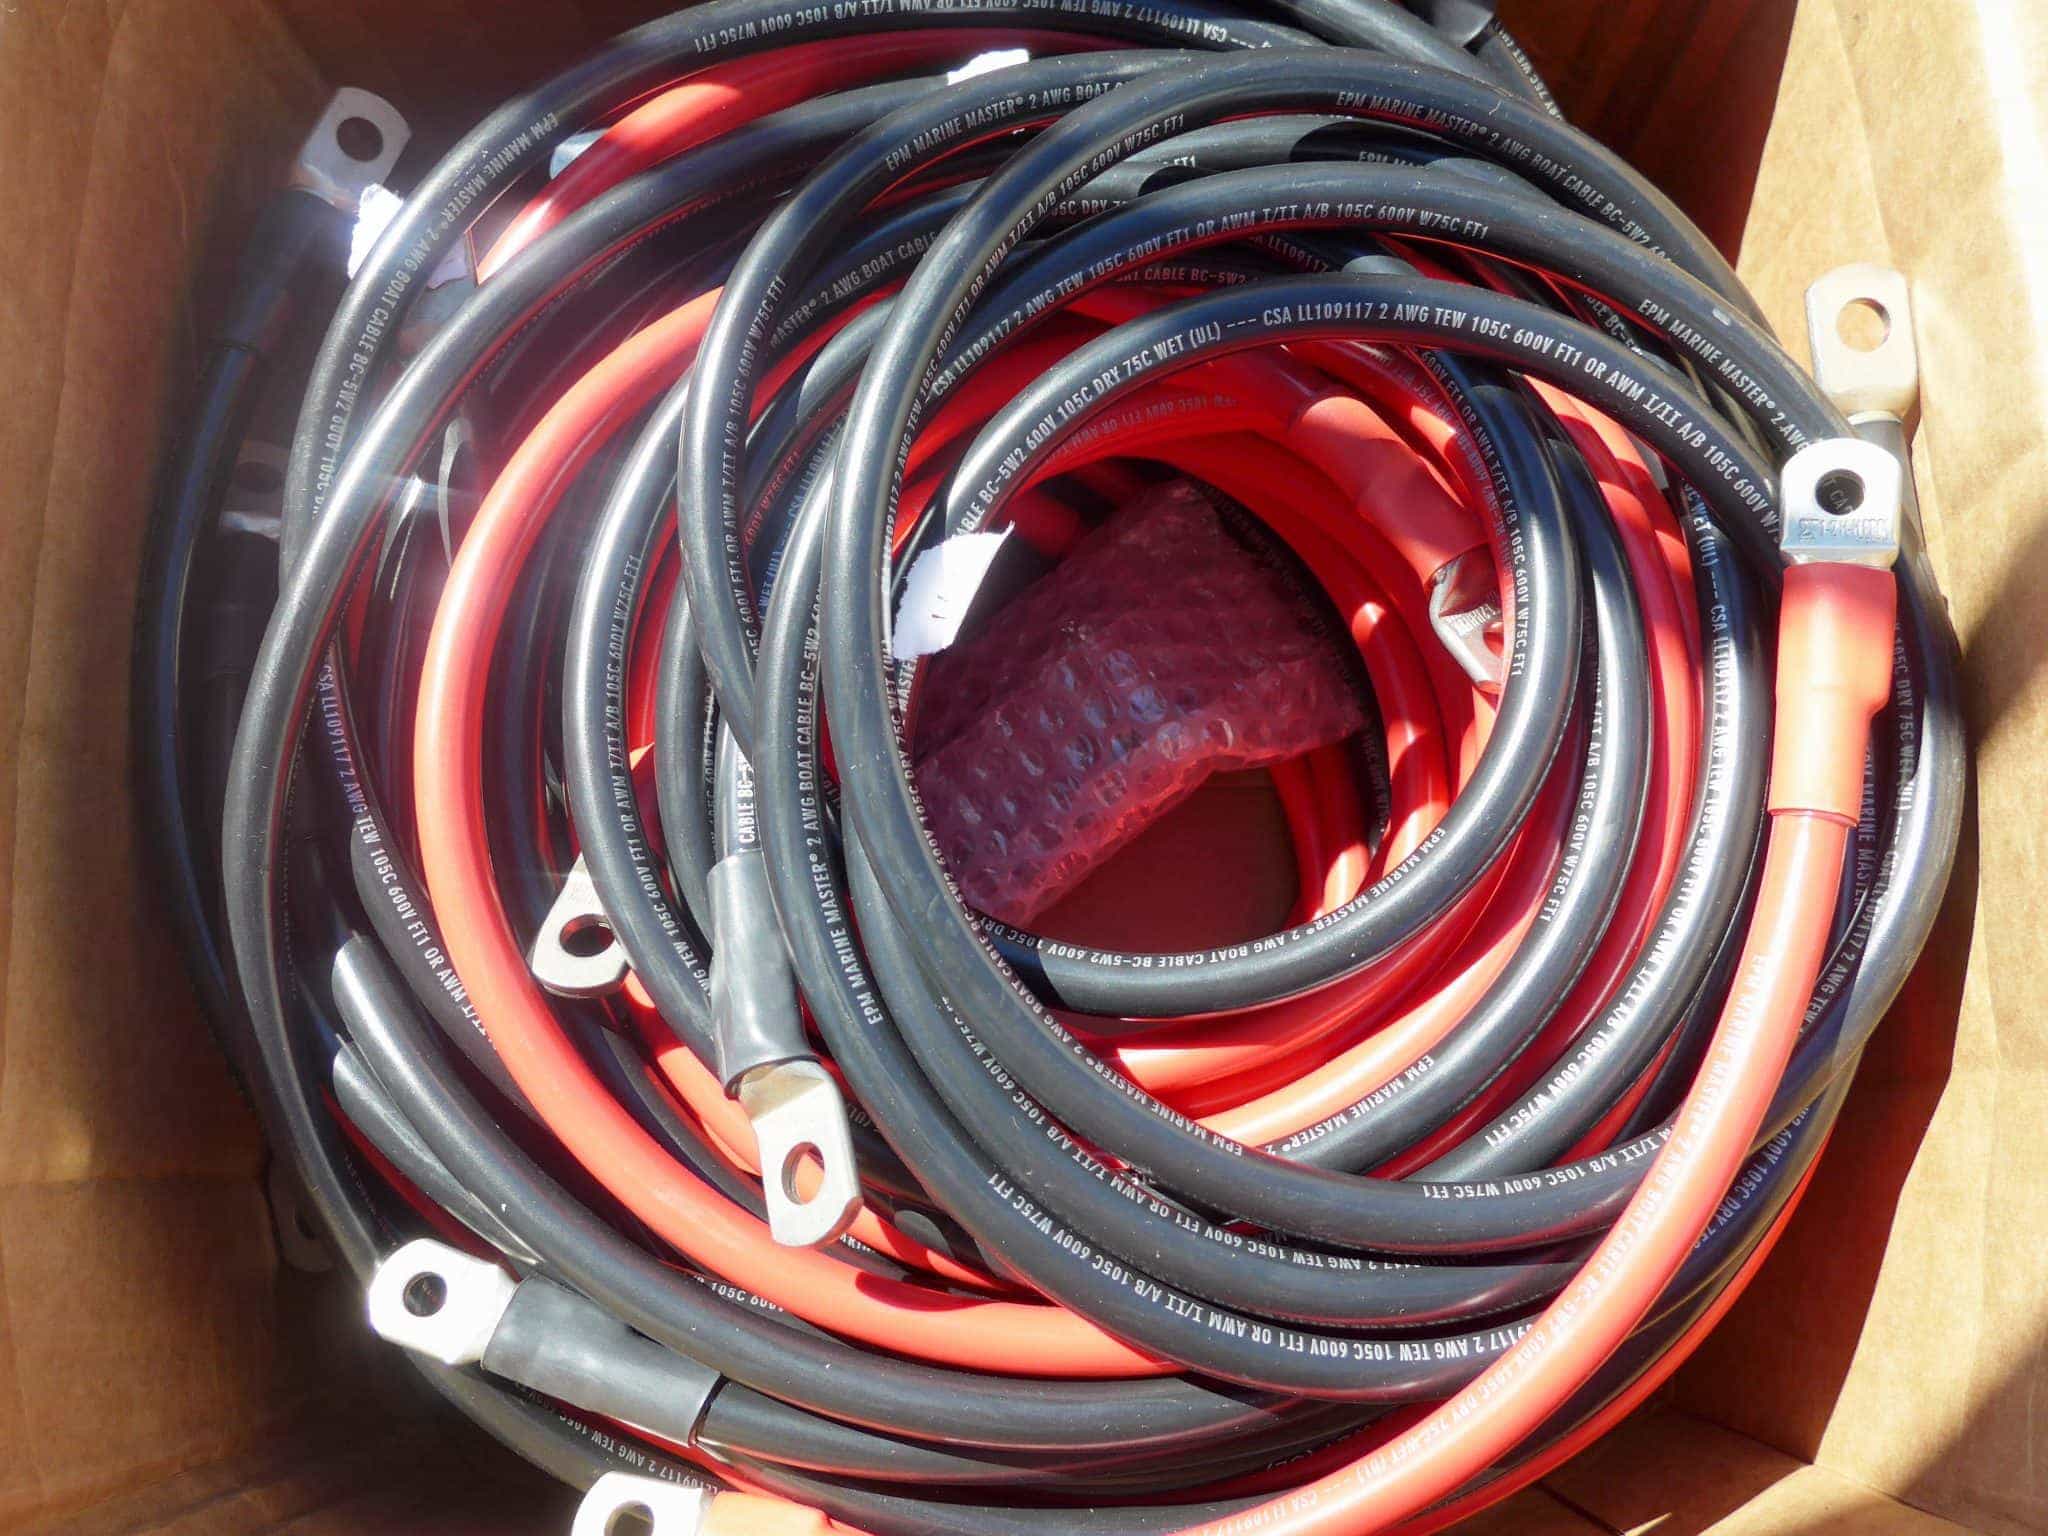
The end result was a box of 20 wires weighing about 70 pounds!
Prep Work
Now that I have the wires, it’s time to figure out where they all go, and how to get them there. The first step was to lay them out in the sun so they became a bit more pliable – several of these suckers were AWG 2/0 and quite a bear to work with.
I was very pleased with the quality of the wire and ends – everything looked far more professional than I could ever hope to do myself. Super thick ends, tight shrink wrap, and very heavy feeling hide and wire.
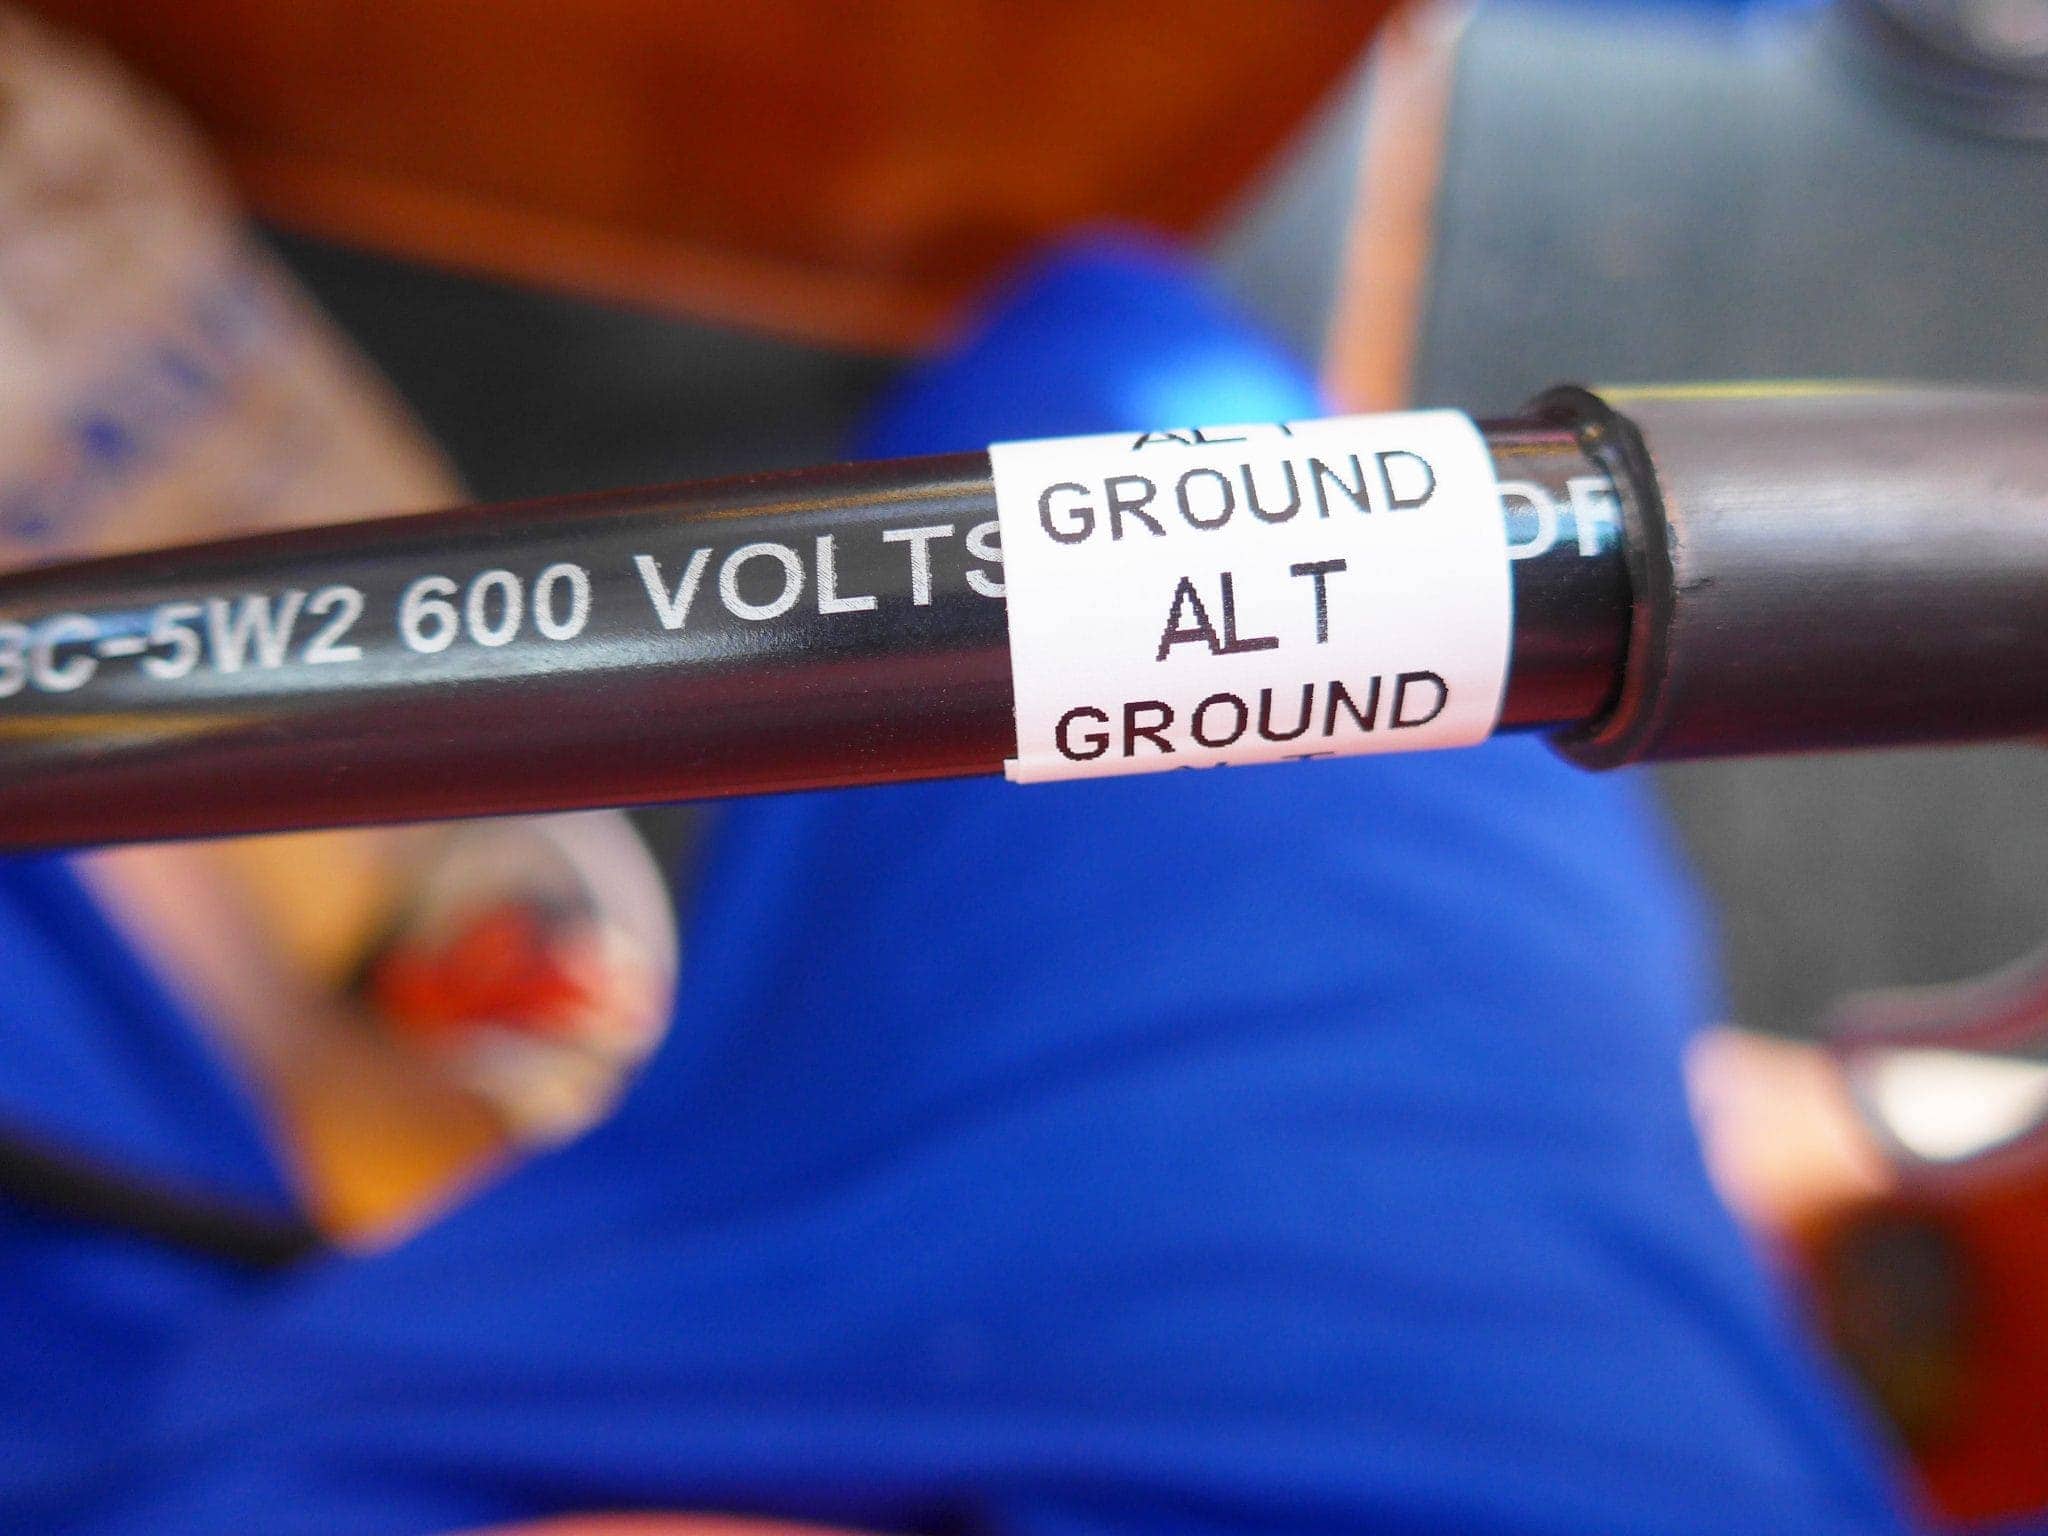
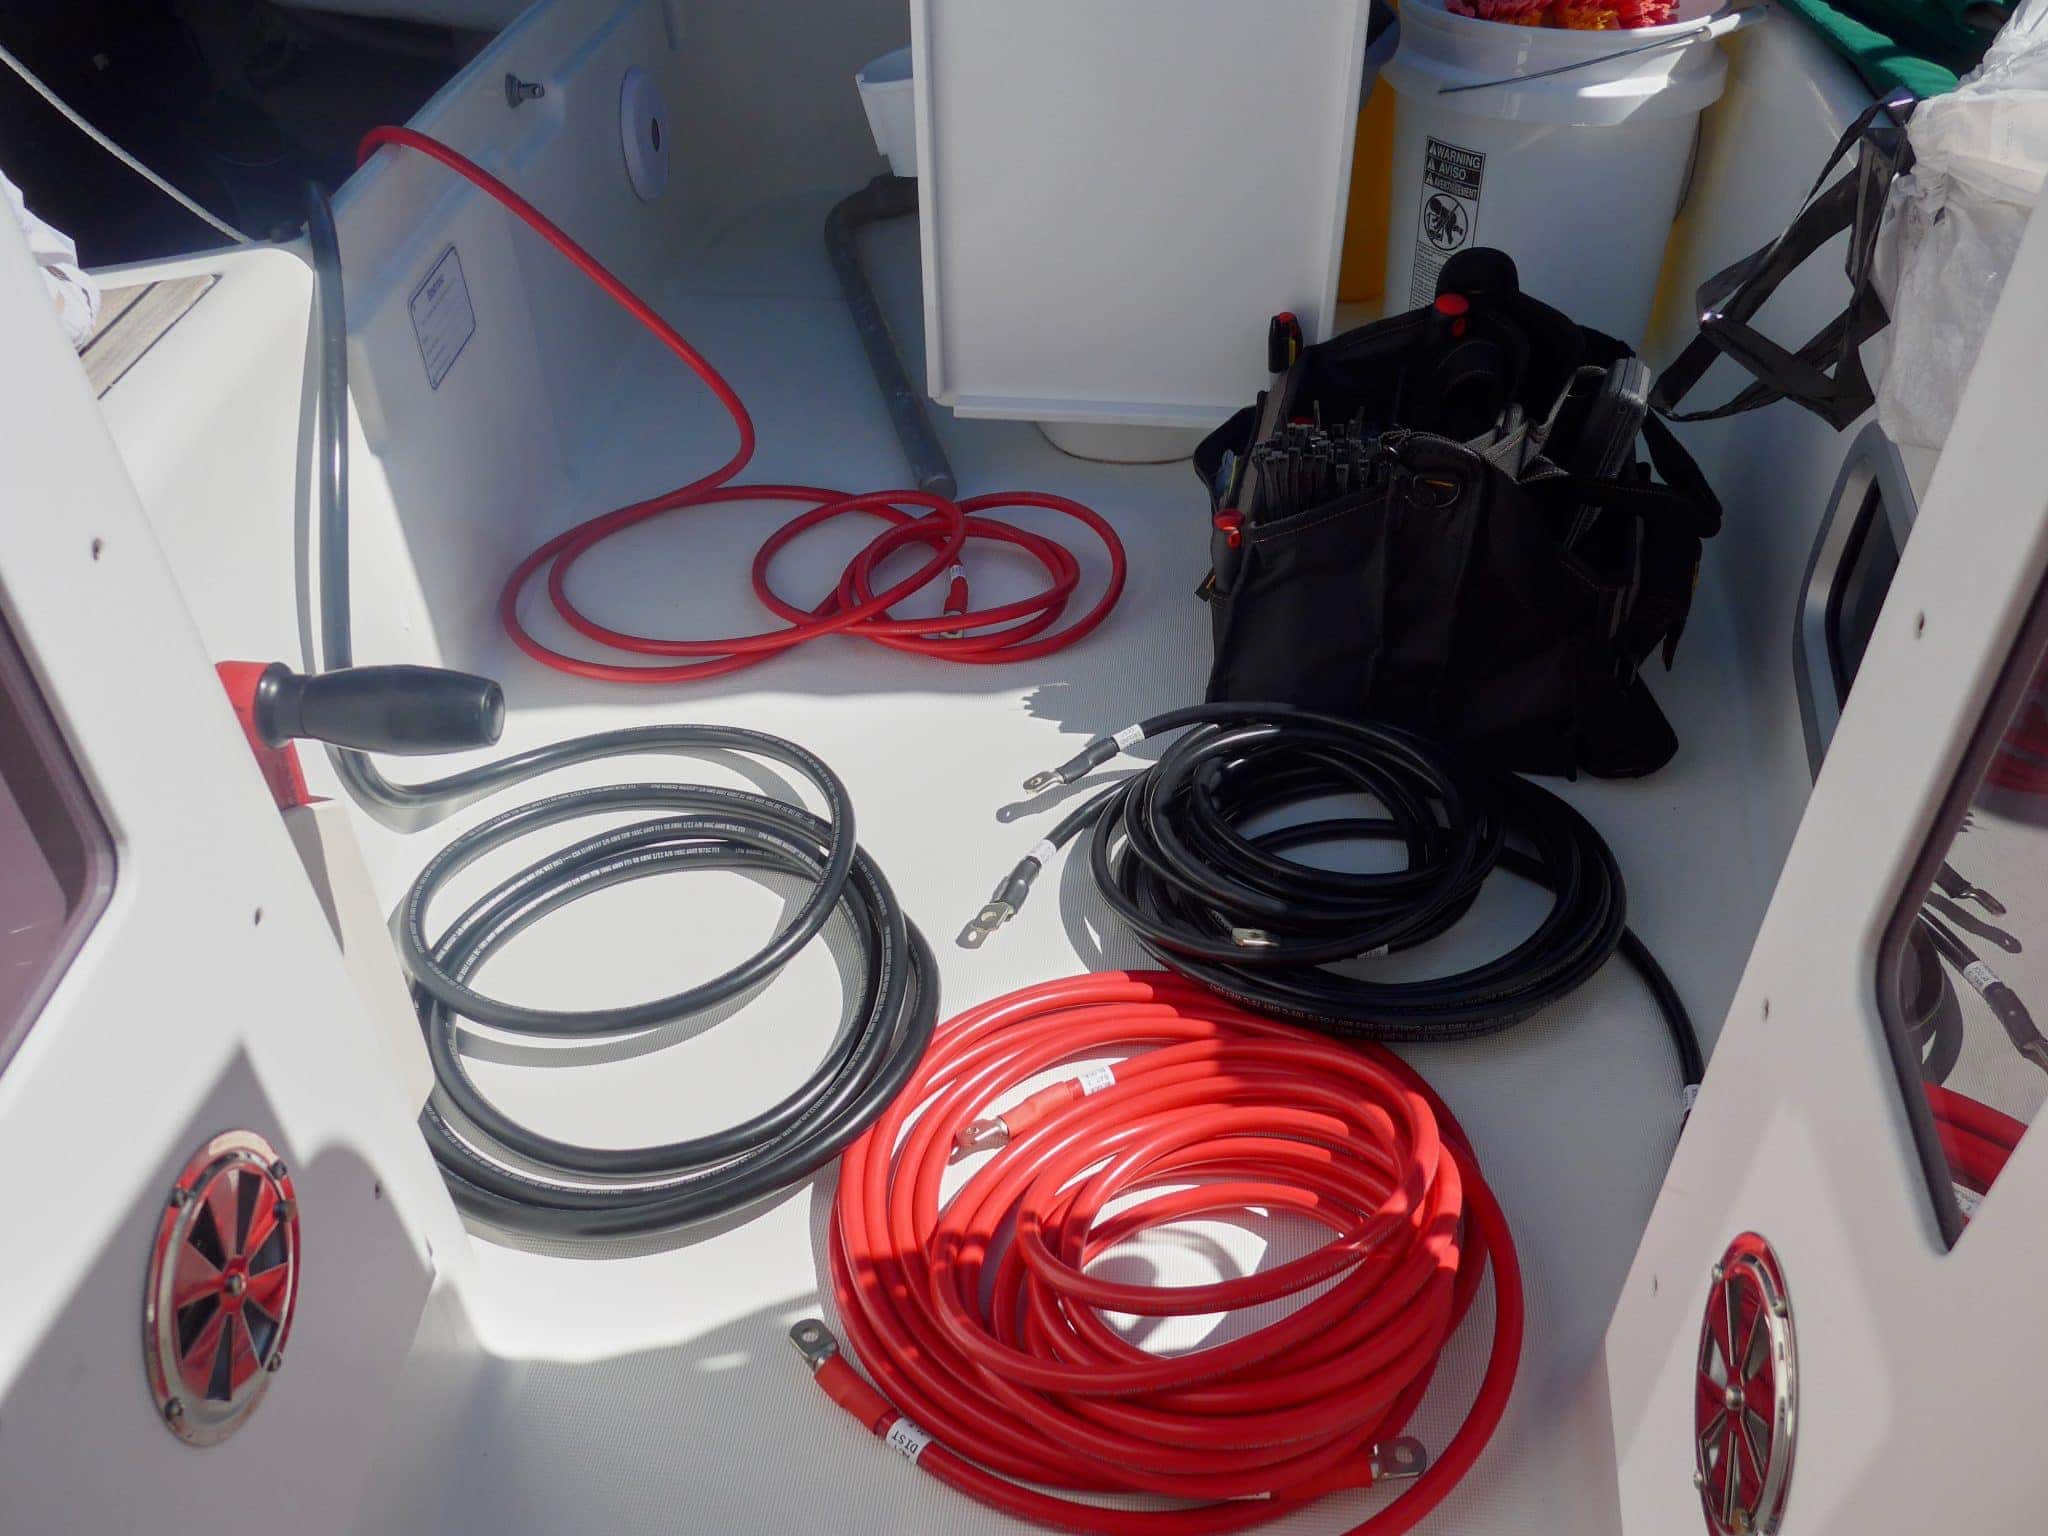
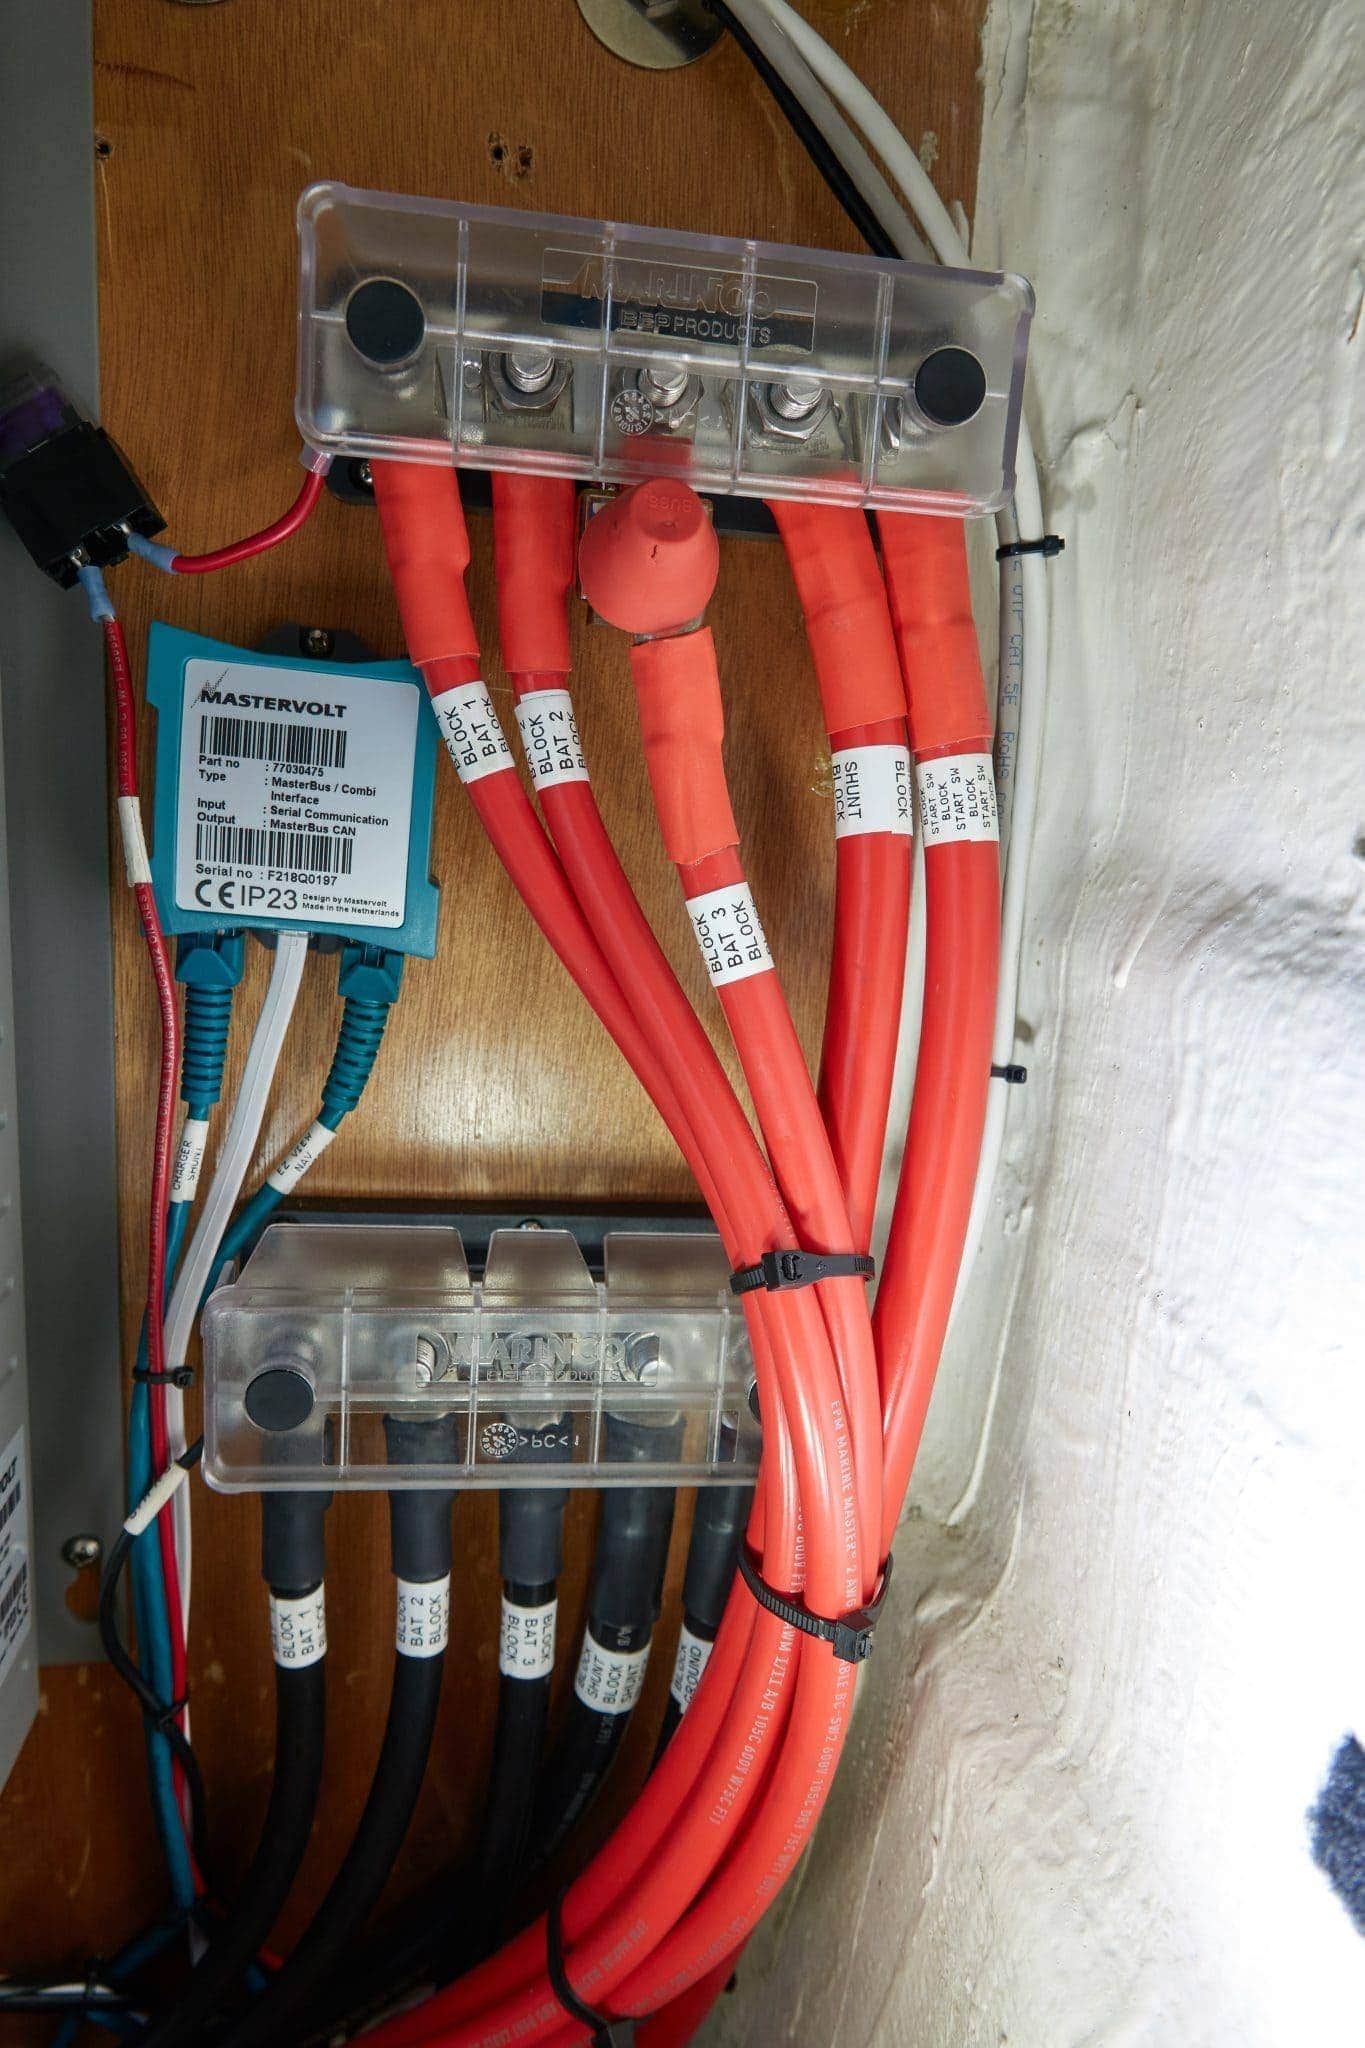
I love labels. I have always had an affinity for making sure everything is clearly identified, and wires on the sailboat are no exception. I use a Brady BMP21 label makerand 3/4″ black on white nylon cloth tape. The nylon cloth tape is absolutely amazing, and lasts a long time in the marine environment. It sticks very well, and is not as shiny as the traditional tape. I label both ends of each wire, and at various intervals along the way depending on the length and route.
Install
Install took about 6 hours, and was a hot, dirty, and unforgiving. The biggest challenge was getting things from the battery/charger area down around the water heater, through the back of the engine space, and to the battery switches, alternator, and DC distribution fuses. I think I walked between this area, down the companionway, and around the corner to the battery switches about a 1000 times. I would definitely recommend having help when redoing longer runs of large cables.
The spaces to transition through some of these areas were no bigger than the wire itself, and required careful routing and movement of wires not to damage or compromise them. I found a bit of dish soap on the wires and a lot of patience helped move things along.
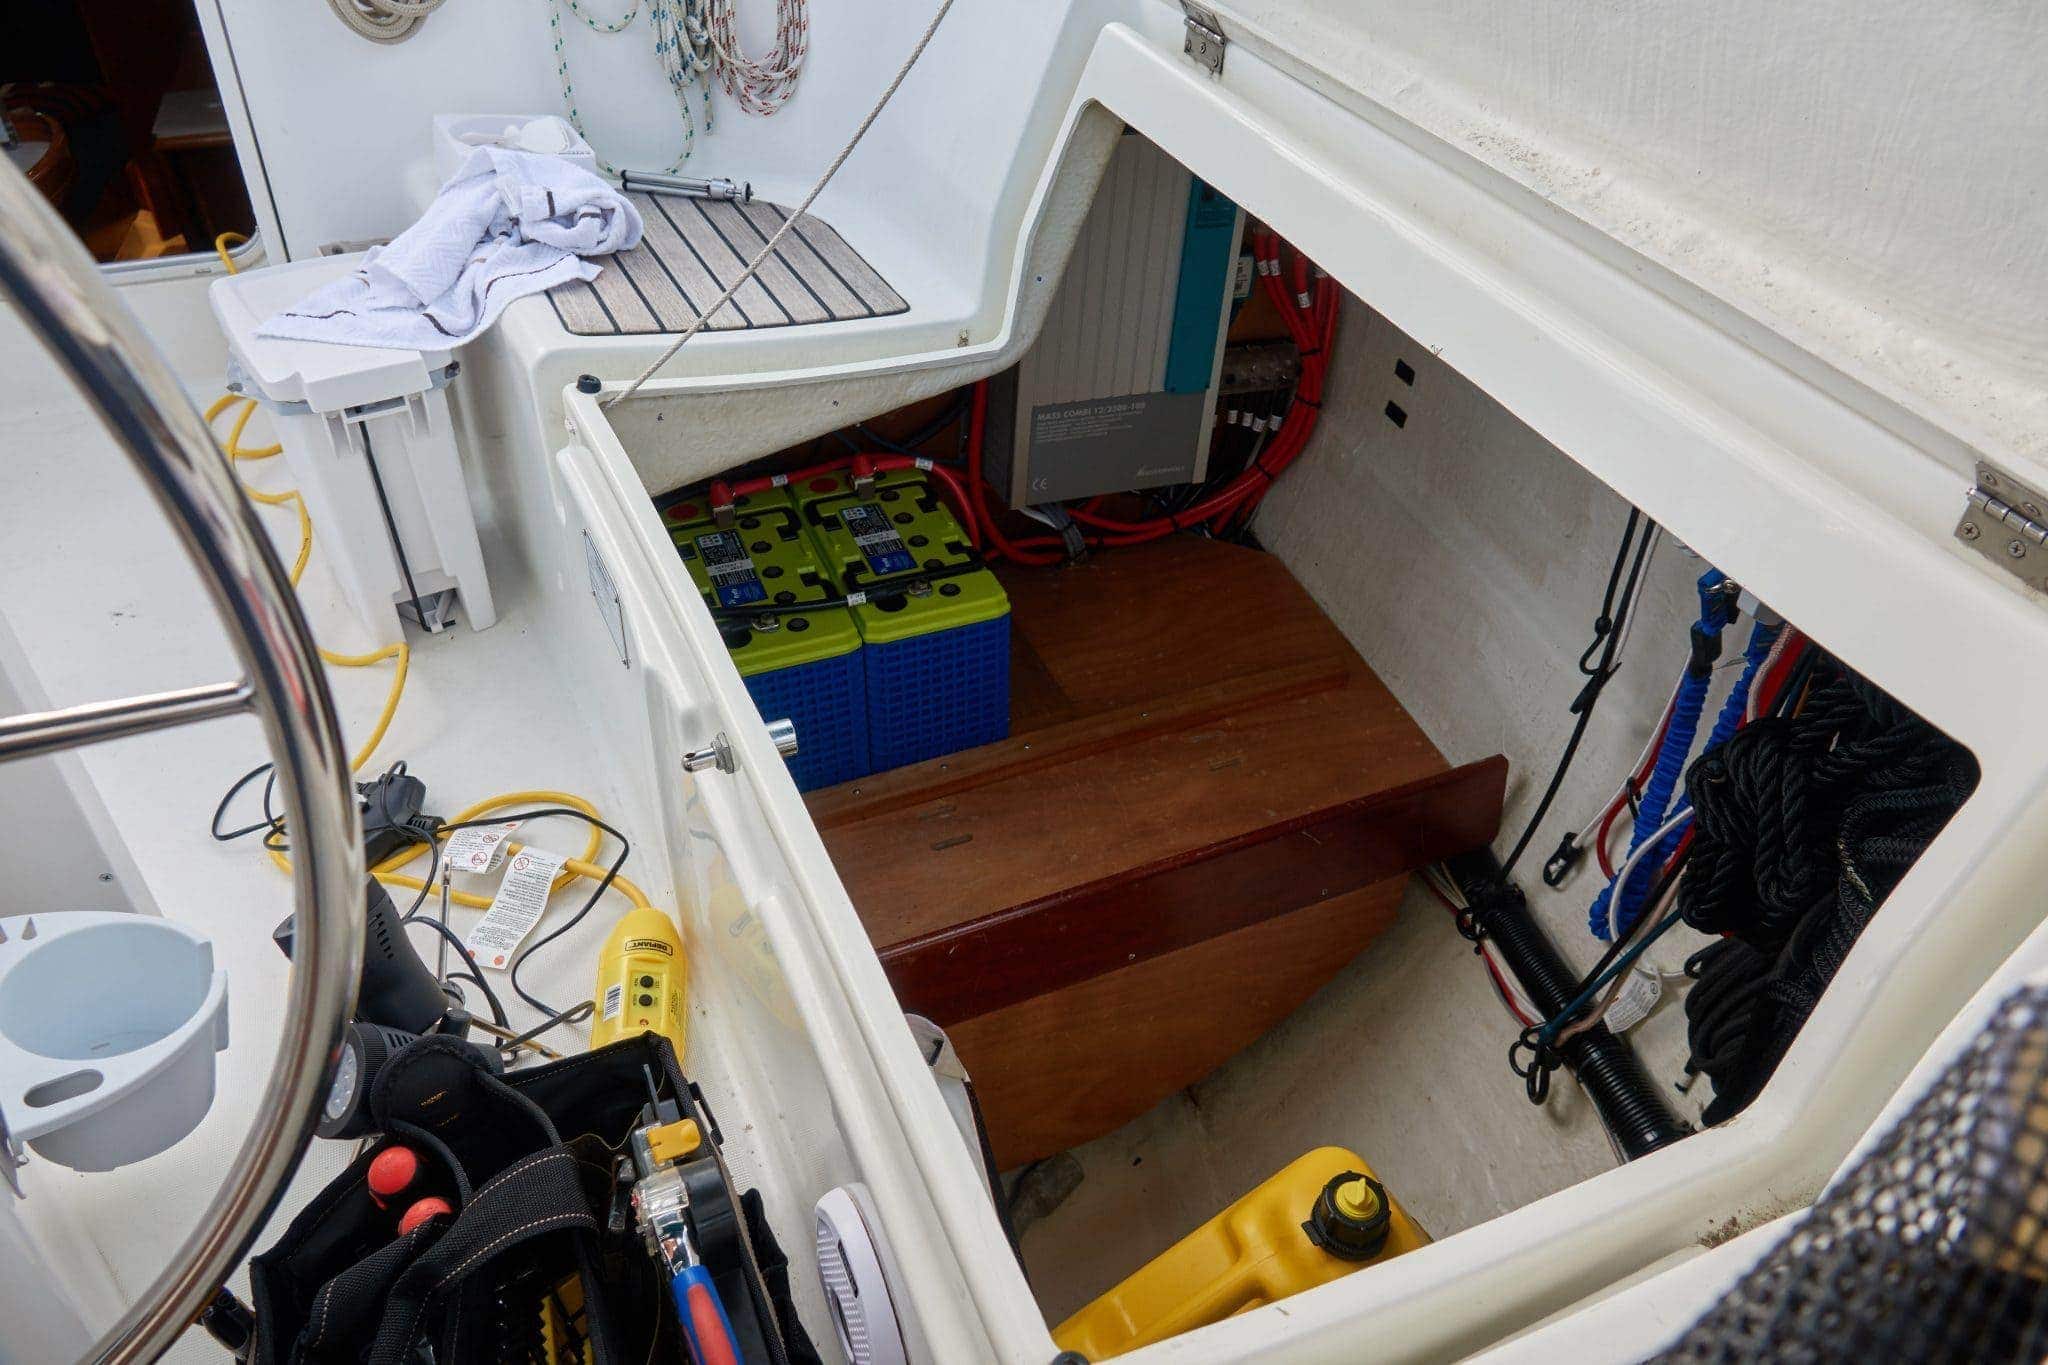
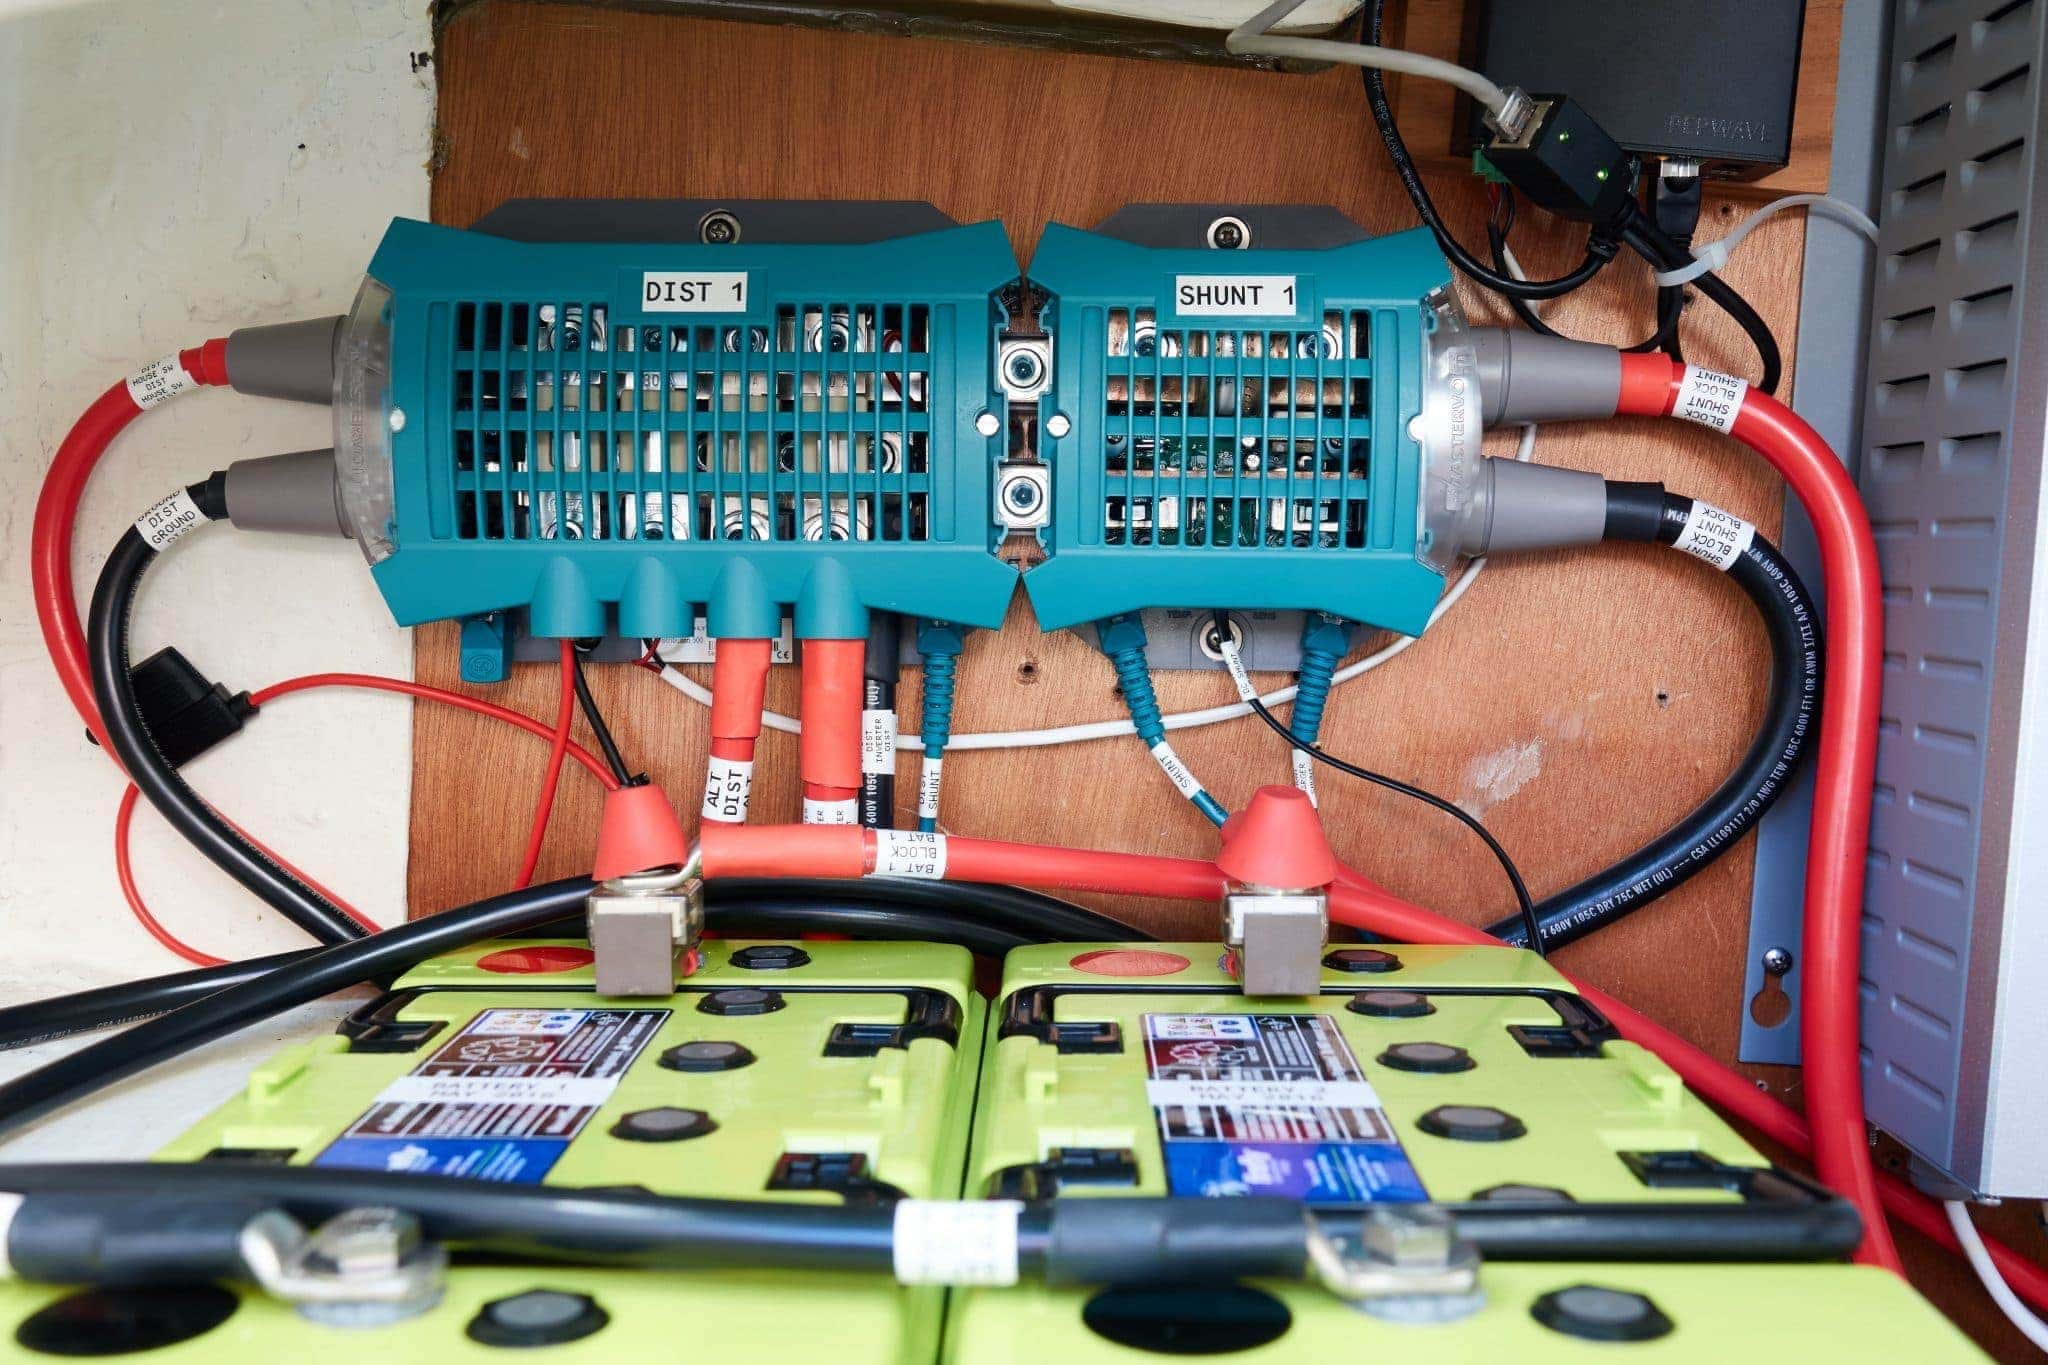
My primary work space for this project was inside the big lazarette in the cockpit and forward. A whole structure was built that contained batteries, charger, and other bits and pieces when the boat was built. Not the best place in the world, but there are few other areas (none that I could find) in the Beneteau 311 design that would allow even a single battery.
The new wires fit very well and there were no mistakes (yay!) in terms of ends or lengths. The double walled ends are far better than the original wiring and feel like they will offer more quality contact. Everywhere there was a connector I used dielectric grease to ensure a good quality connection and prevent corrosion.
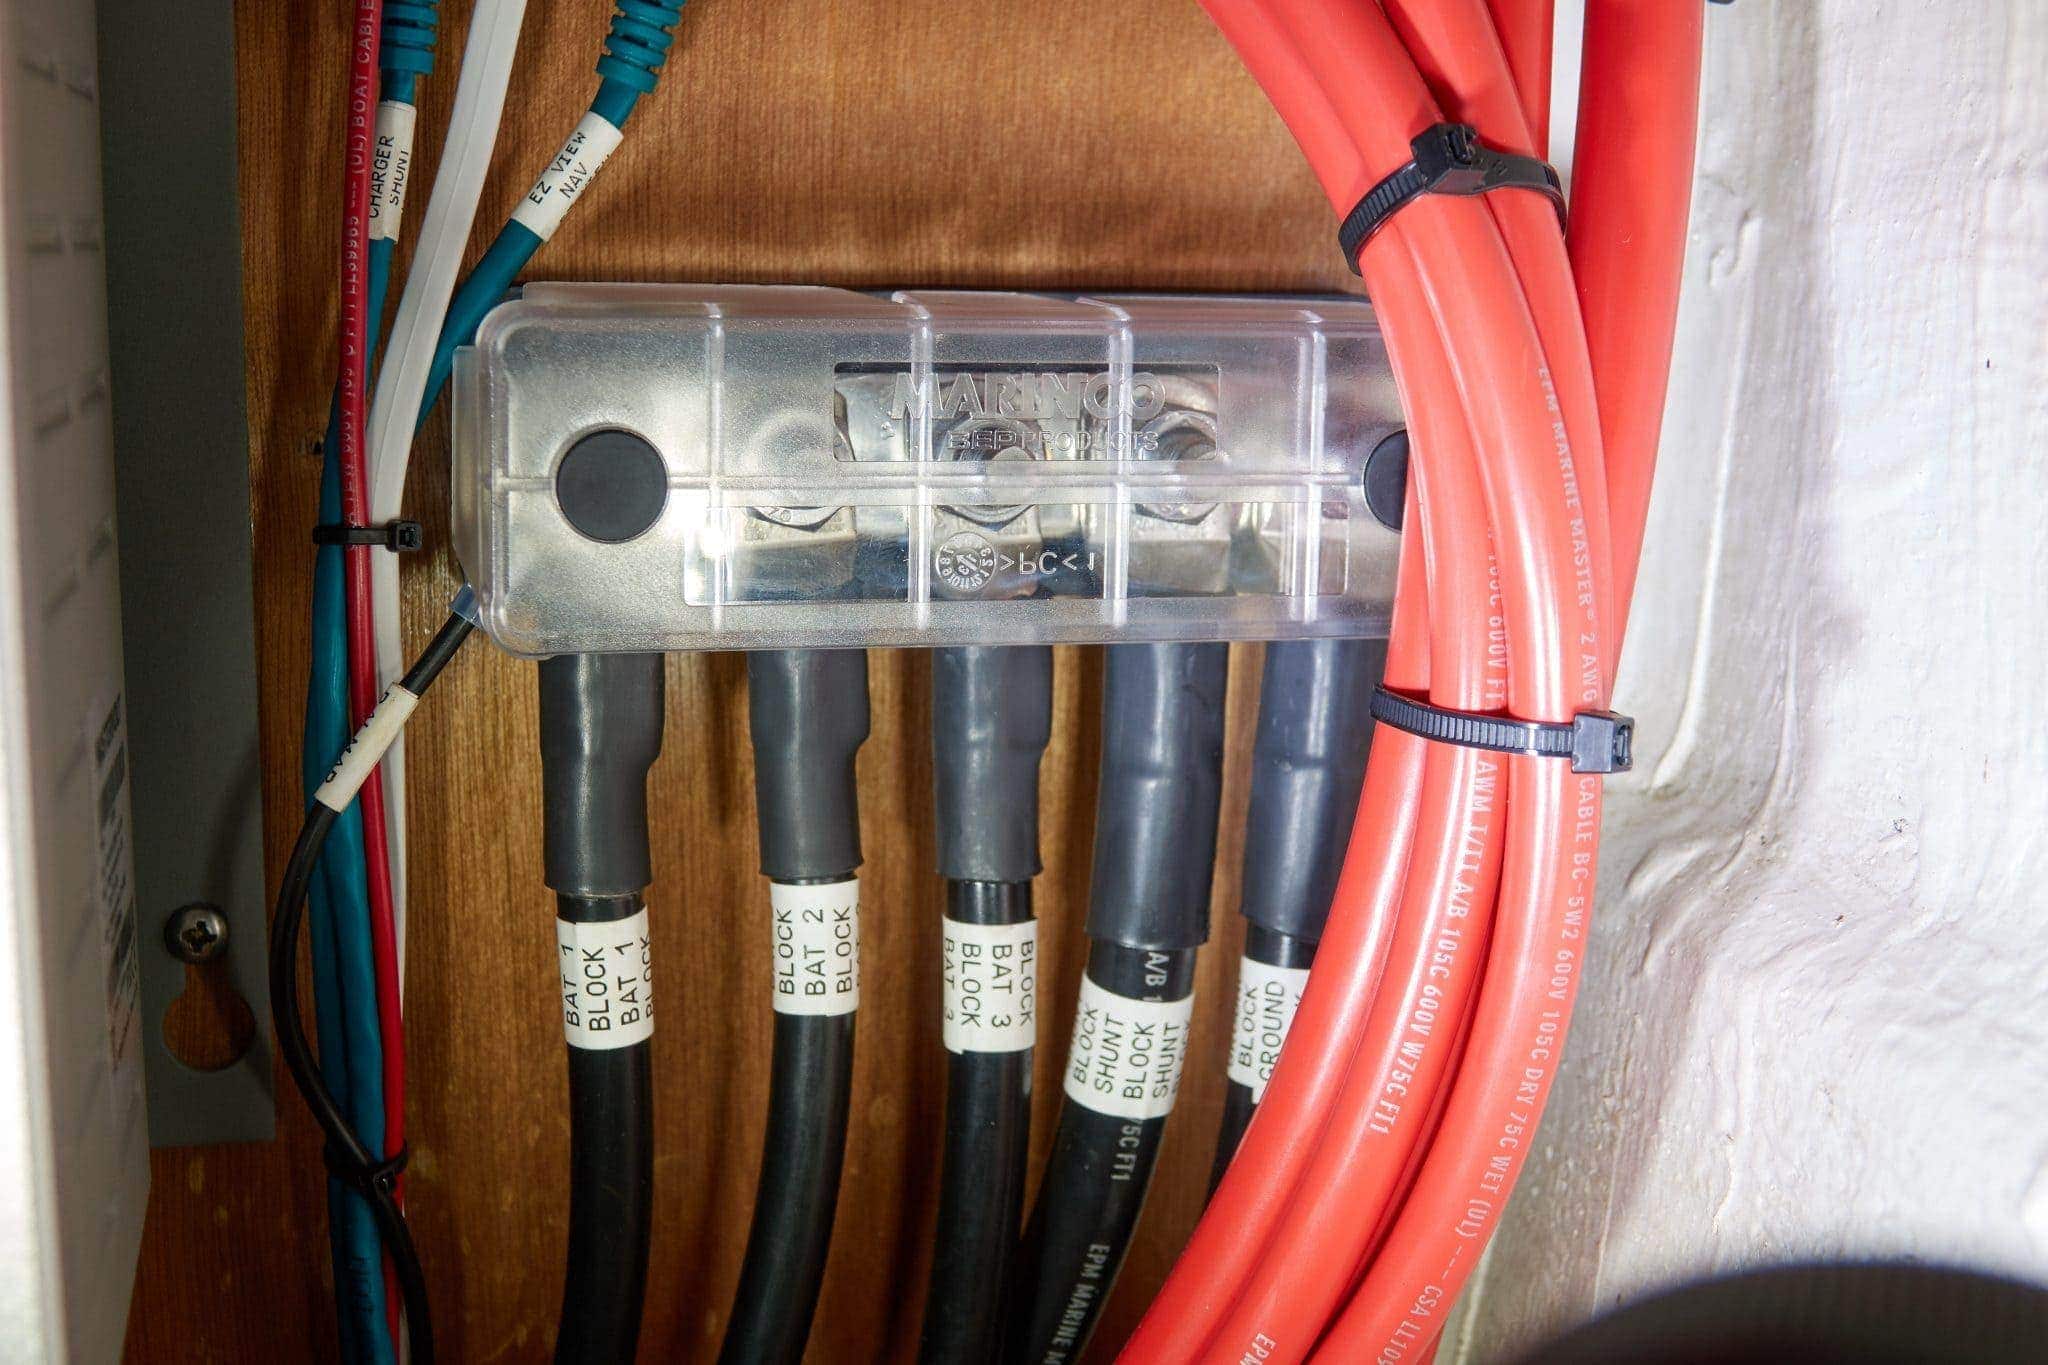
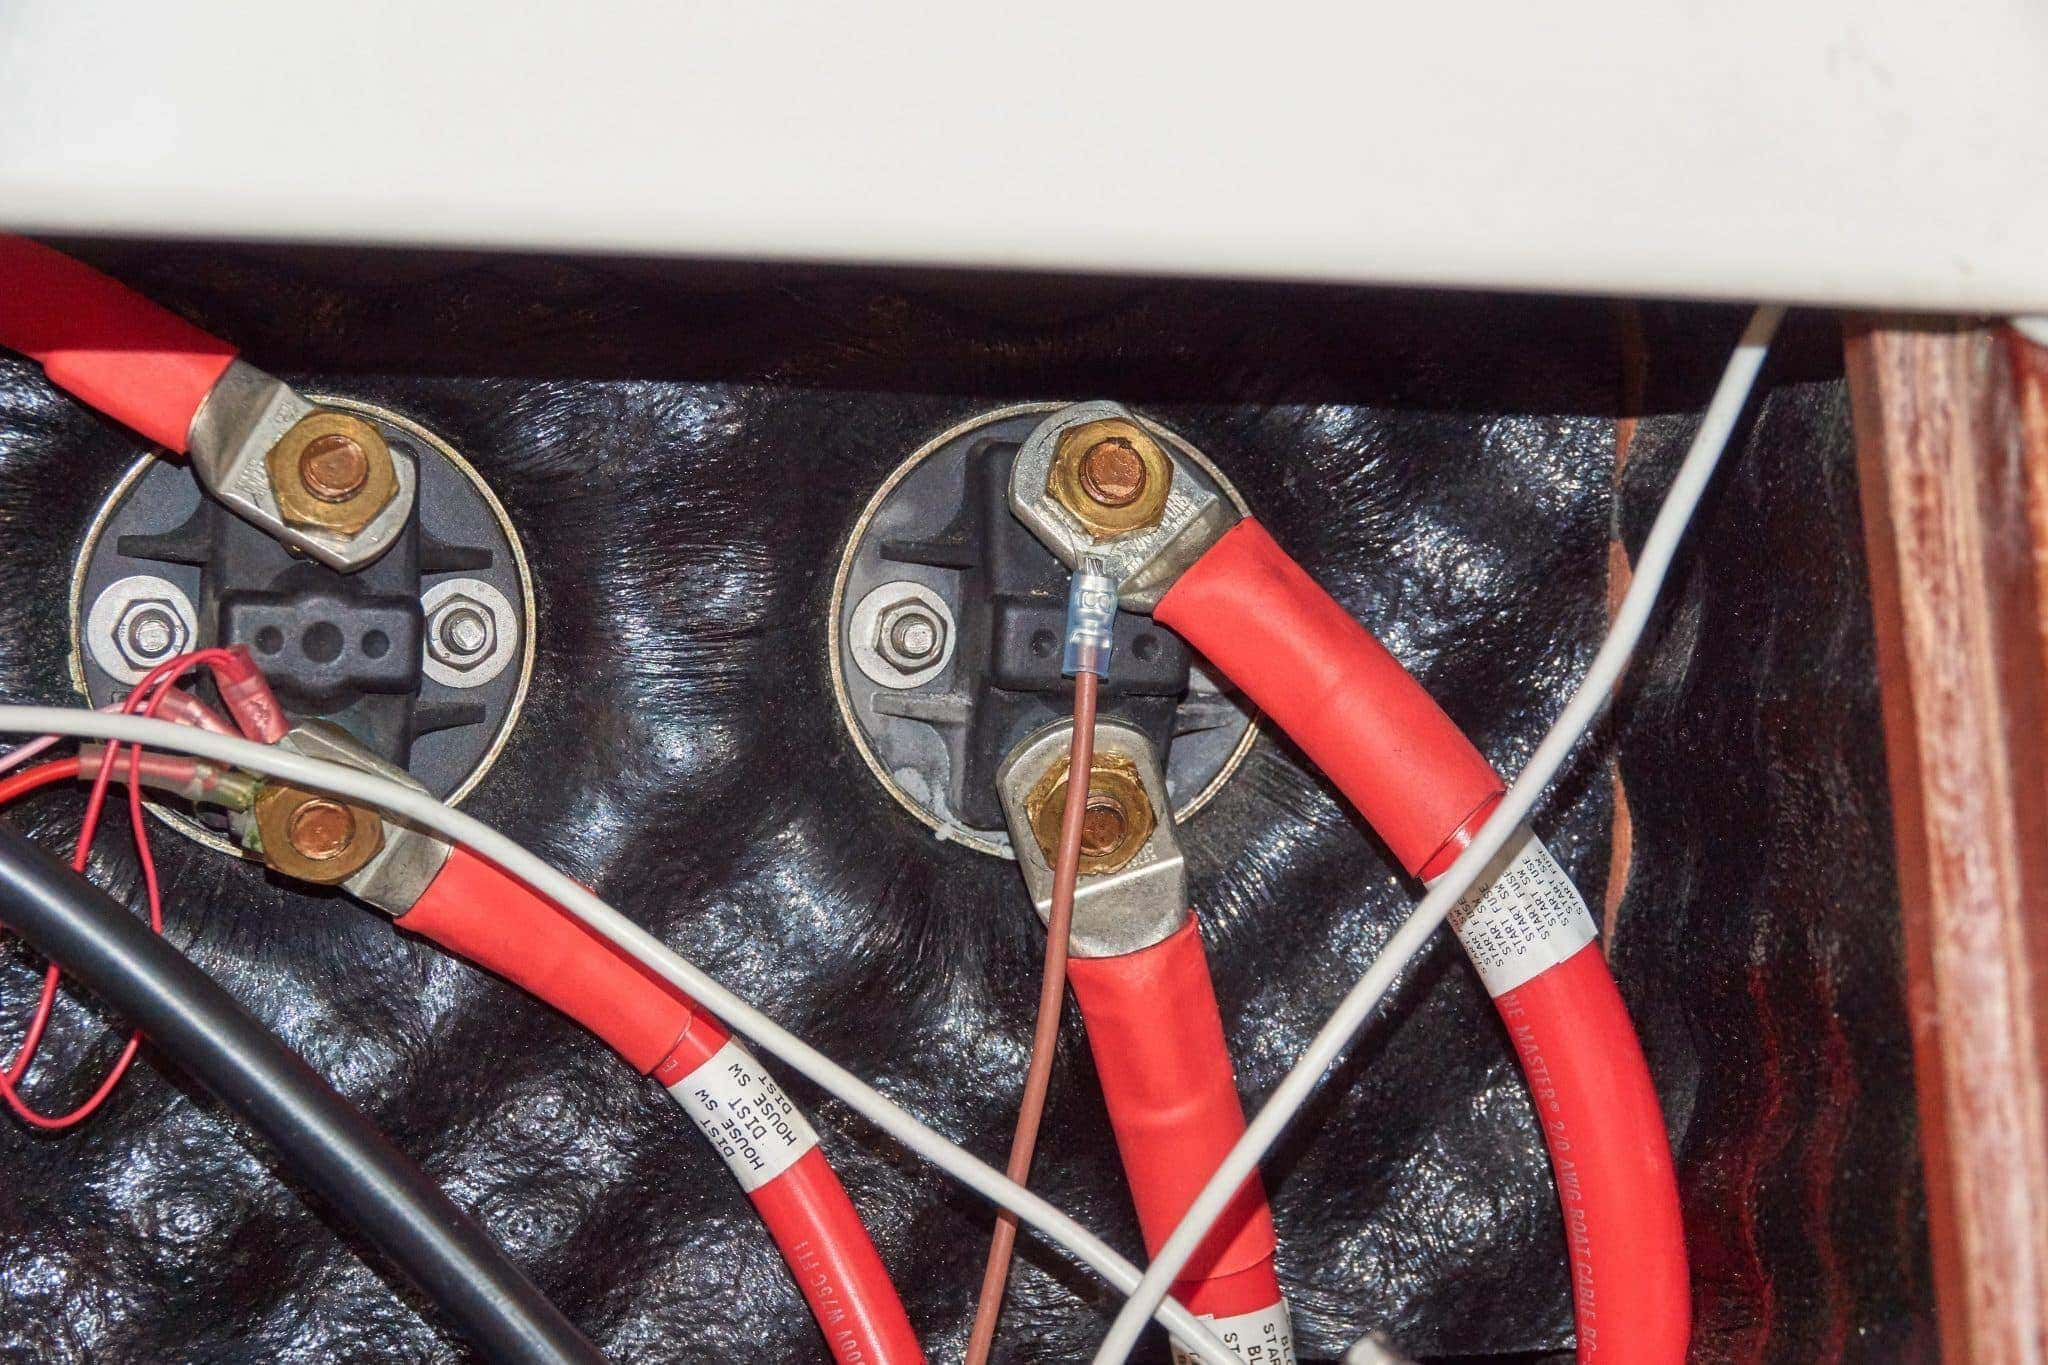
In addition to new wiring, I installed new positive and negative busses. I chose the Marinco 5 stud busbar over other manufacturers because of their compact size. They fit perfectly in my limited space and give me a high quality way of aggregating the big wires all cleanly.
There’s still a lot of clean up work left to do on wire routing and tidying, but everything fits the way it should and works perfectly. Load and crazy situation testing went perfectly – I’m very thorough with proving out my designs and trying corner cases at the dock, not on the water where there is more risk. This included tests such as draining the batteries down to a very low level and attempting to start the engine, dropping one or two batteries out of the bank and using only a single battery to do various high amperage loads, and testing each and every cable path as much as possible.
Wires are so very important to the health of the entire power system, and I’m very glad I took this opportunity to design that into my project. The original wire was still in good condition in most places, but was definitely undersized for what I needed. Several key cables had issues with their ends at spots like the battery switch, which was definitely causing a lot of loss.