On my sailboat Grace, the refrigerator is a key part of being able to enjoy the water and the journey. It’s also one of the biggest power draws, and the contents never seem to be just the right temperature. Those issues are what the Stainless Lobster Fridge Optimizer is out to change.
The Fridge Optimizer is a compact screen and CPU inside a 3D-printed shell that connects to your existing compressor to more efficiently run your refrigerator/freezer. As a result, you end up with your food (and beer!) being kept the right temperature more accurately, the fridge running more optimally, defrosting regularly, and a clear way of seeing the impact it has on your battery bank.
Originally posted on Three Sheets Northwest on March 23, 2016
The System
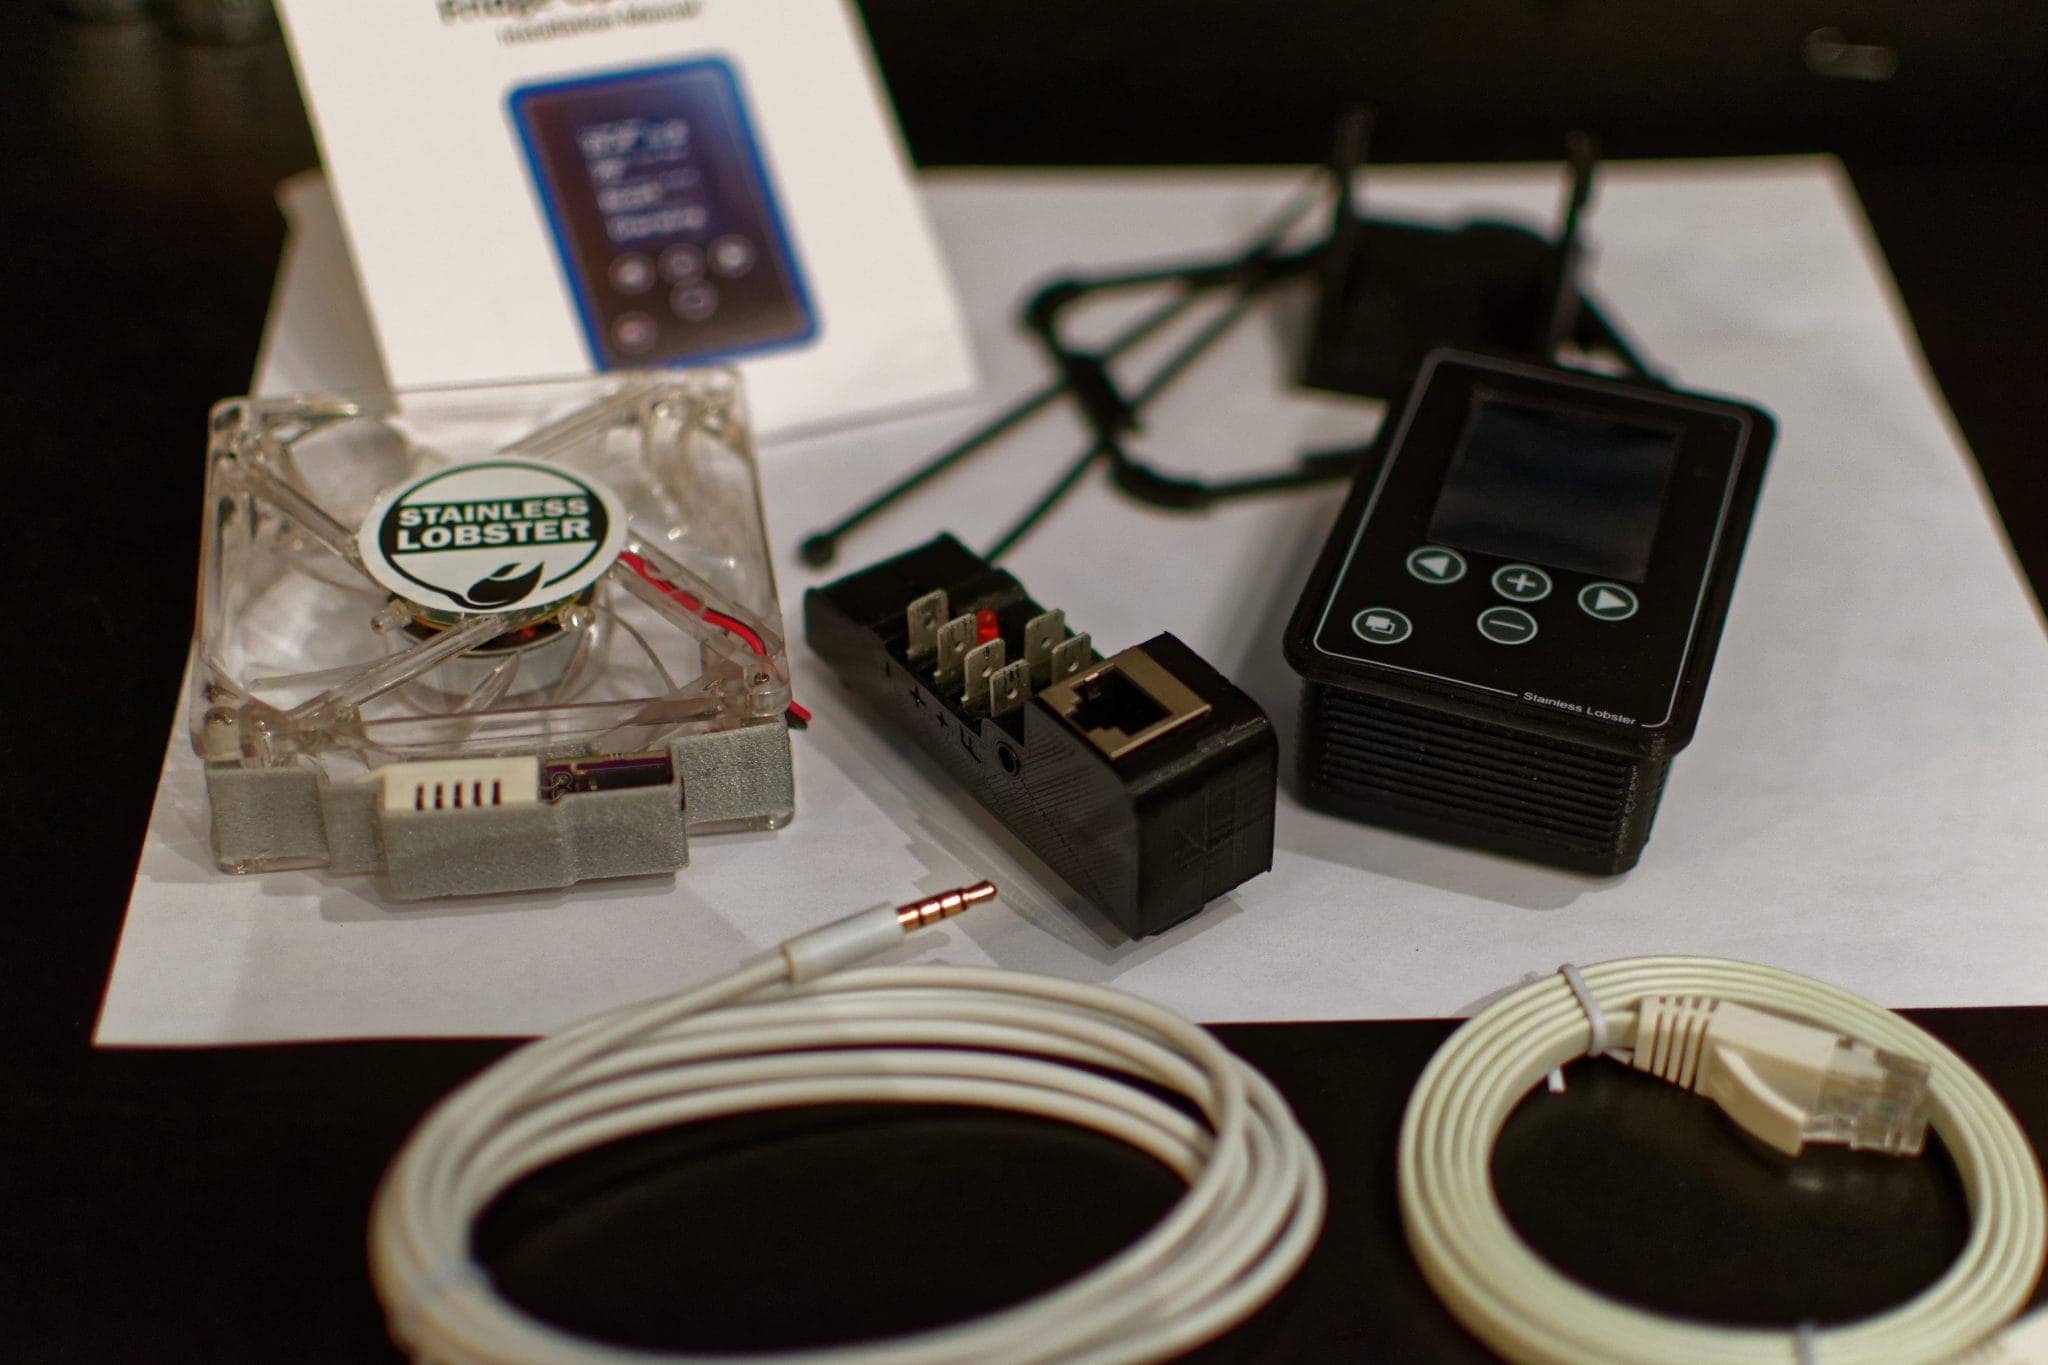
The Fridge Optimizer consists of three main pieces – the control unit, the bit that connects to your compressor (connector block), and the fan/temp sensor that goes into your fridge. There’s also a cable for the fan/temp sensor to connect to the compressor unit, and an Ethernet cable to connect the compressor unit to the control unit. There are very clear instructions included with the packaging, and some basic information online as well.
One thing that is important to check before purchasing is whether the system is compatible with your compressor. From Stainless Lobster’s site:
Fridge Optimizer kit for with a connector for the DC only Secop/Danfoss based fridges and freezers. These compressor controllers have the model numbers:
101N0210, 101N0320, 101N0400, 101N0410, 010-1153
My compressor was a 101N0200 model system, and after a few emails with Annika and Arvid @ SL, they confirmed that my model would still work! They also have an AC model too.
Fan and Temp Sensor
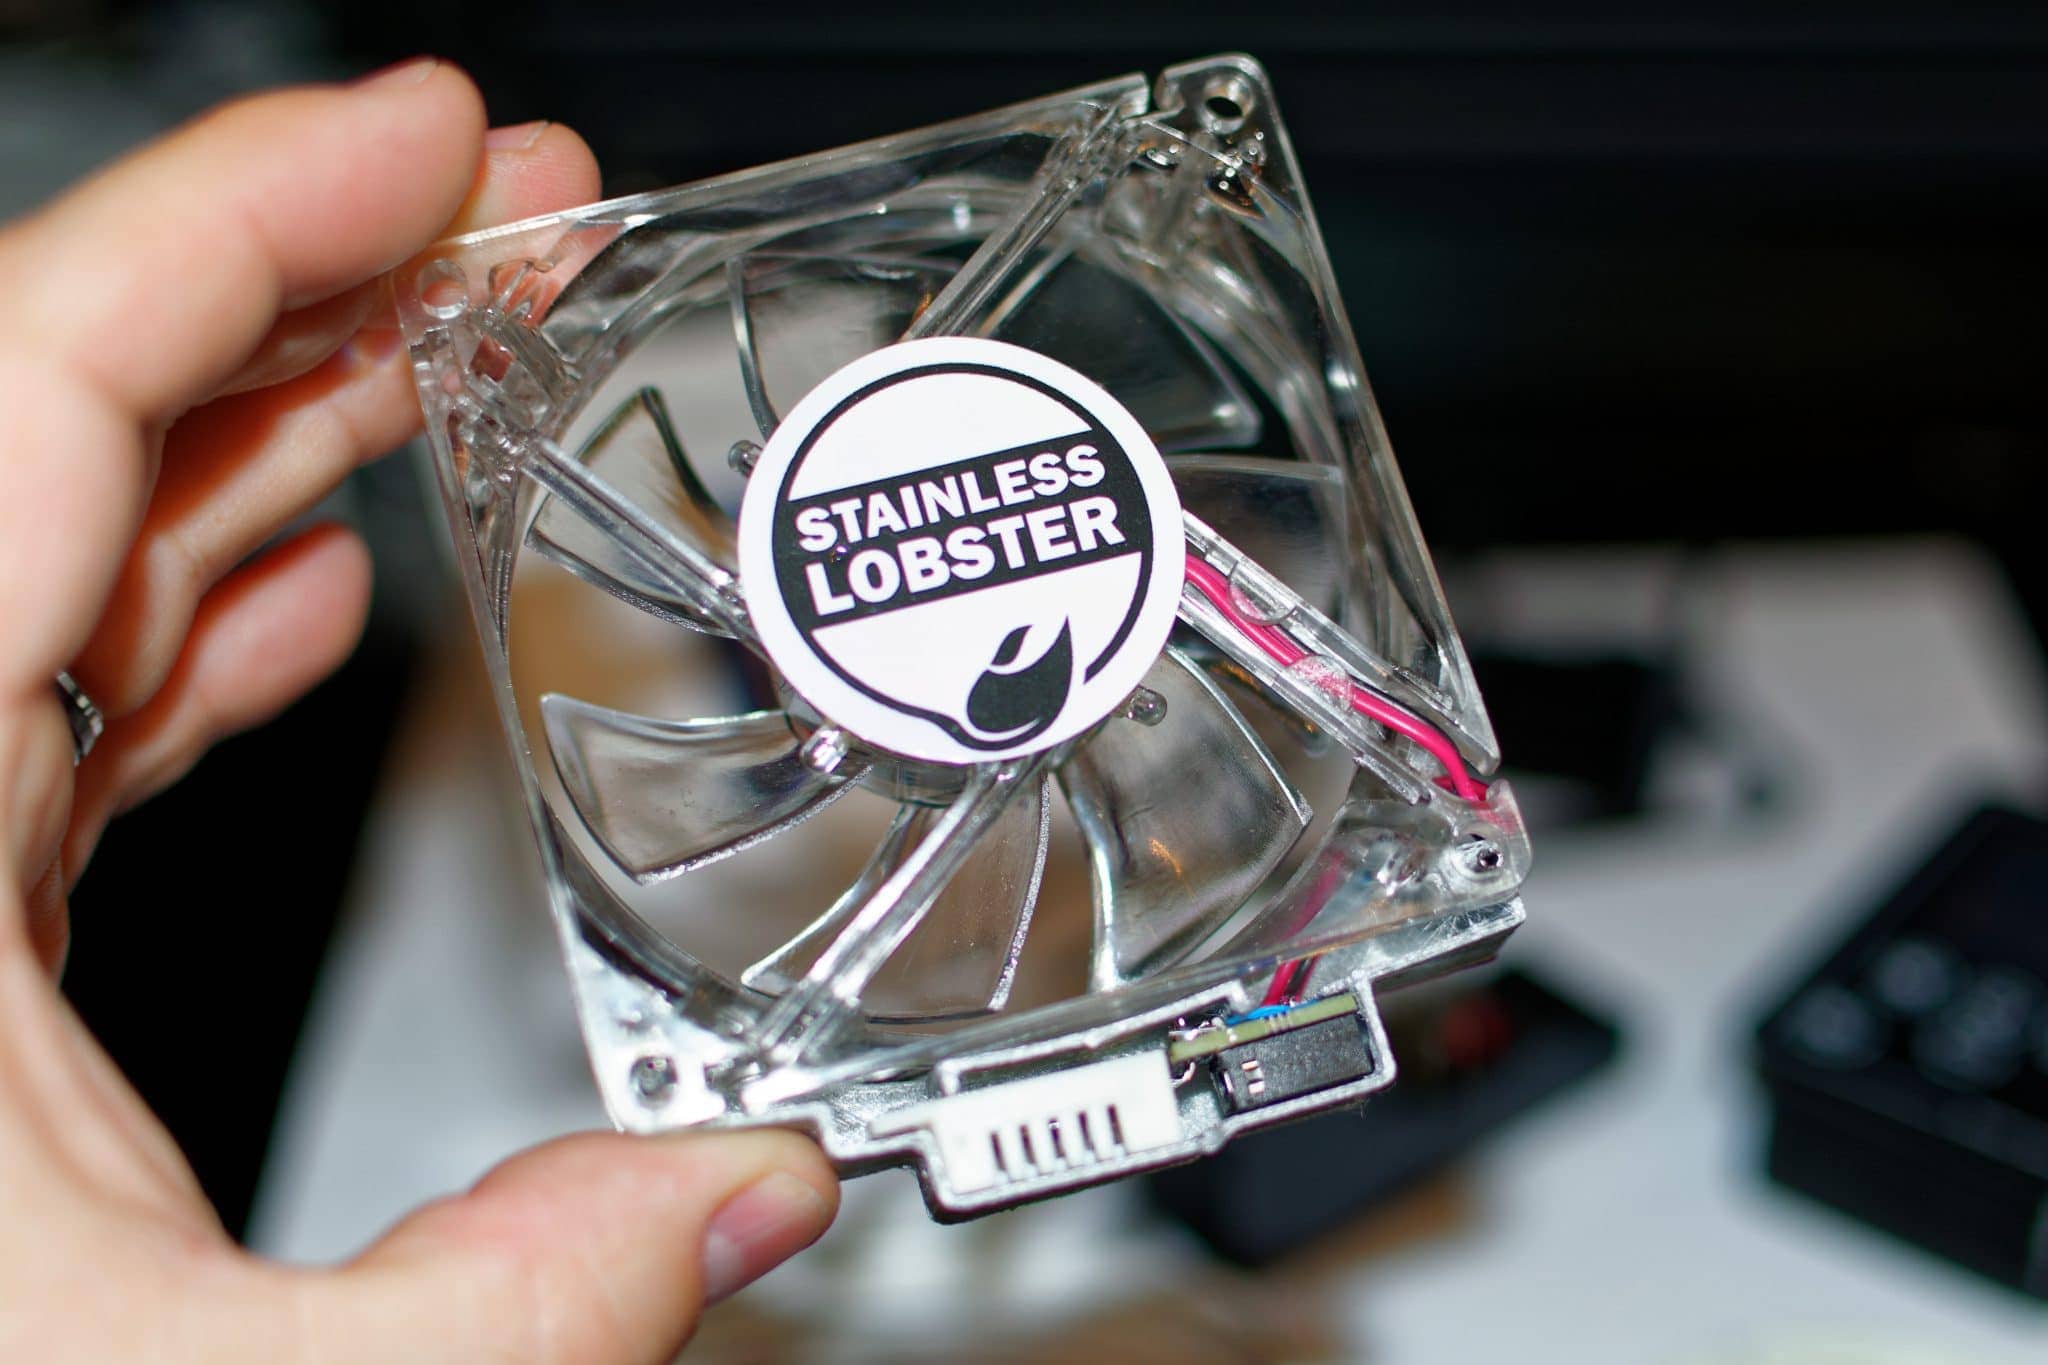
This part of the unit goes into your fridge and monitors both the temperature and the humidity at a very accurate level — apparently 0.01 degrees of accuracy. In addition, they’ve included a 4″ fan with a cool blue LED light that is on while the fan is in operation.
The fact that it’s monitoring both temp and humidity gives the system a huge advantage in controling the state of your fridge. First, it’s not an old-school temp sensor – it’s digital and extremely accurate. Second, the humidity sensor provides great feedback about when you should defrost, absolutely key in keeping it running in optimal condition. Combine the inside humidity with outside humidity from the control unit, and you’re really running things efficiently.
Add in the fan, which aids in air distribution dramatically in my case, as well as helps with defrosting.
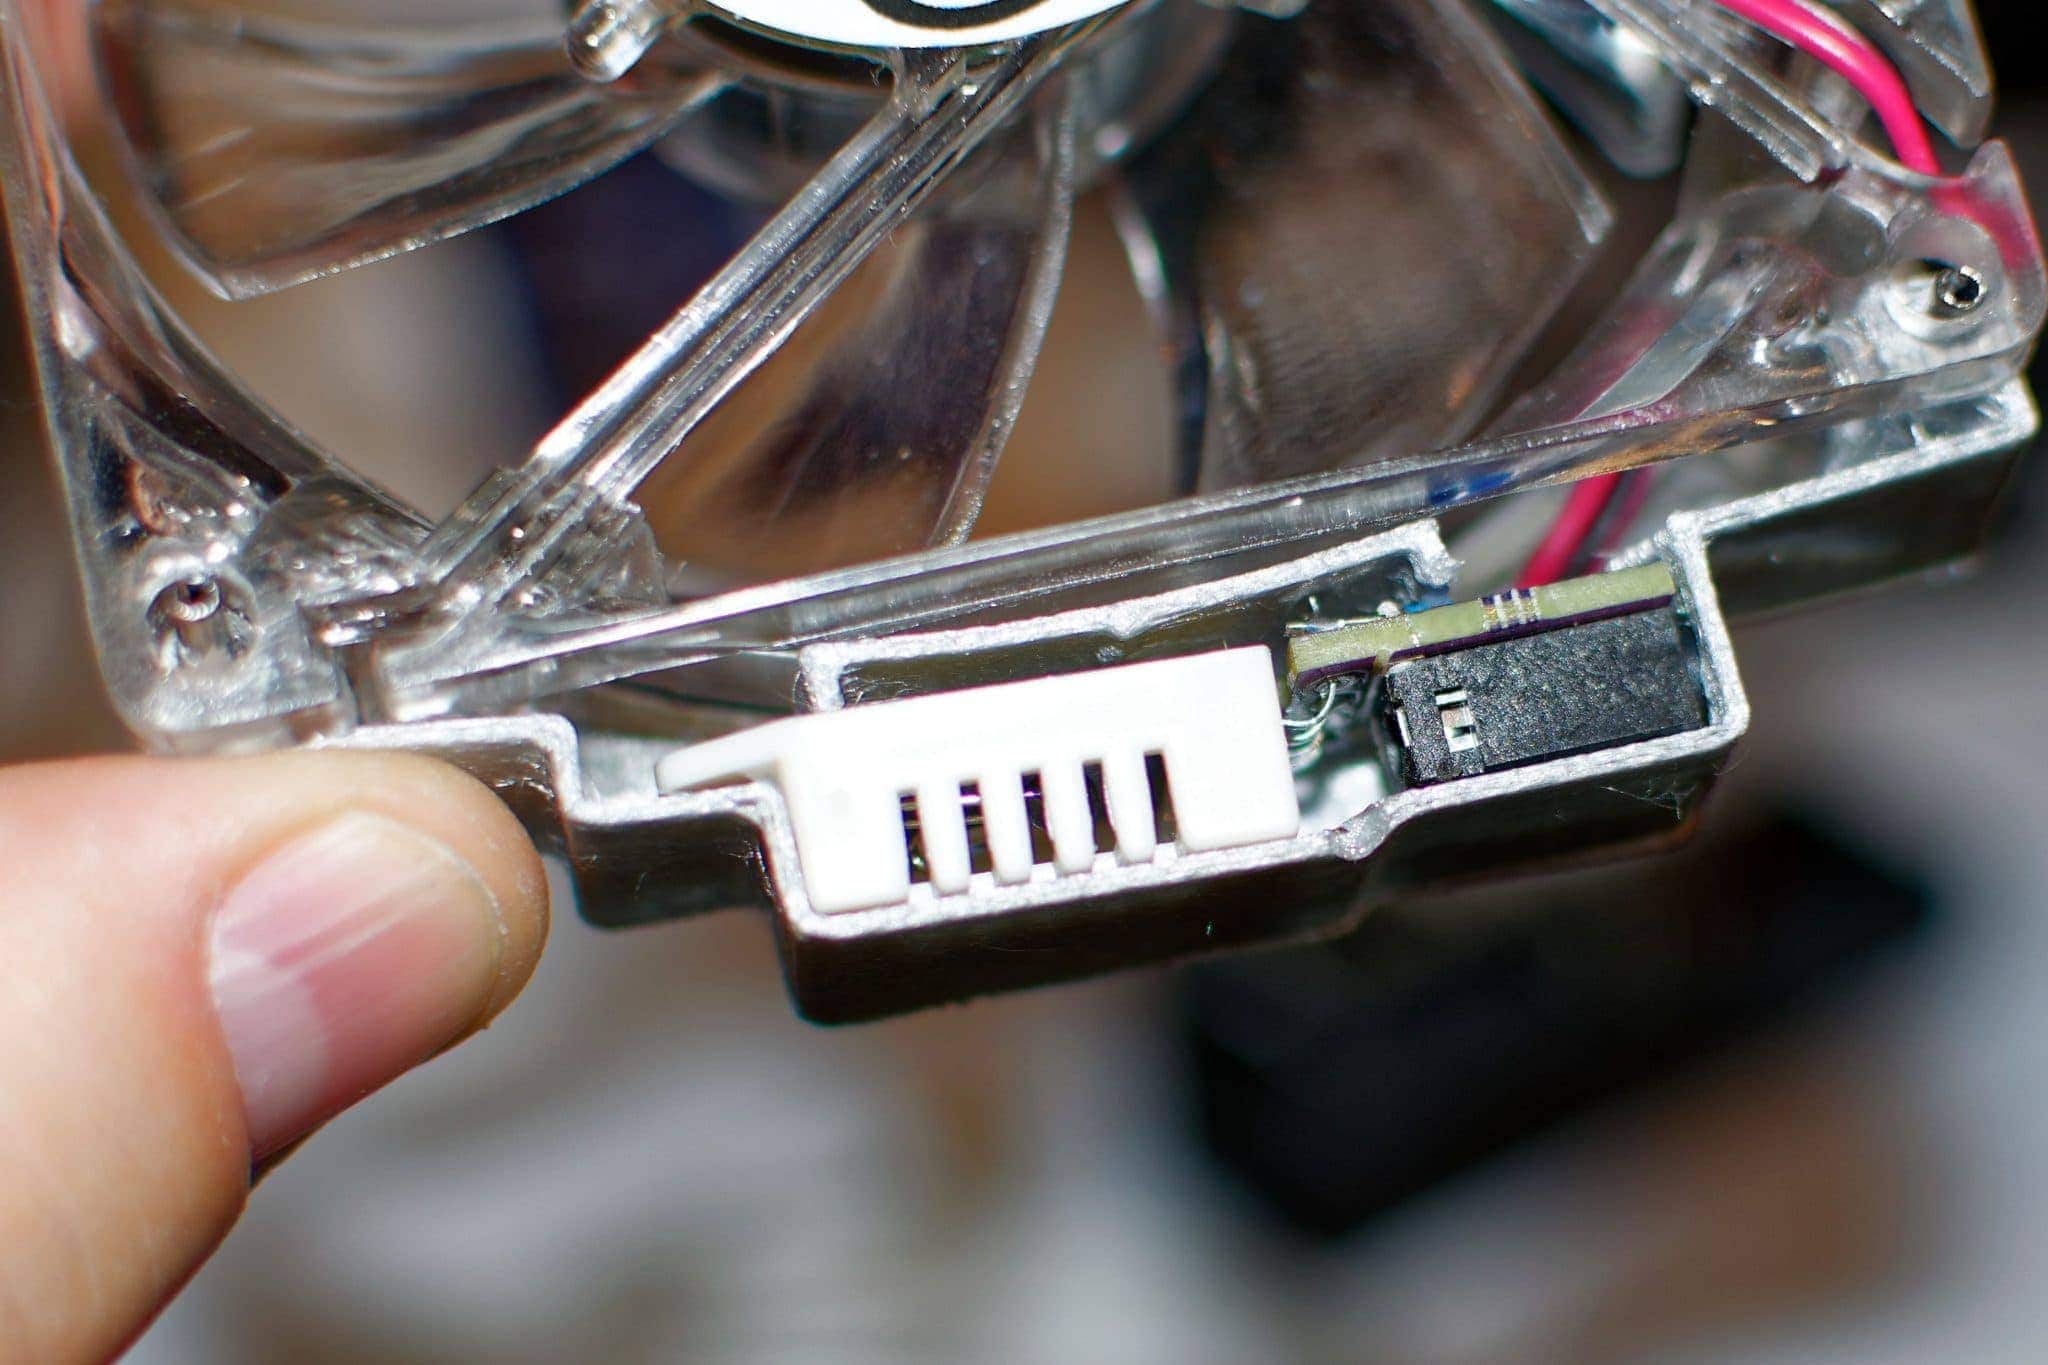
This piece of the system is key in gathering the right data about the health of your fridge, but you need something smart to use the data…
Control Unit
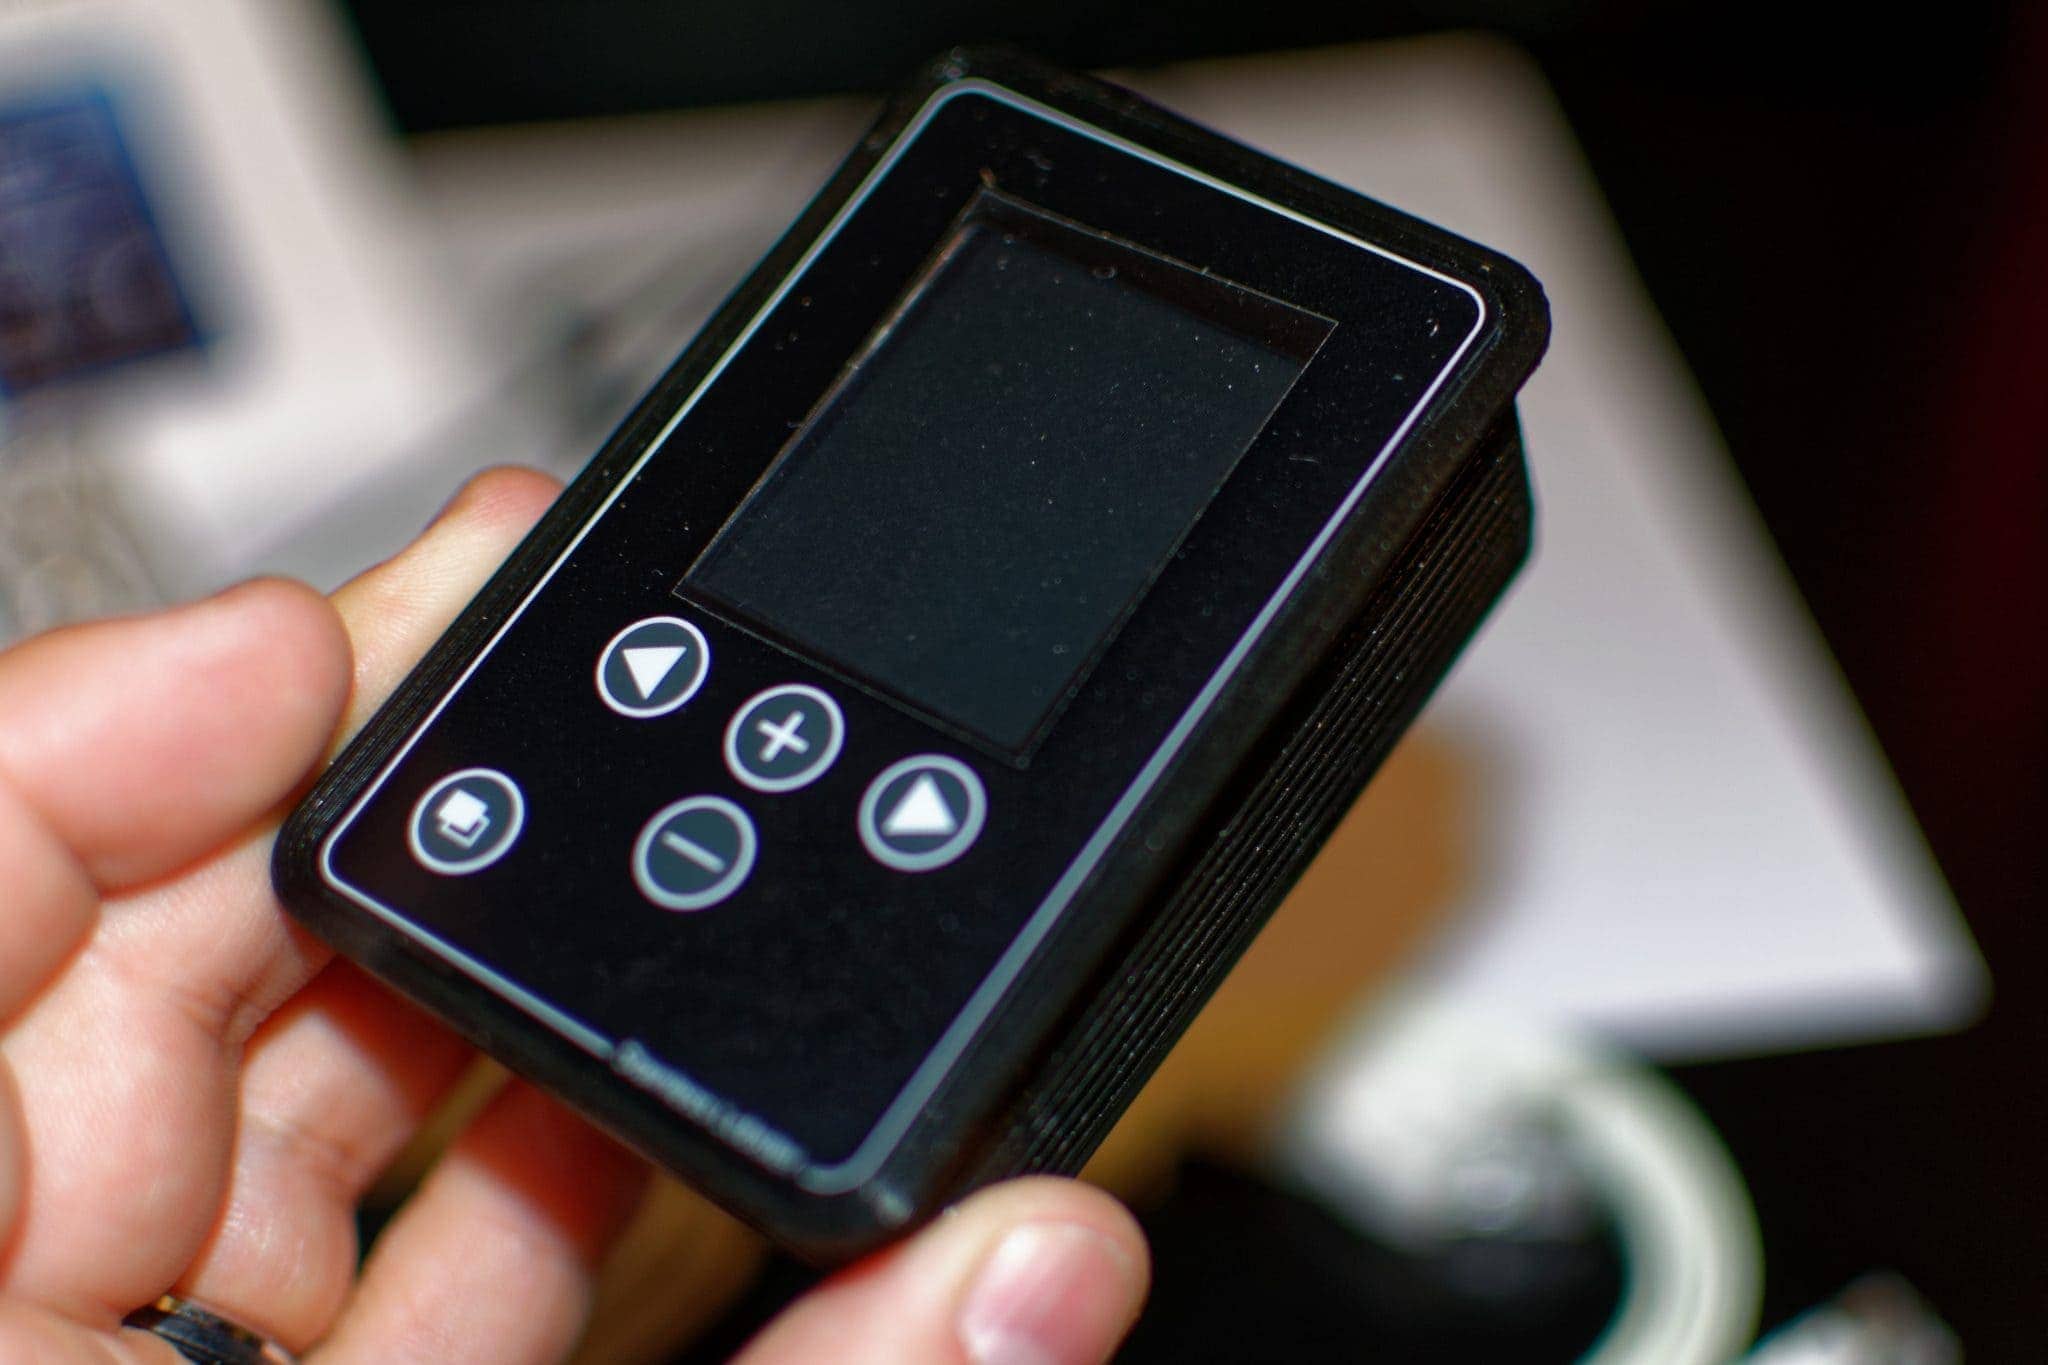
The 3D-printed control unit is a thing of beauty. I love 3D printing in general, and am happy to start seeing mainstream products using this more. It allows for quicker time to market as well as constant revisions and innovation. The unit itself has a bright front display with control buttons for various settings, screens, and menus. There’s an Ethernet port on the back where the system gets its data and power, and a USB port for updates.
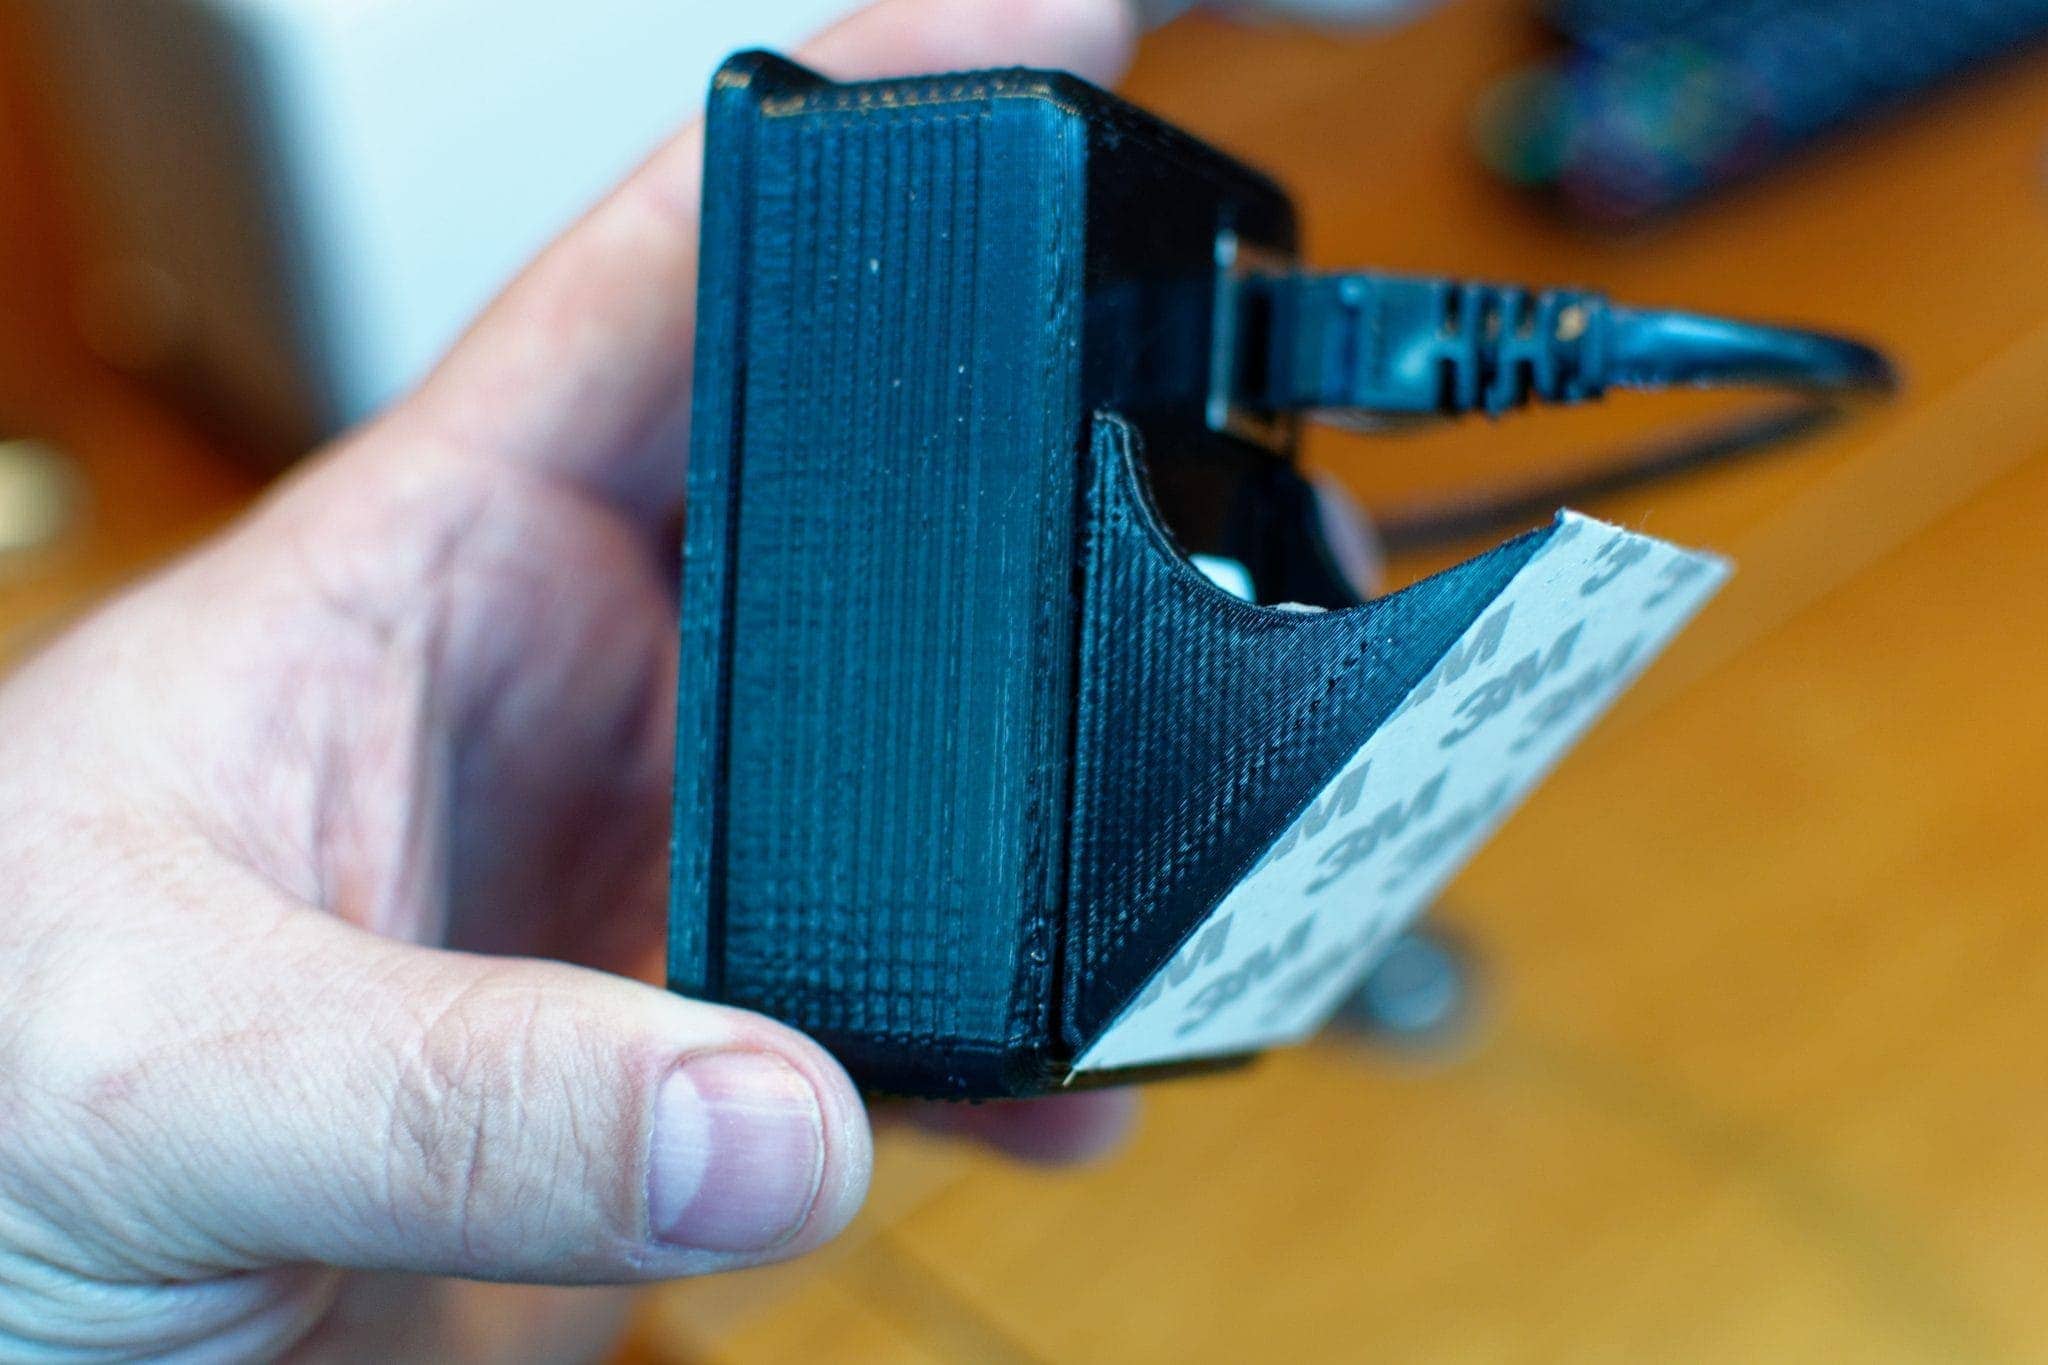
The unit can be flush mounted, or connect on an included stand that has 3M sticky tape to keep it in place. I have not fully mounted mine yet, pending another project I’m working on to replace my entire nav station panel.
Connector Block
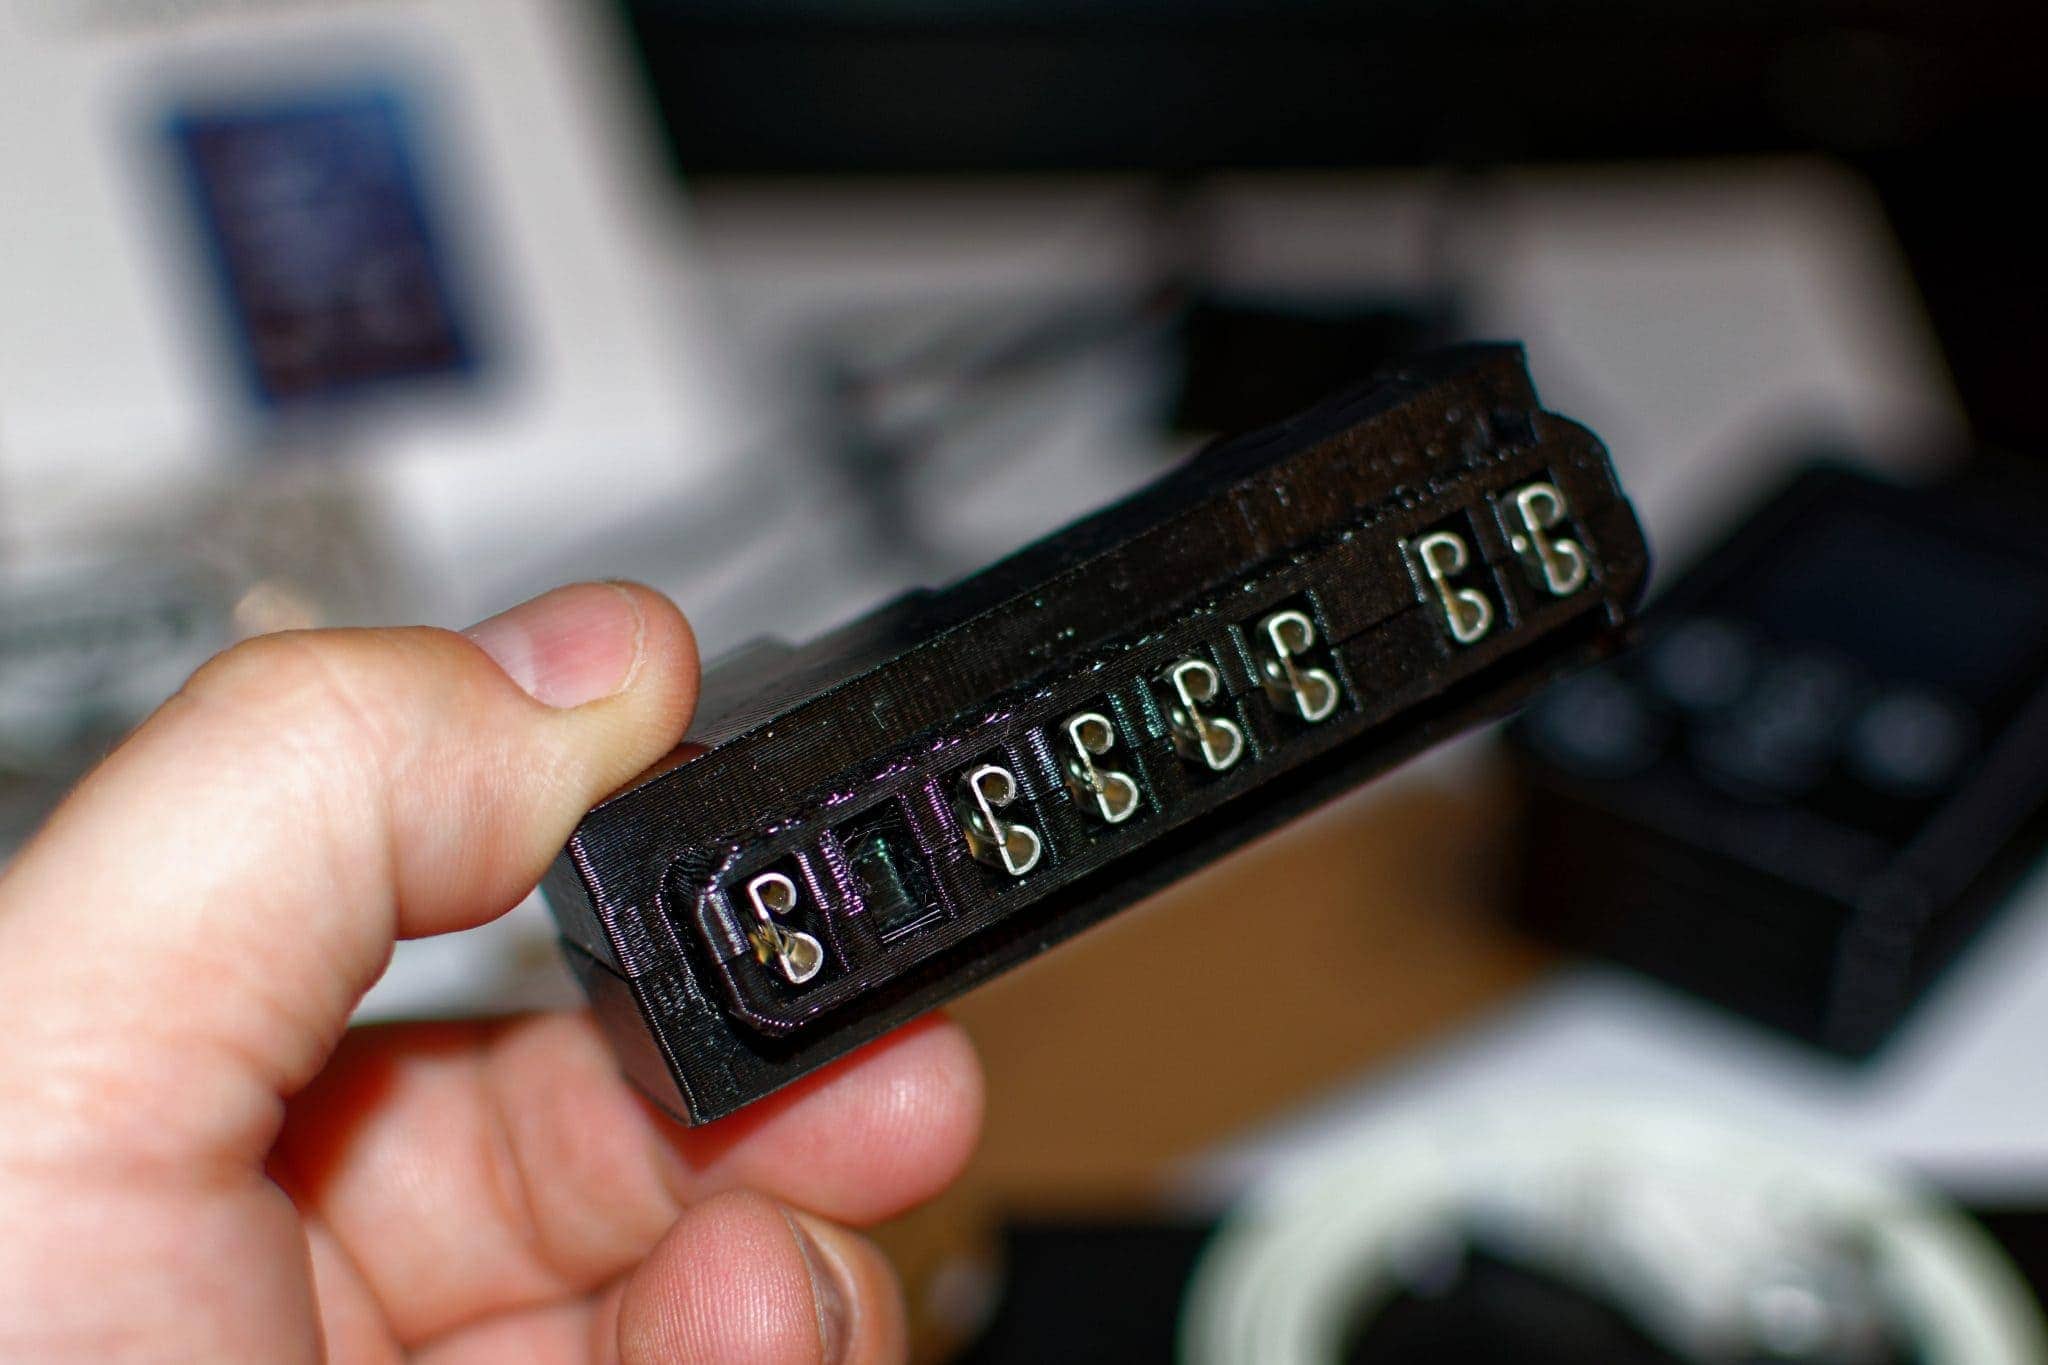
The connector block connects to your compressor, fridge optimizer temp/fan sensor, and the control unit itself. The backside of the connector block is built to snap directly into your existing compressor wiring harness. You’ll have to remove your existing wires to do this — I took the opportunity to label them for reassembly later.
This is where the 3D printing will really help Stainless Lobster in the future. If they want to support a new compressor type, they can design a new block quickly, and spit out new blocks on demand based on orders. I have to imagine the chips and tech inside would not change that much (if at all) depending on the compressor, only the control unit software.
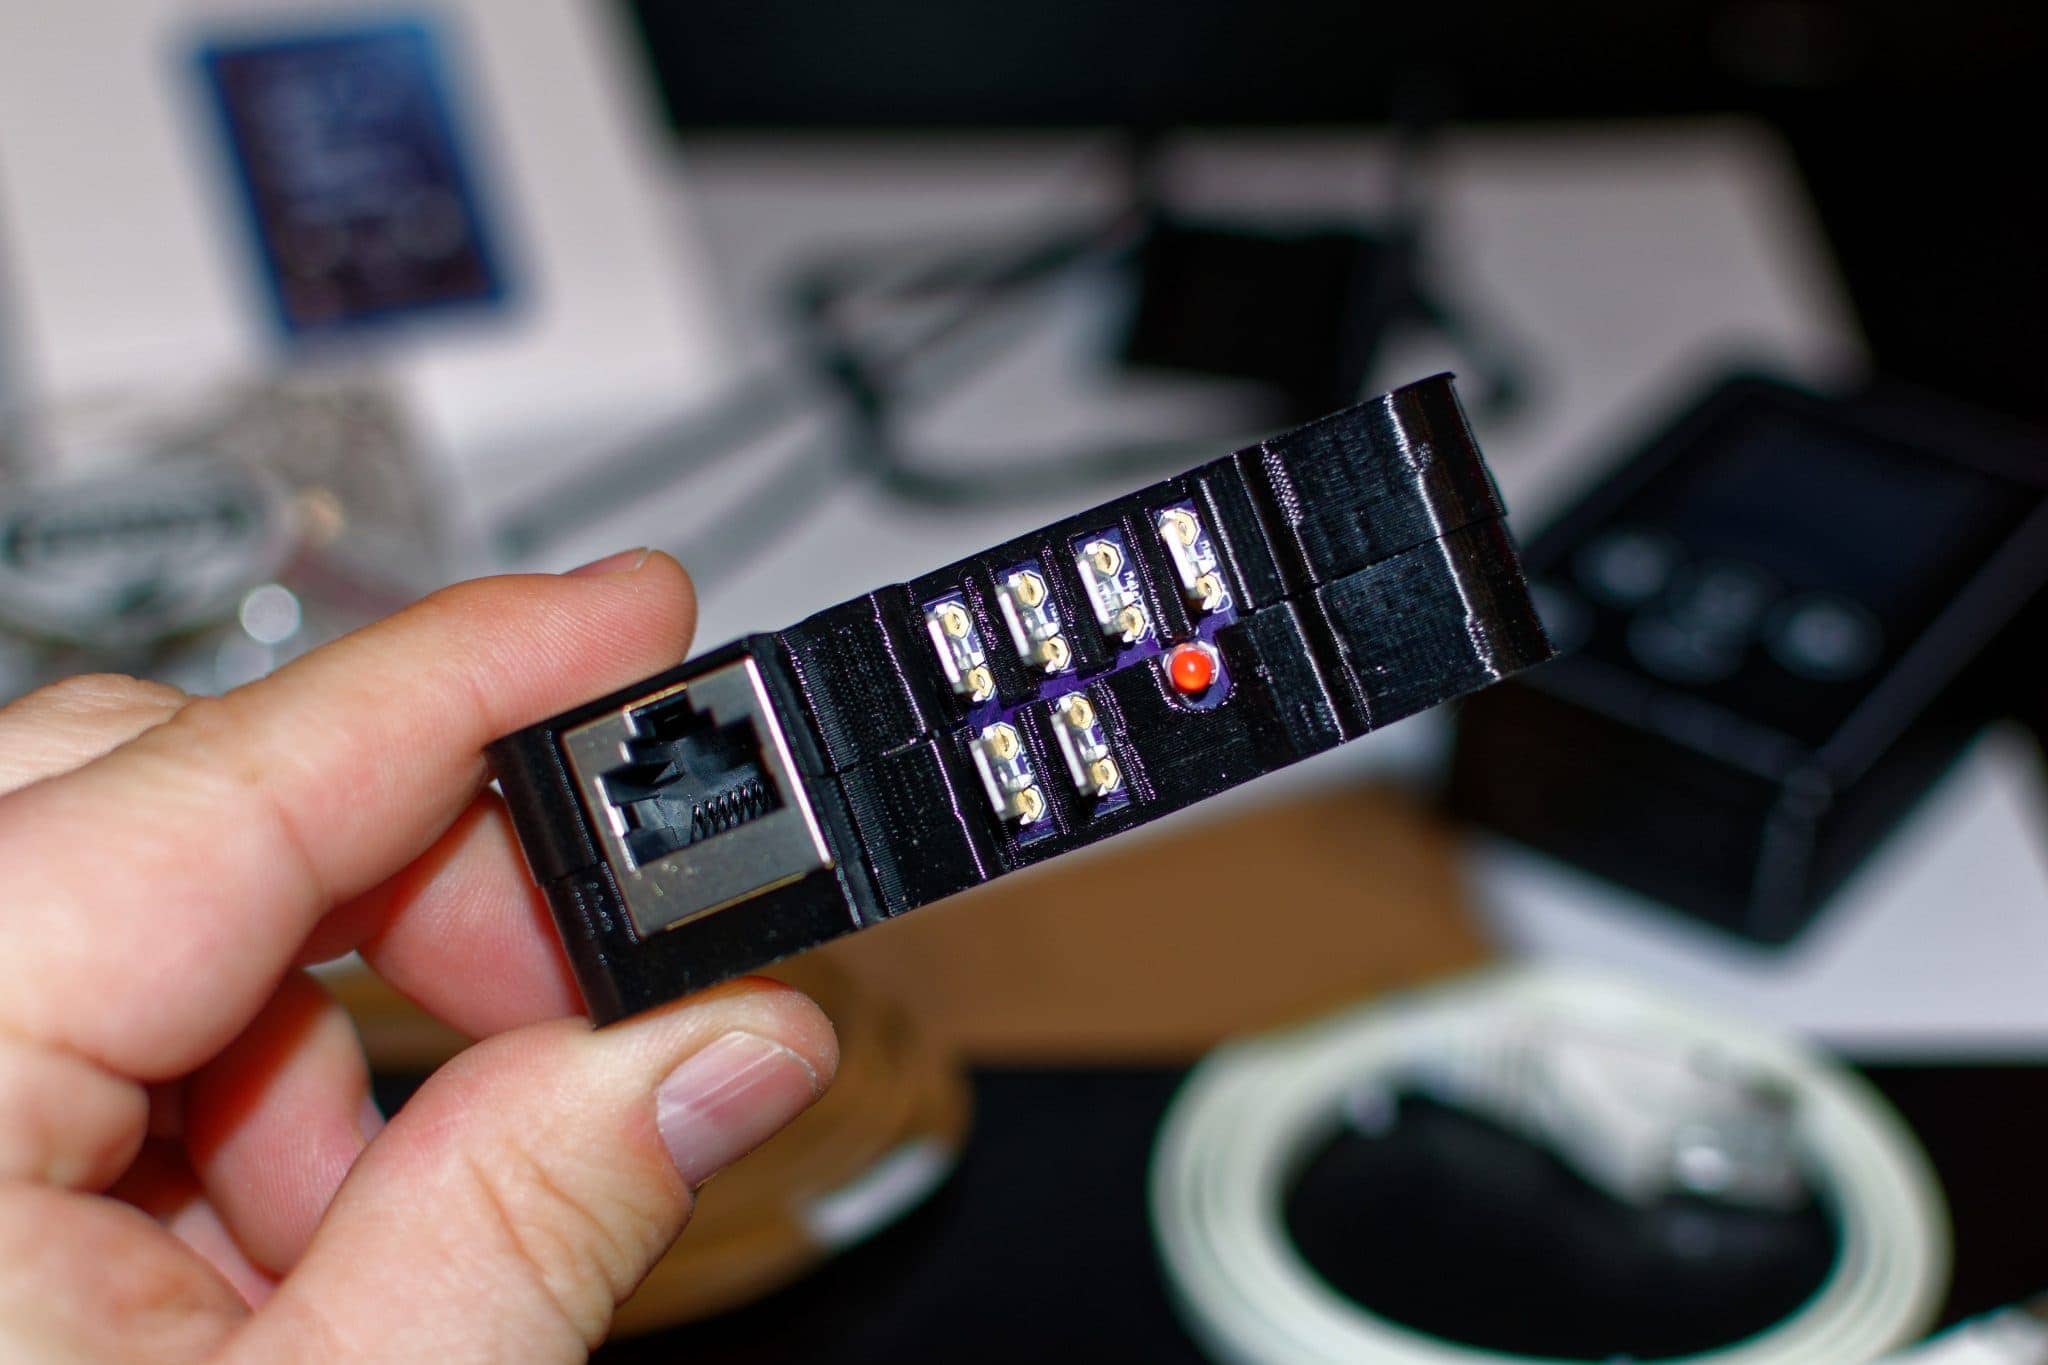
On the front of the connector block are the pins for your wiring to reconnect to, a status LED, and the Ethernet port to connect to the control unit. On the side is the input for the temp/fan sensor cable.
Installation
Installation took me about 2 hours, but I had been planning for a while, and thought I’d traced out where I wanted everything. First, I installed the connector block on the compressor, which was very easy, then reconnected the compressor wiring, connected the Ethernet cable and temp/fan sensor wire and ran them to their destinations. I ended up using my own Ethernet cable, which was longer and colored black to match the unit.
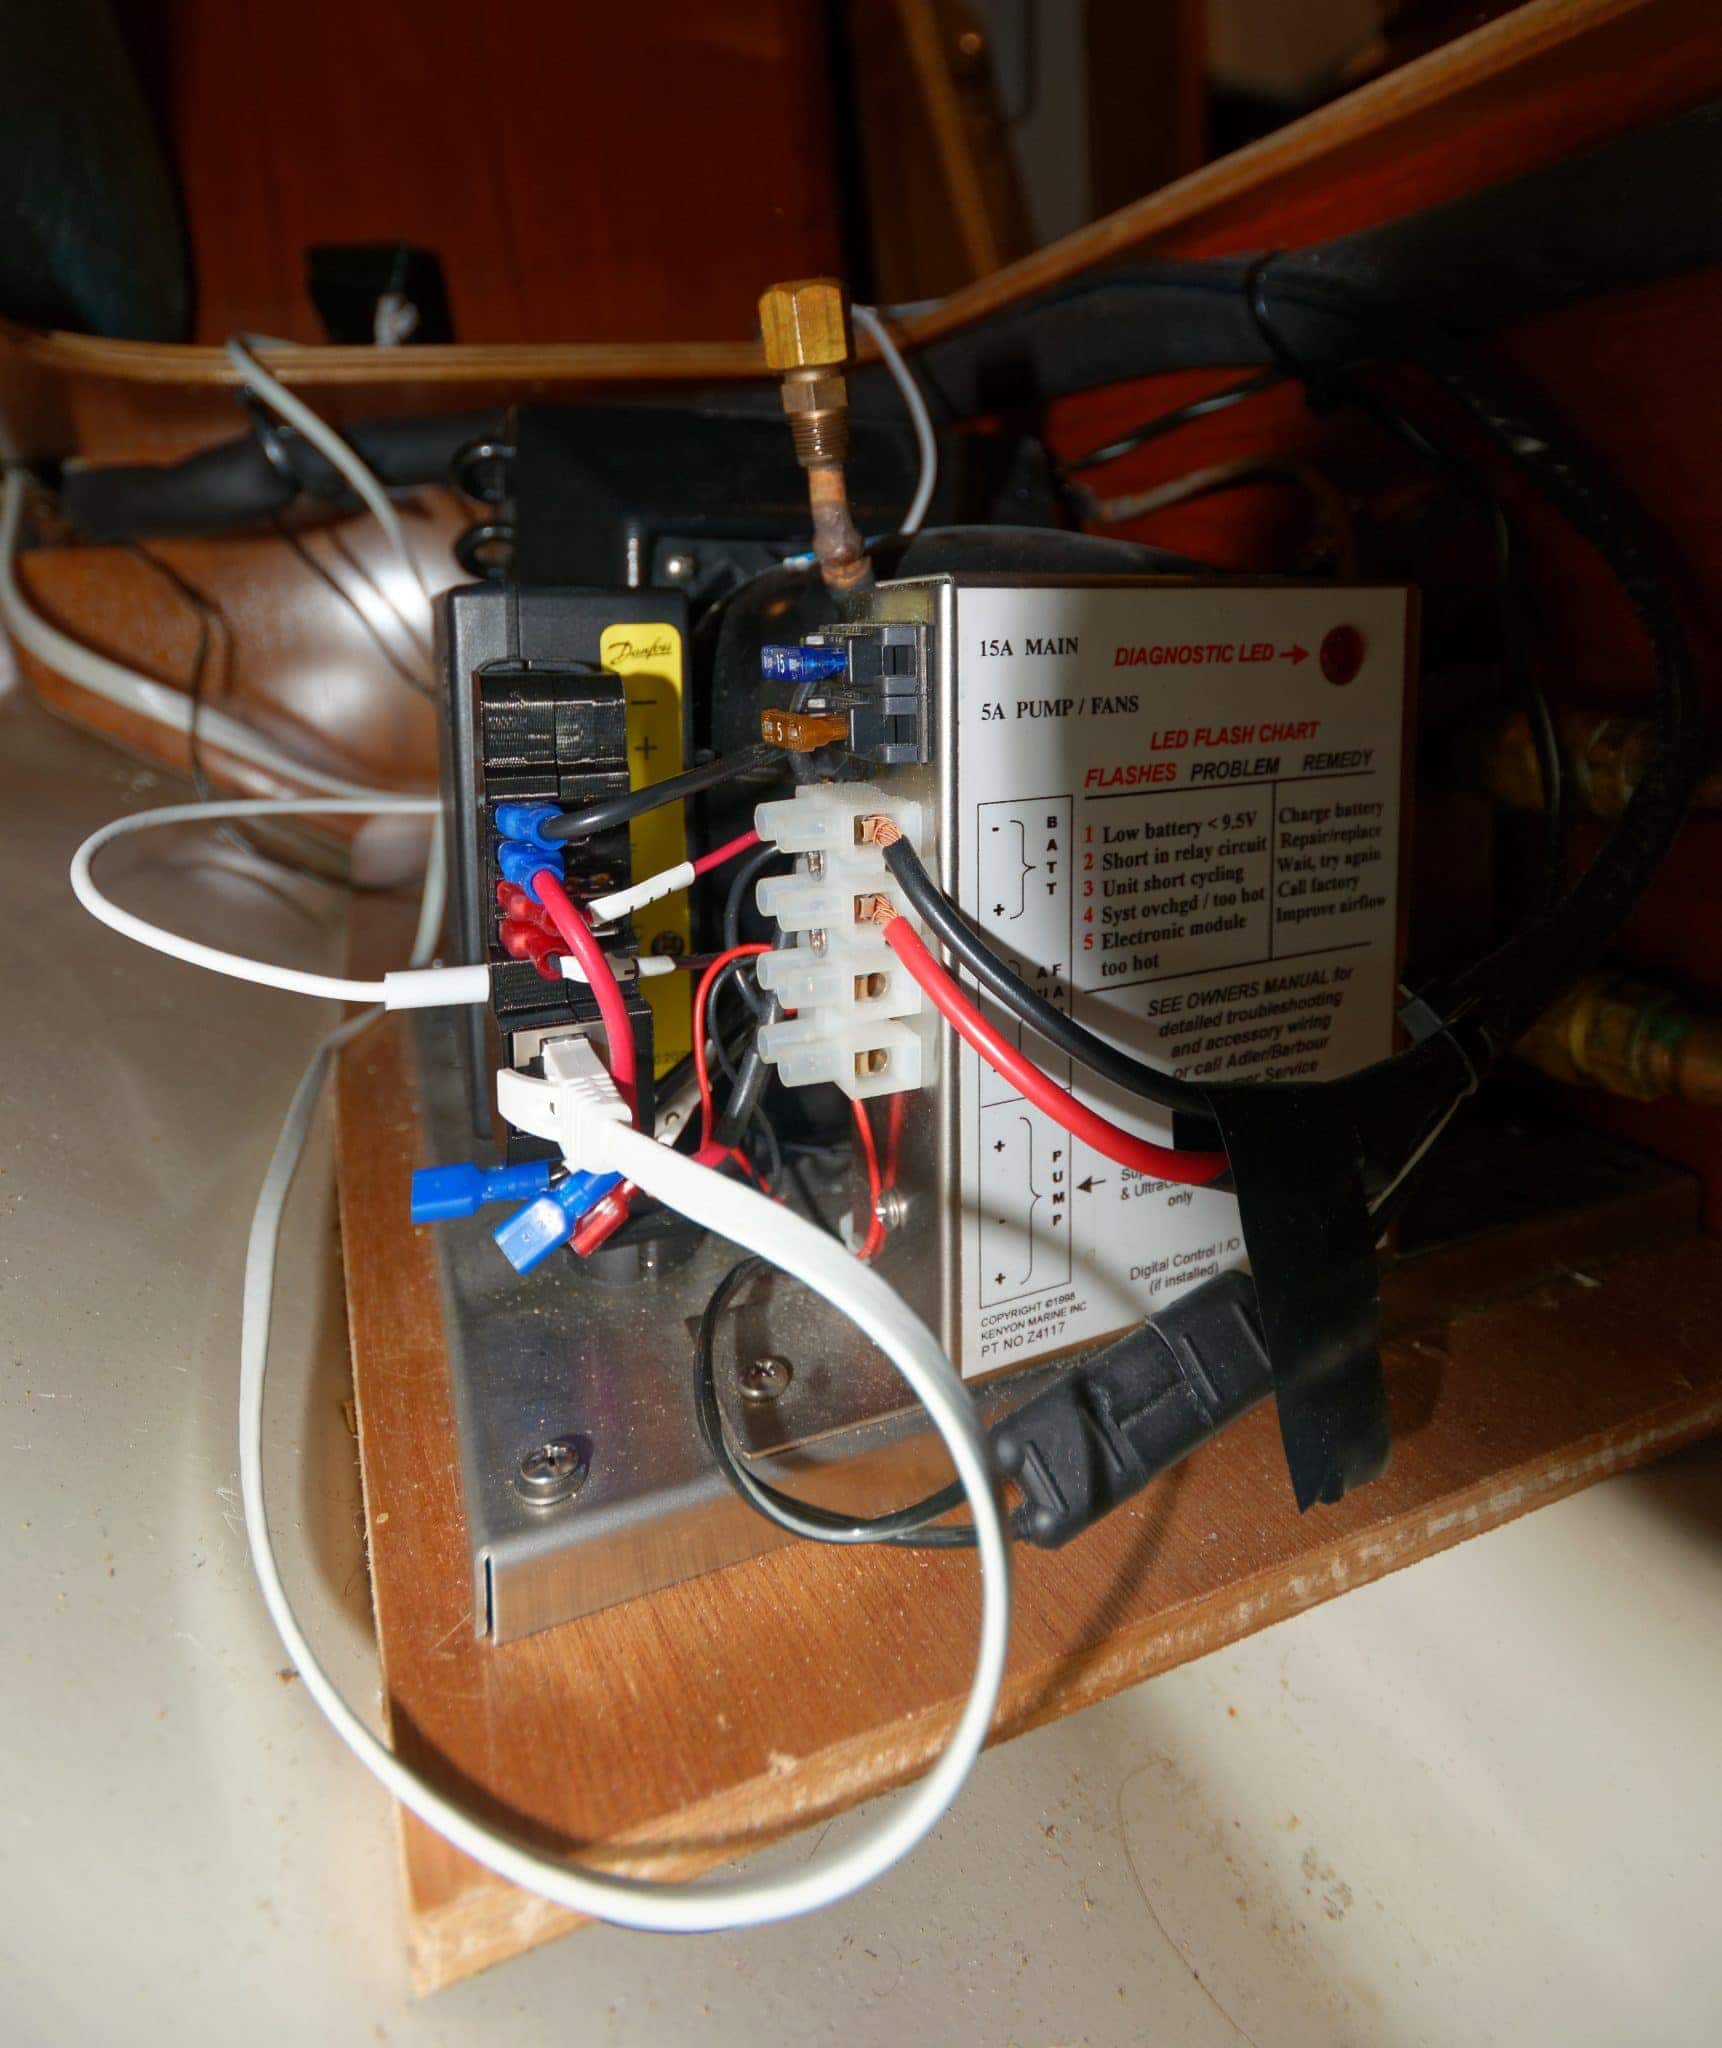
Connector block installed with wiring reconnected on the front, Ethernet cable on the bottom, and fan/temp sensor cable on the left hand side.
The longest part of the install was getting the darn temp sensor wire in through the back of and into the fridge. The way that Beneteau built Grace, they used a standard temp sensor and adjustable knob inside the fridge — I used that cabling to pull the new cable through, but it still took 30 minutes of contortions and pain to get it where I wanted.
Once all the cabling was in place, I temporarily set the fan inside the fridge unit blowing on the cold plate, as recommended by the folks at Stainless Lobster. I found them very quick to respond to questions, and helpful with optimizations on how to install the system. My recommendation would be to temporarily mount the fan/temp sensor unit and see how your performance varies with it in a few areas.
I loaded up the fridge with as much as I could find, some warm, some dense items, and started experimenting with the control unit.
Control and Settings
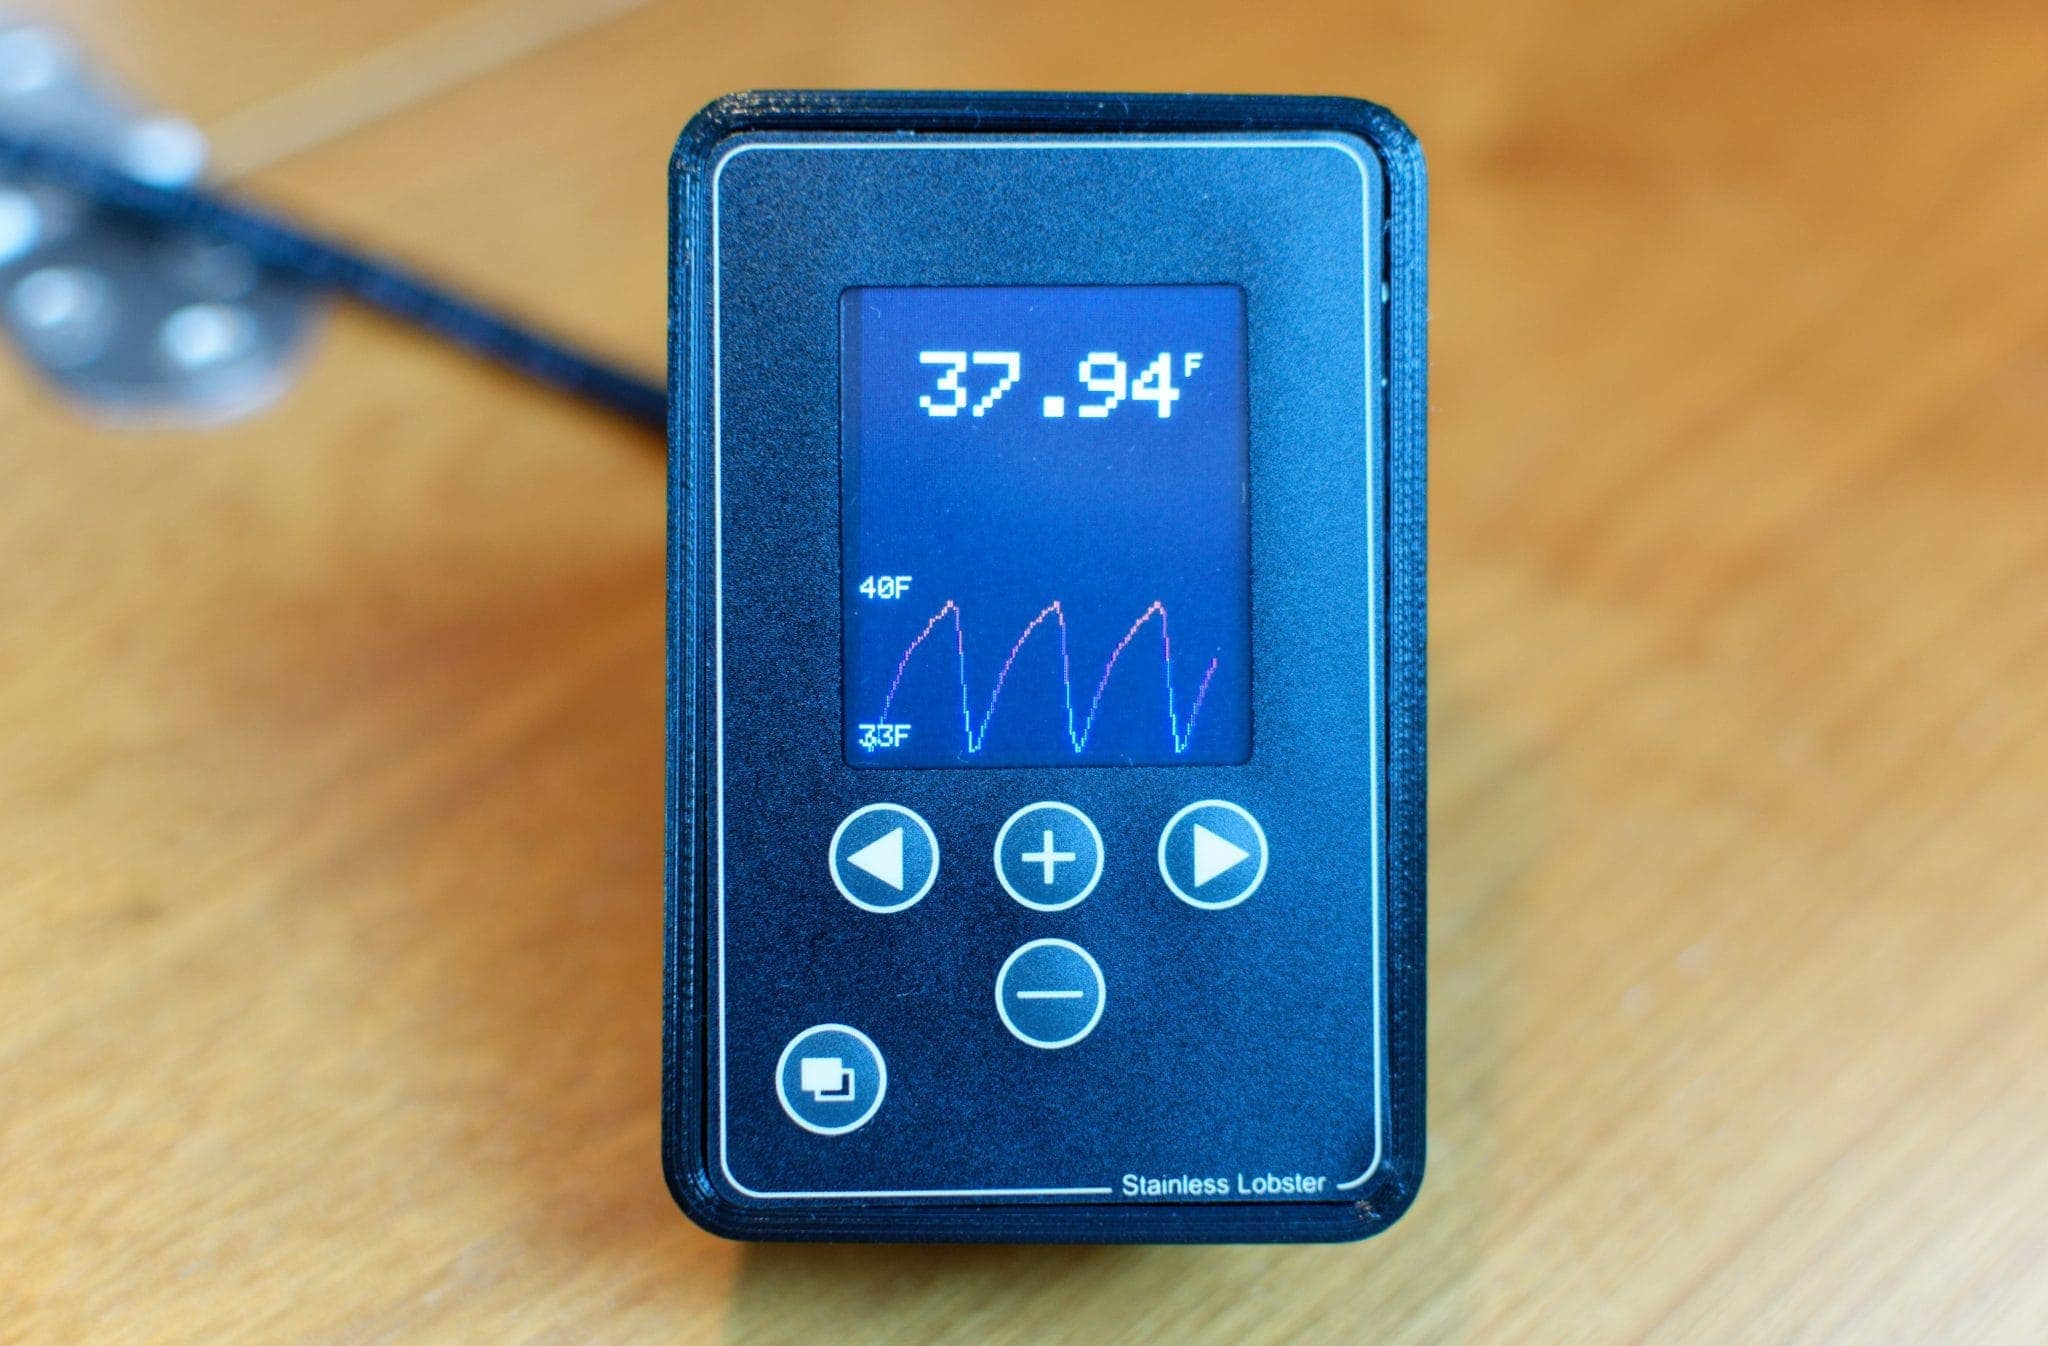
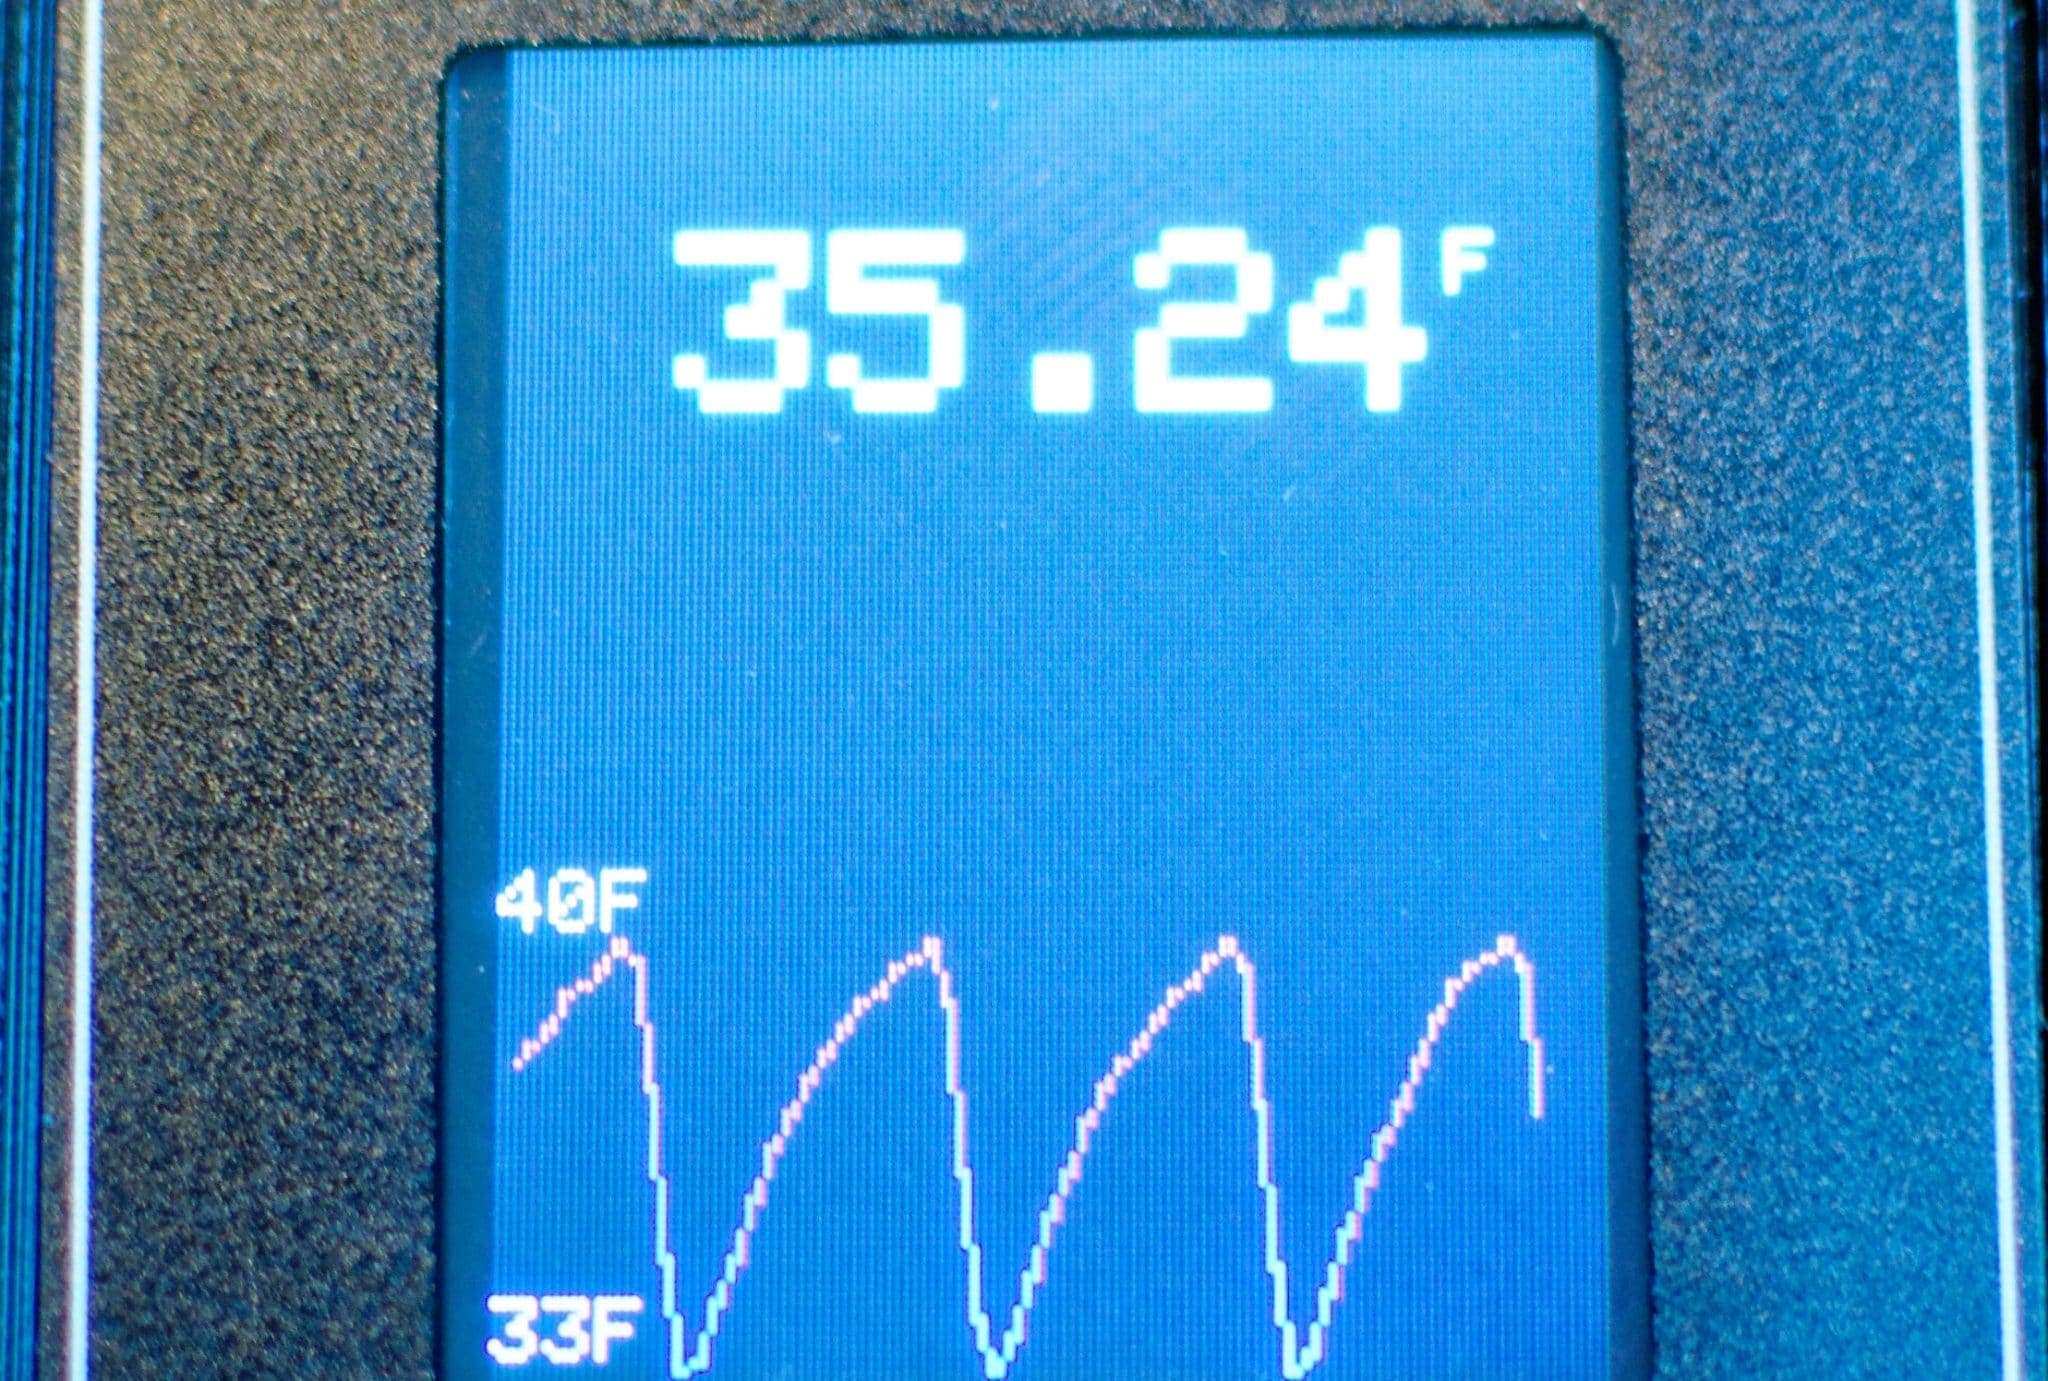
Control unit showing current fridge temperature along with a histogram of temperature ranges.
The control unit is absolutely beautiful when you leave it in the graphical mode above — pictures don’t do it justice, but the graph on the bottom is a nice rainbow color showing the cold and warm side of the cycles. The unit itself is very bright and easy to read and automatically dims after a timeout.
The buttons are easy to use, and allow you to navigate screens using the bottom left button, and change settings using the other four nav buttons.
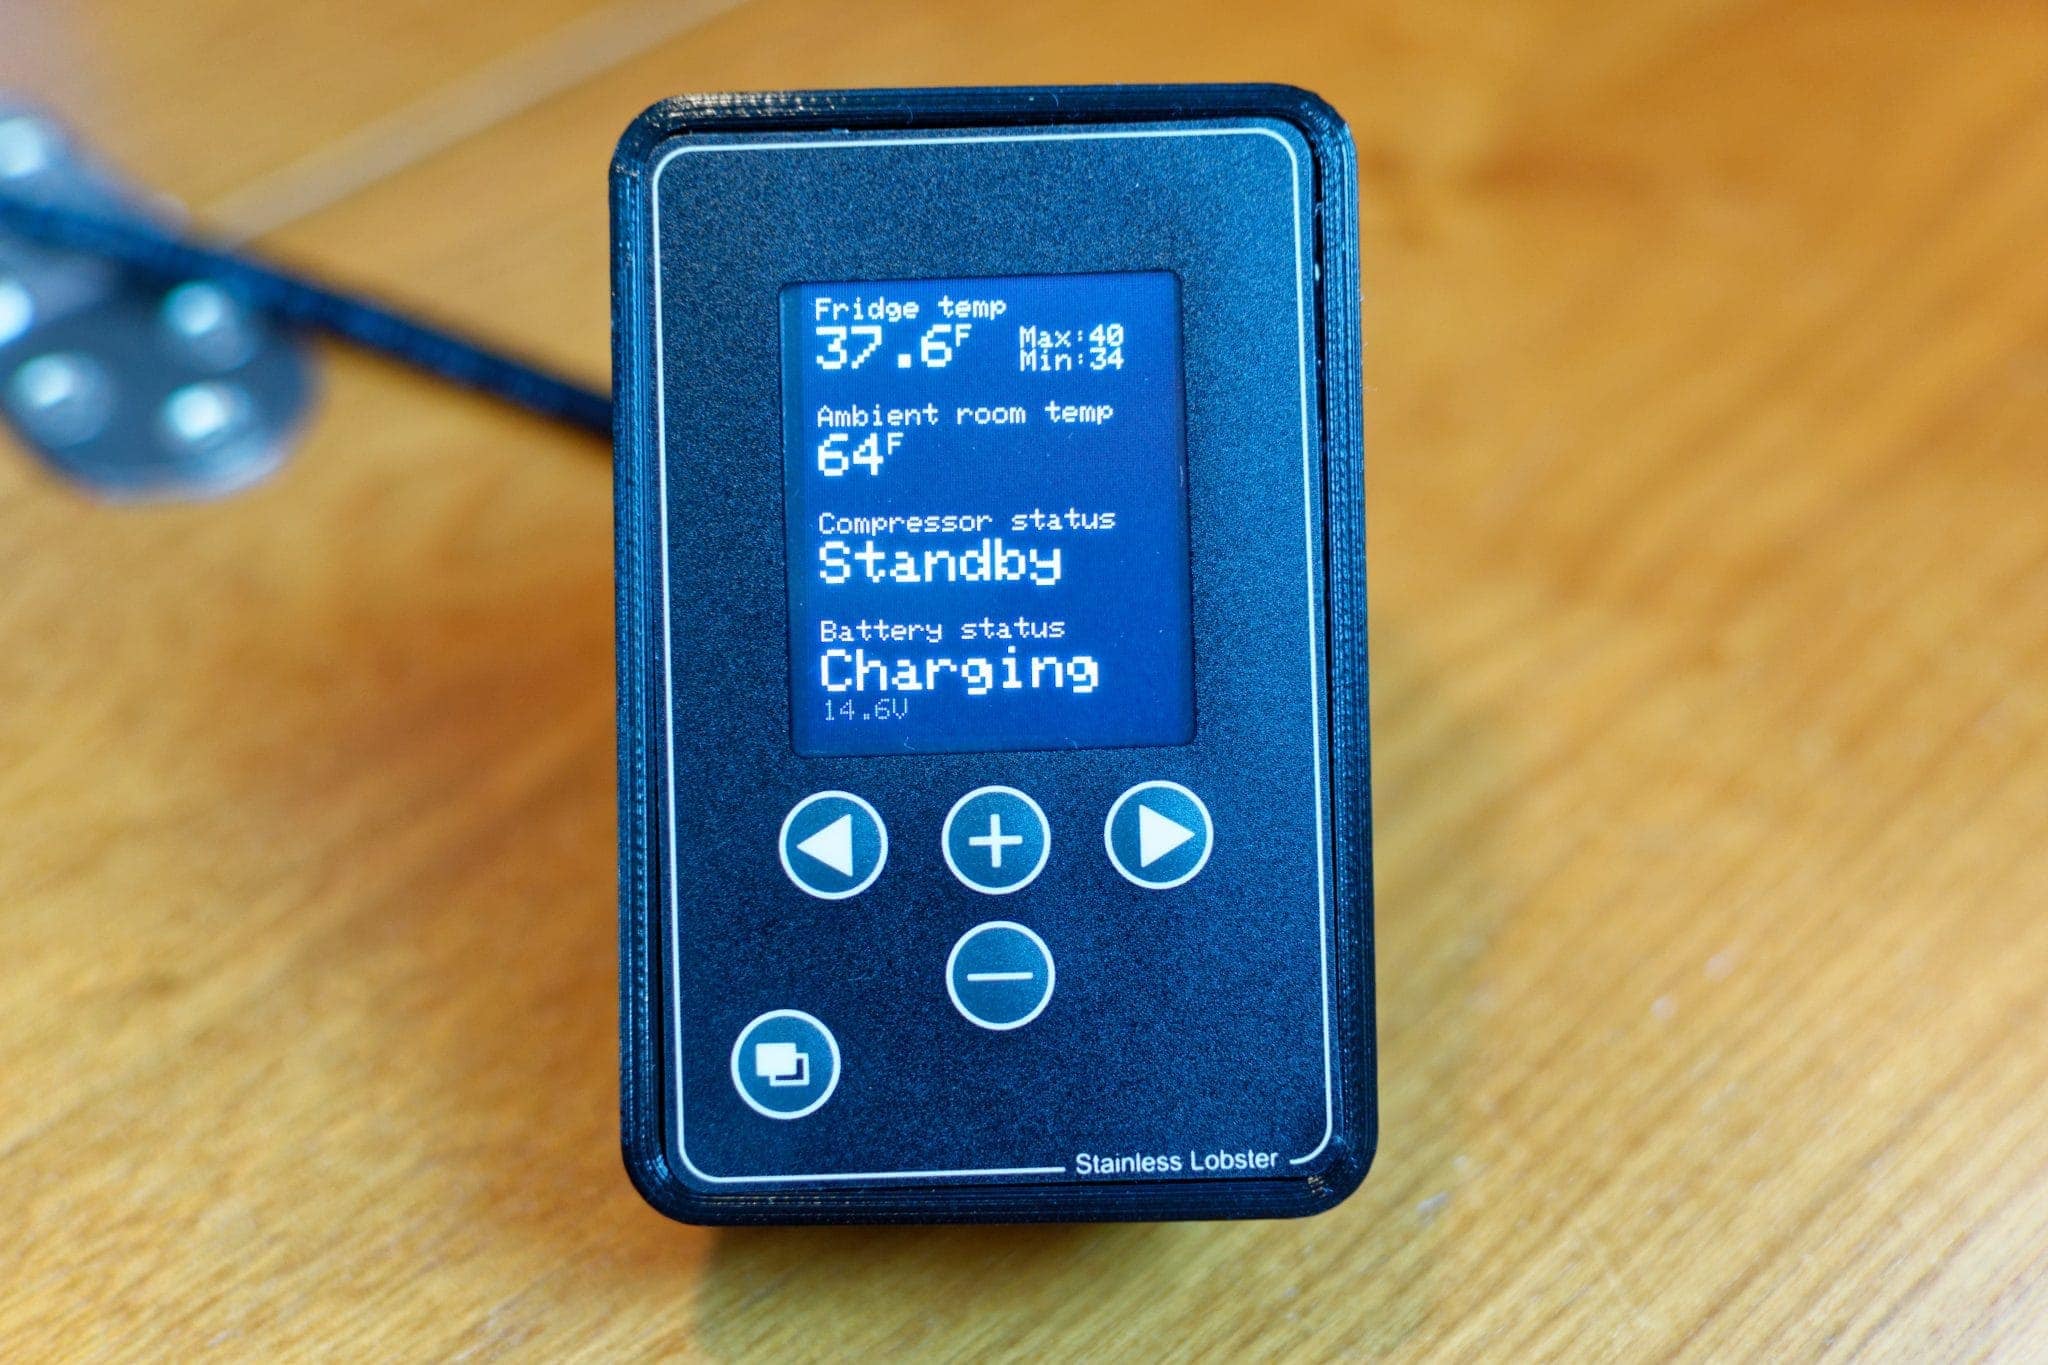
Summary screen showing current temp, min/max setting, room temp, compressor status, and battery state.
The summary screen shows the current temp, min and max temp settings, the room temperature, along with the status of both the compressor and your batteries being charged. I leave the system on this screen most of the time so I can see everything all in one place, especially the temp and whether the compressor is running or not.
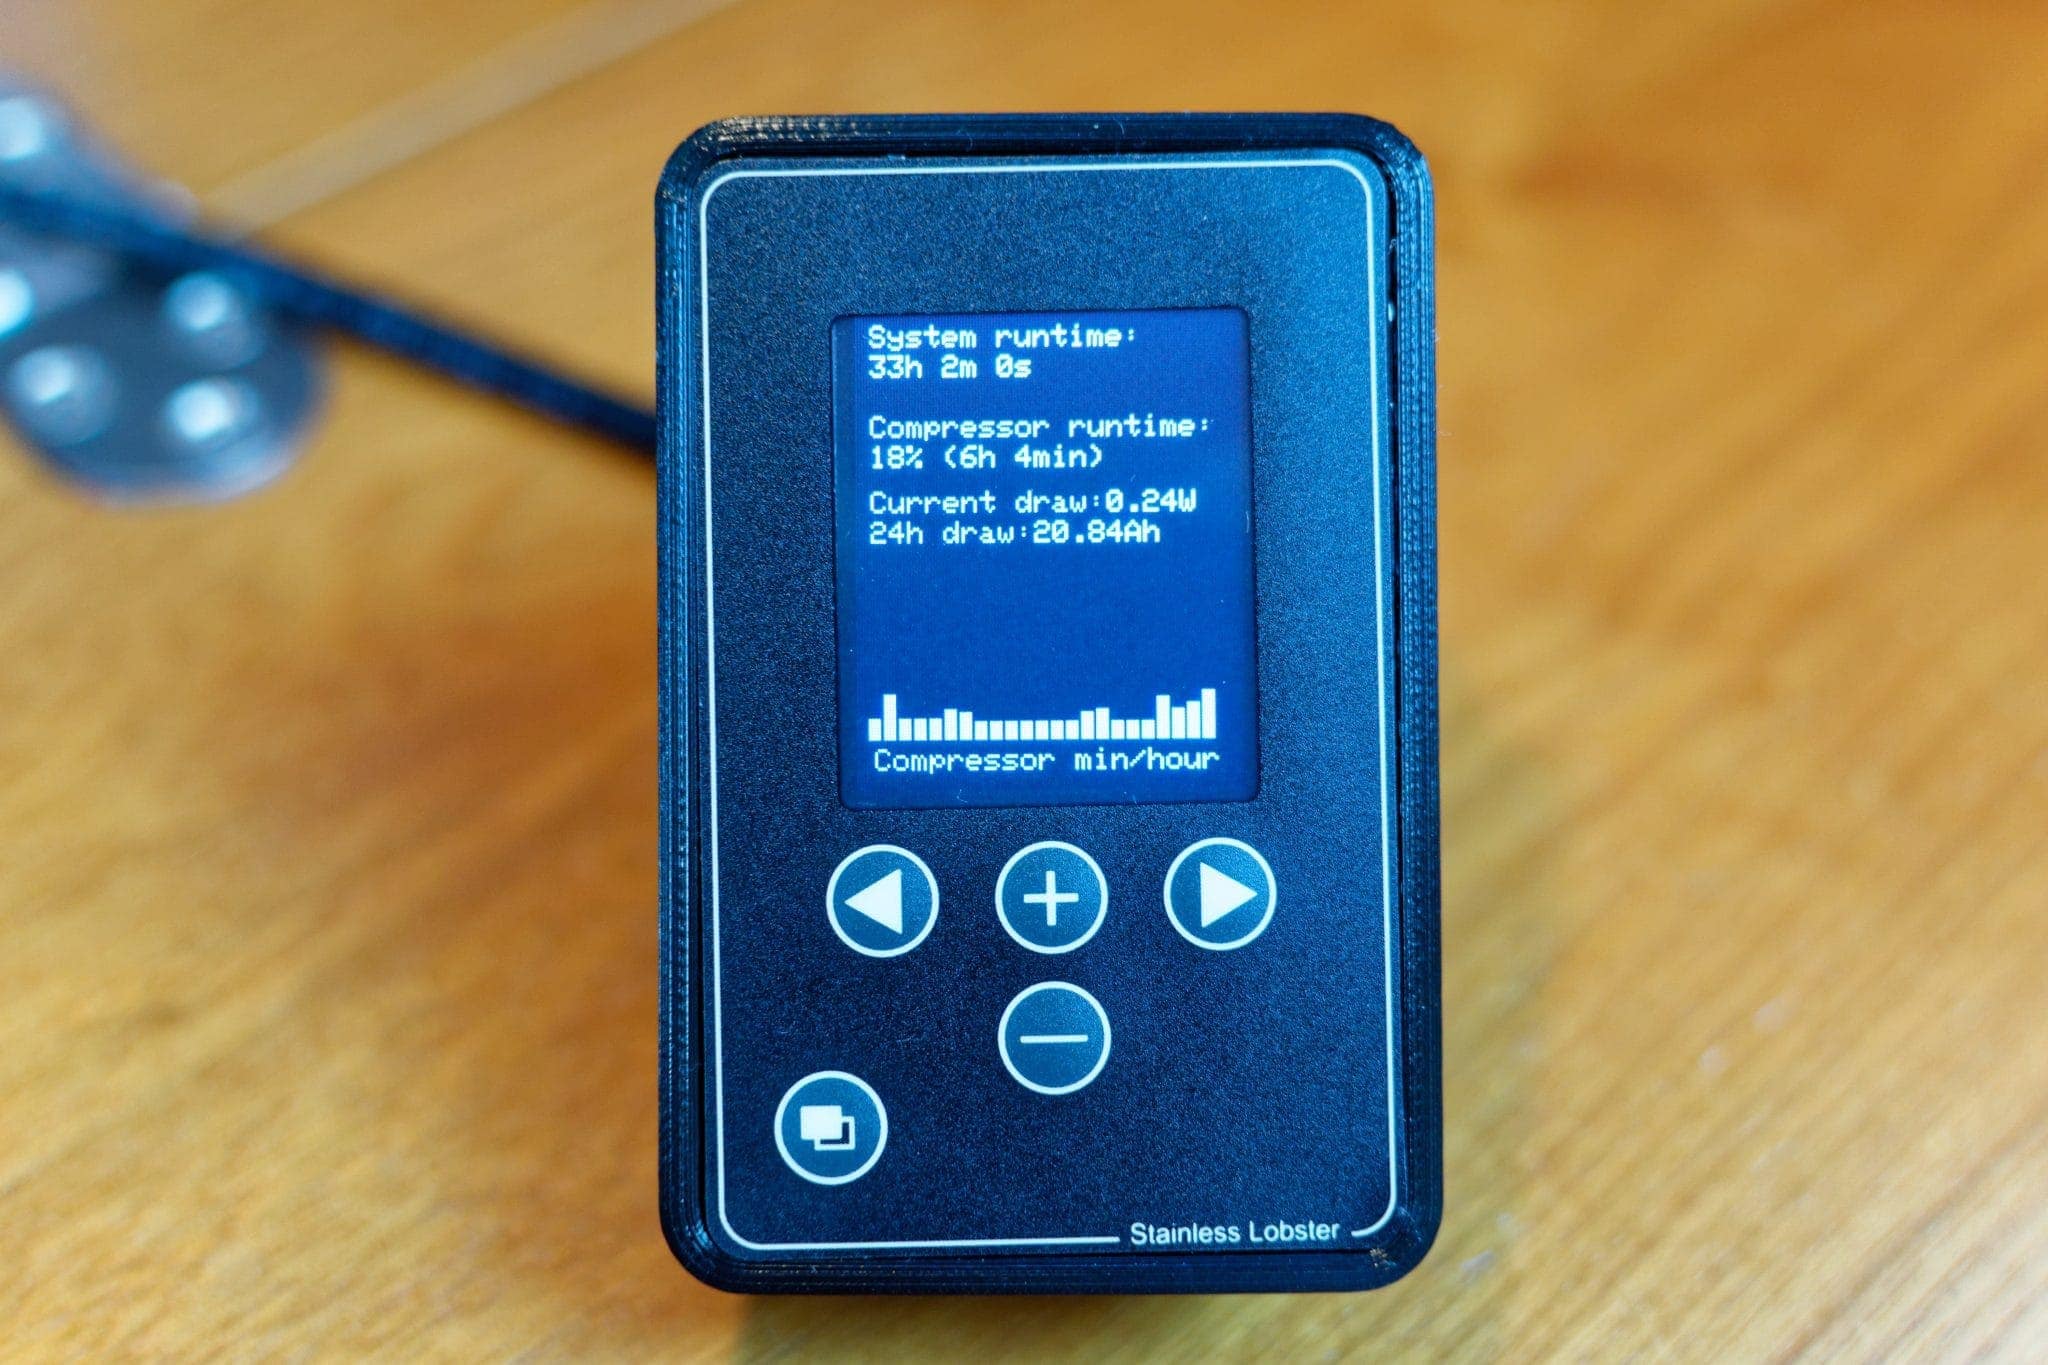
System runtimes, current draw, amp hour usage, and a compressor graph
System runtime is great to know how long you’ve had your fridge on, but also how much of that time the compressor ran, as well as the current draw and 24h amp hour usage. These figures initially surprised me because they were so low but after running the entire system on battery, disconnected from shore power, and monitoring the battery bank with my Balmar meter, I can confirm that the figures are accurate.
The amount of power I observed the system using during the month test period was at least 50% less than what I used previously! This will go a long way in allowing me to use more power elsewhere while away from the dock, and being able to charge up faster.
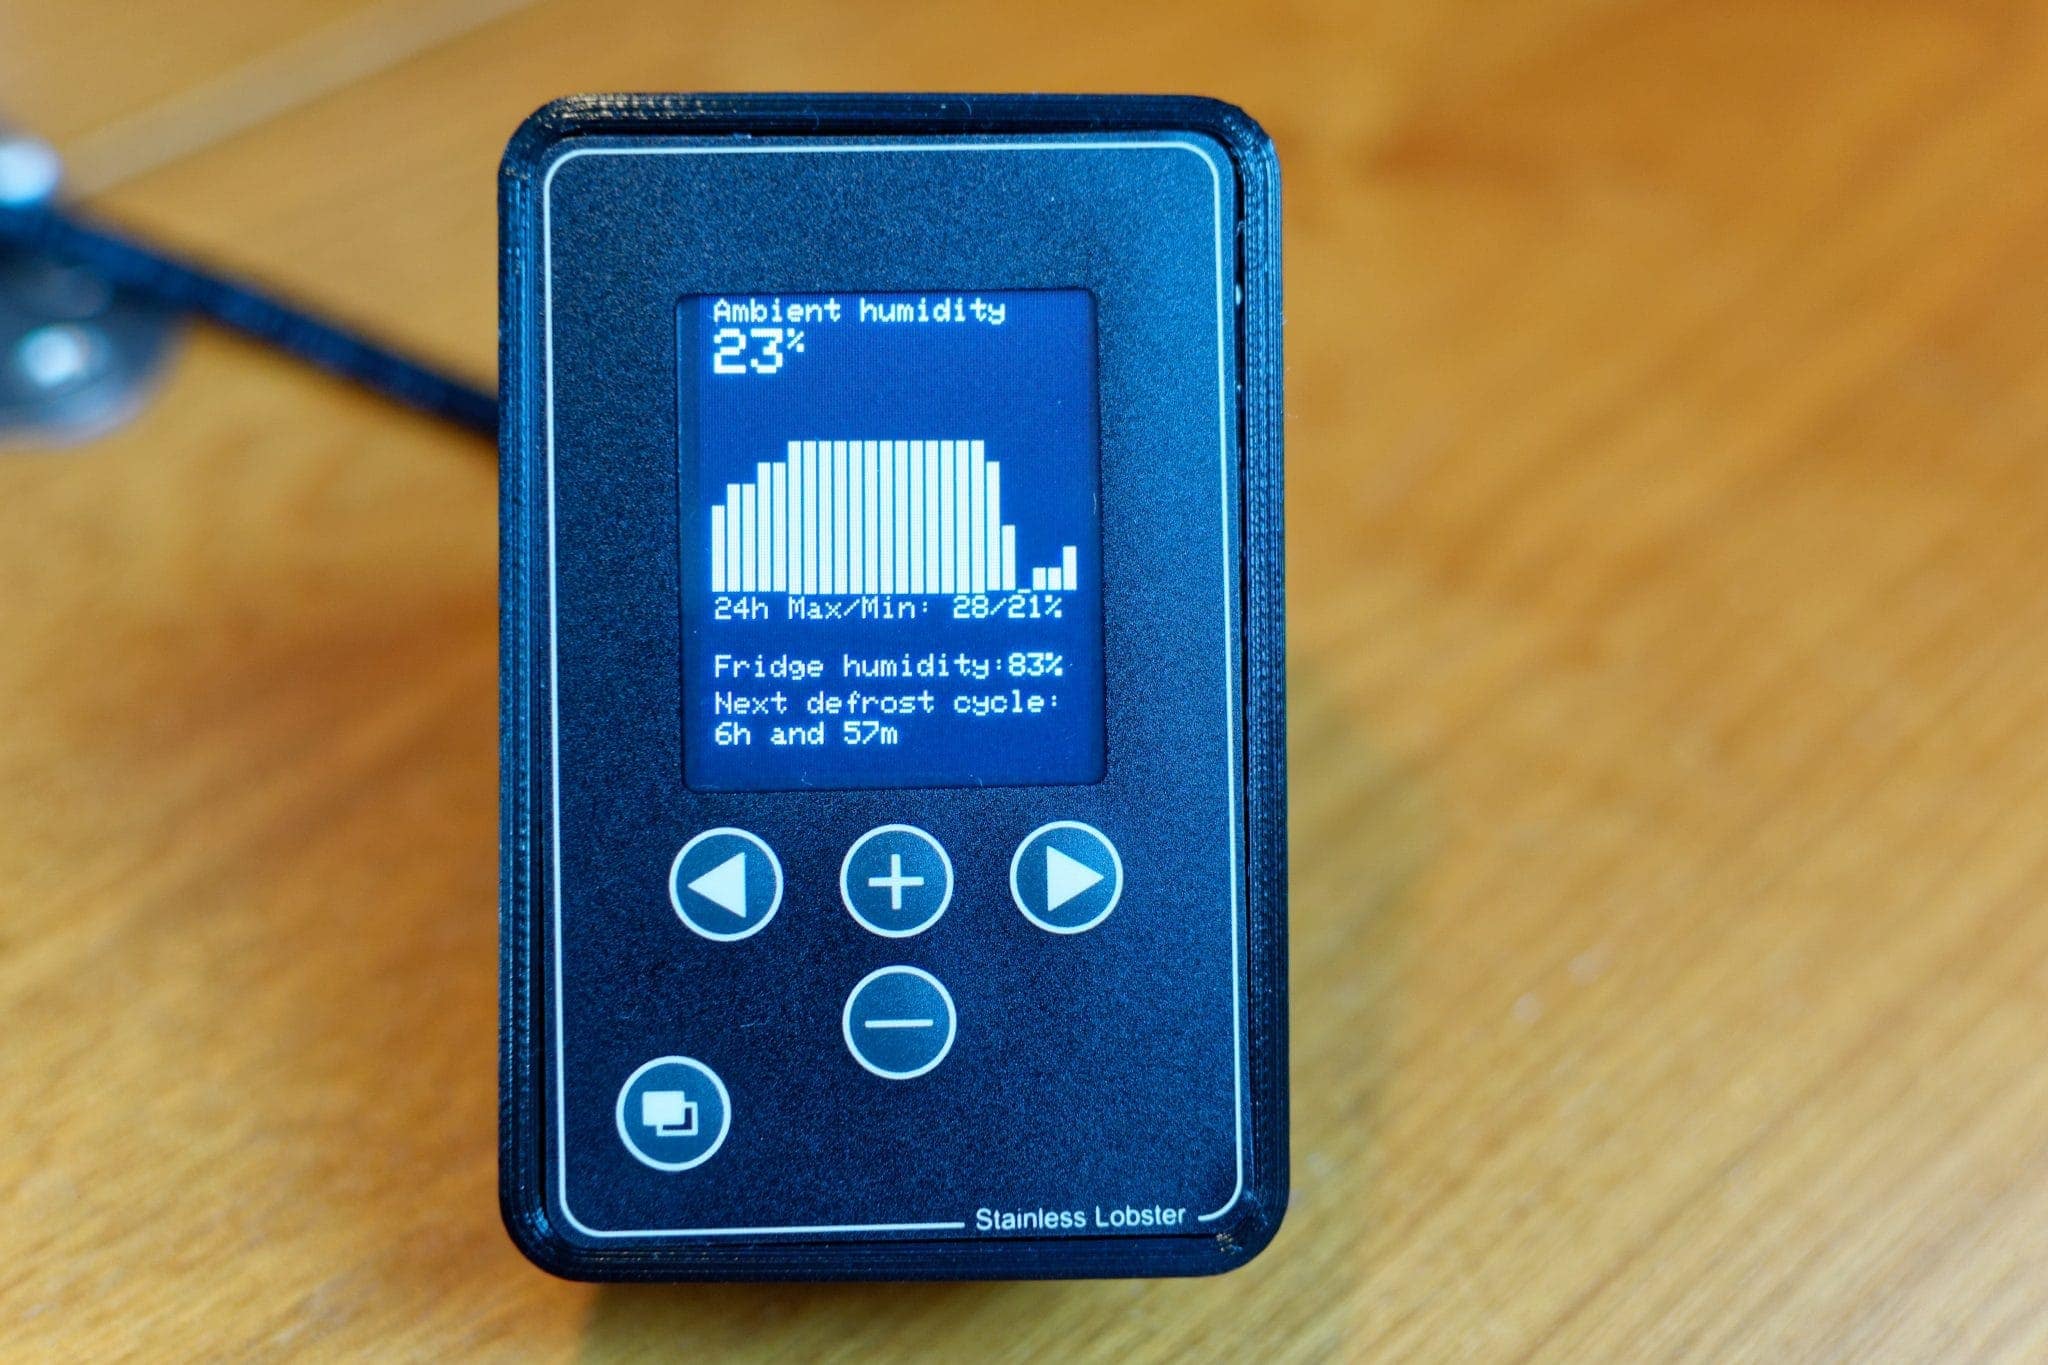
Defrost/humidity status including fridge and outside humidity, a graph of humidity, and when the next defrost cycle is planned.
The humidity calculations that the Fridge Optimizer uses include both outside in the cabin and inside the fridge. This allows for far more accurate calculations on how likely the cold plate is to freeze up, and drives the next defrost cycle.
One thing I have noticed is that there is more water in the bottom of my fridge than with the previous system. Stainless Lobster says on their site that you can use a sponge to catch this, or a more permanent pipe if possible.
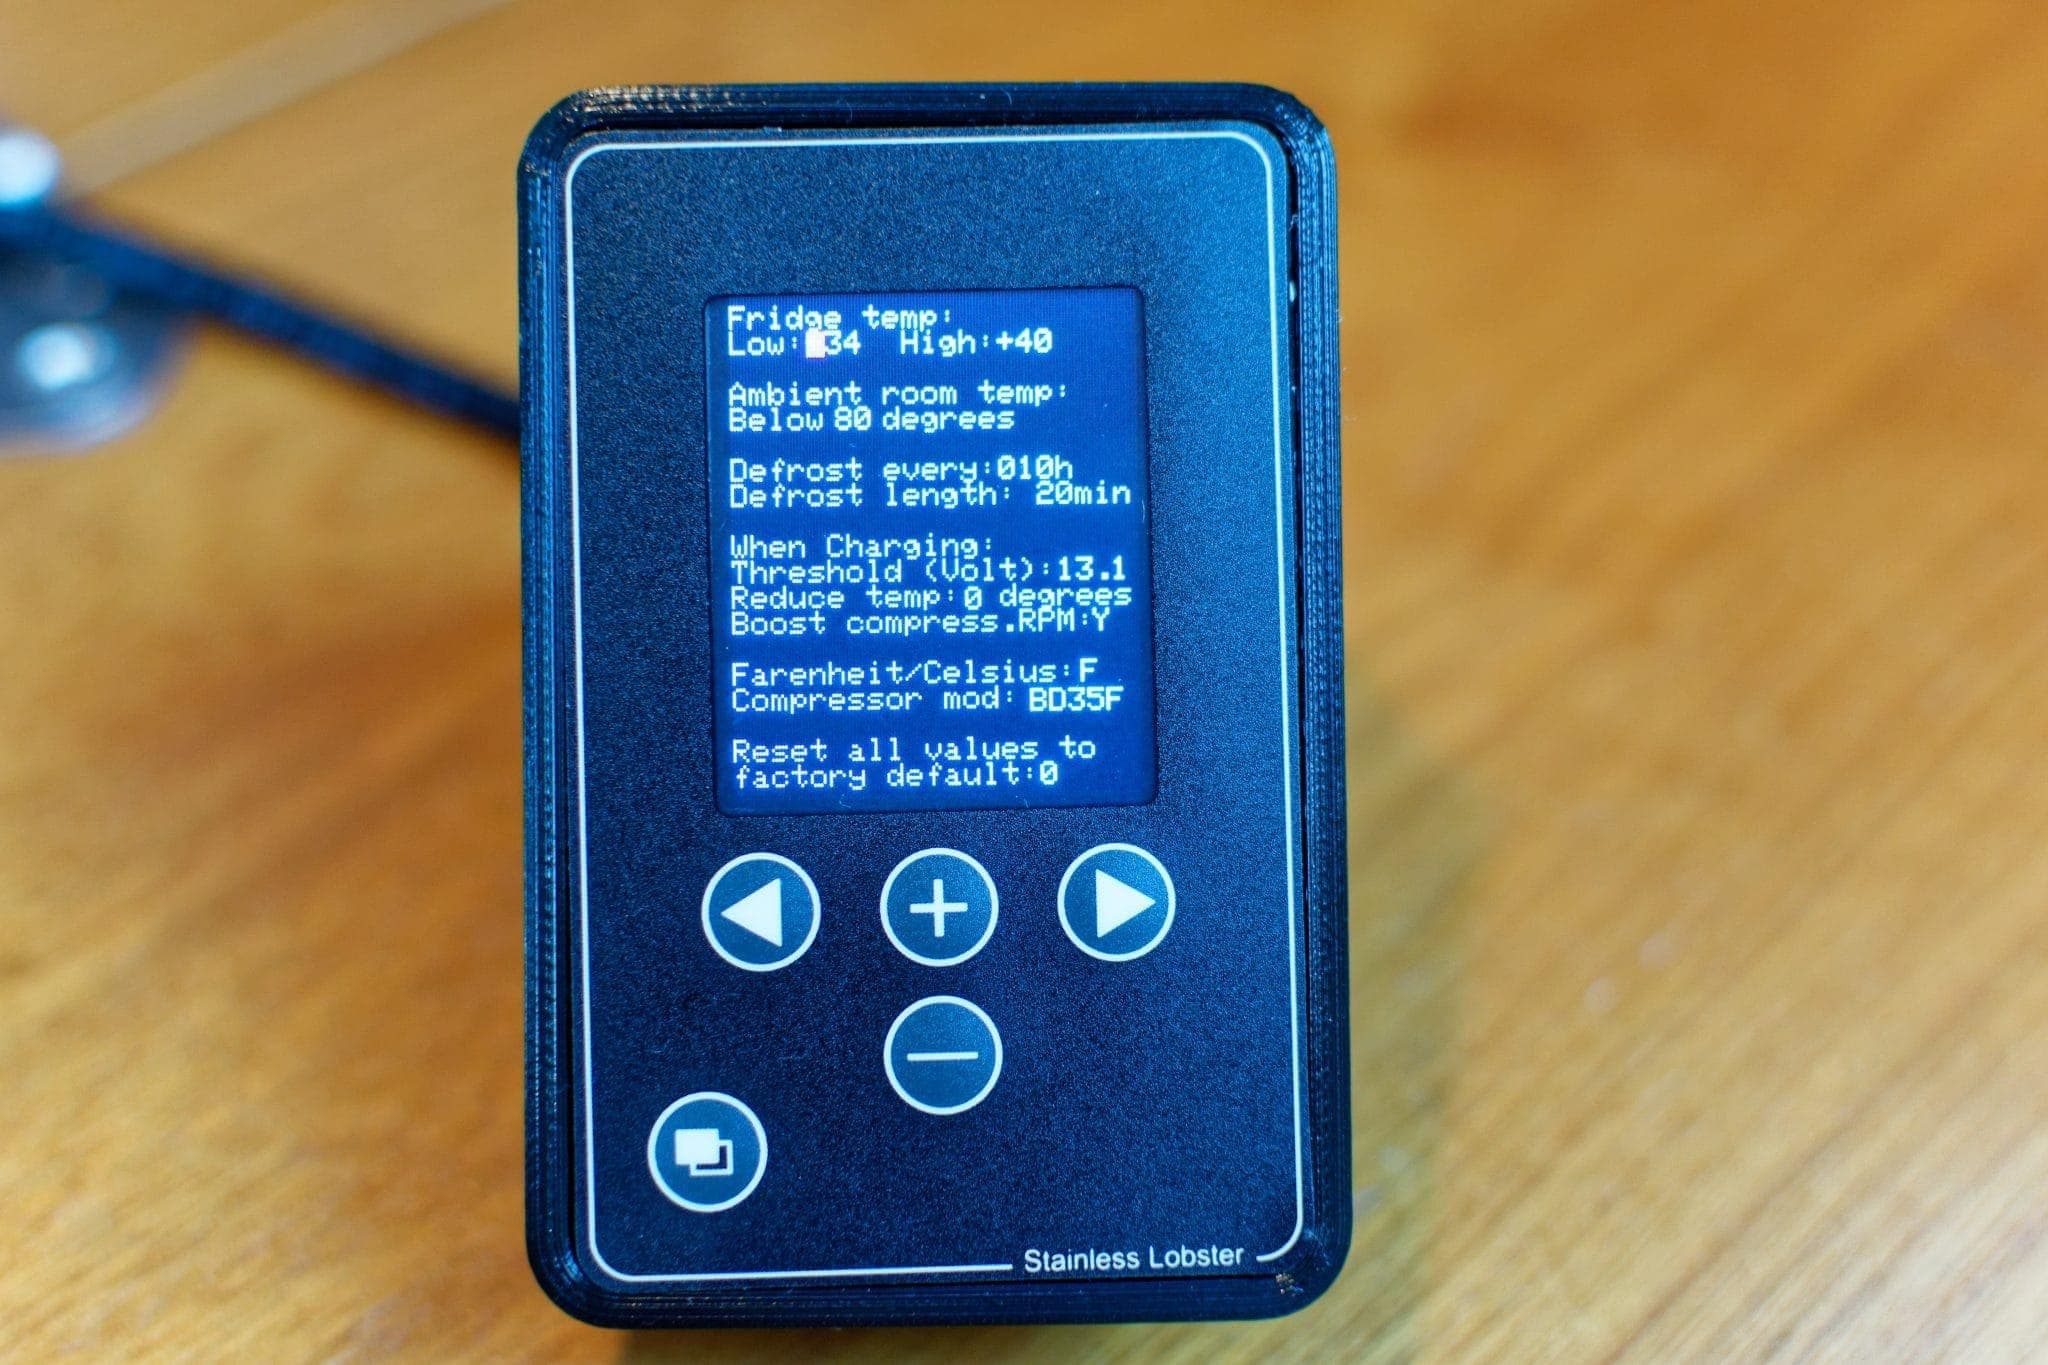
Settings has a bunch of values you can tweak to get your system setup just perfectly. SL recommends you change temp levels 2 degrees at a time while dialing in the perfect low/high setting, while still leaving a good spread between the two values. I found that for my system a low of 34 and a high of 40 would keep my significant other’s milk the perfect temperature.
Here you can also turn boost mode off/on, set your compressor type, minimum battery voltage, plus lots more.
I left most items at their defaults initially and had no issues, but wanted to experiment with boost mode and drop the temperature a bit.
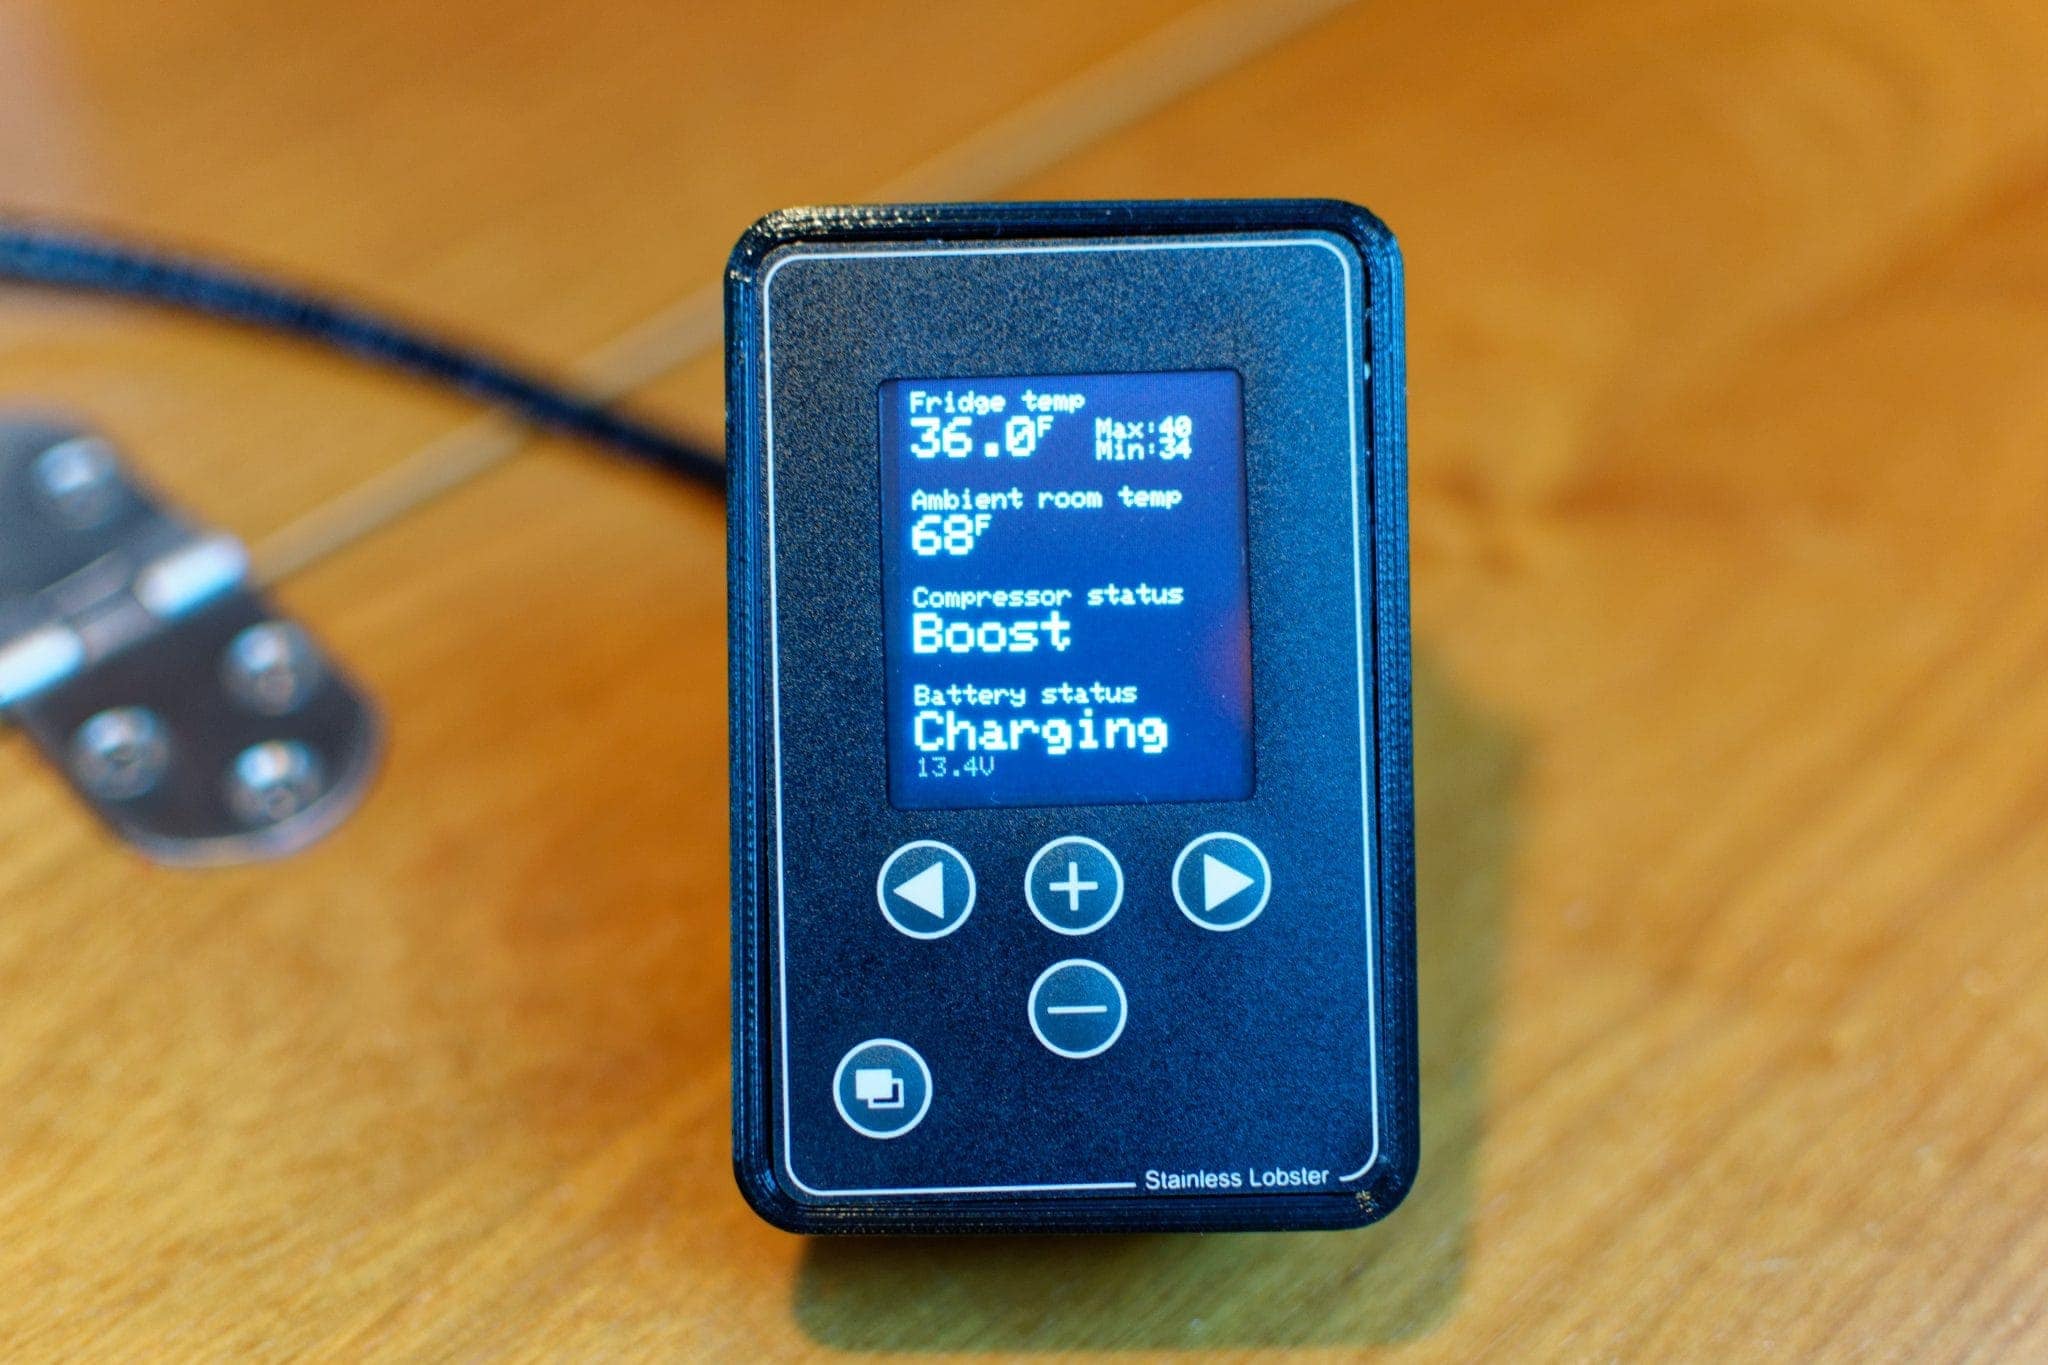
Boost mode didn’t seem to be an option with my previous thermostat or configuration, but with the Fridge Optimizer, you can enable it in the settings menu. From my testing so far, this allows for a very intense amount of cooling in a short period of time, only available if the battery status is “charging” so you’re not using as much battery power.
They recommend adding an additional fan due to the heat generated by this mode, so I have not run it extensively until that is procured and installed.
Repairability and Maintenance
Stainless Lobster has really outdone themselves here — they even highlight it in their documentation, as they should! They’ve used common components wherever possible — off the shelf CAT5 cabling, 4″ PC fan, 1/8″ audio cabling, etc. This means if you’re in some remote country, you’re more likely to find the things that are going to fail, and not have to deal with proprietary cabling.
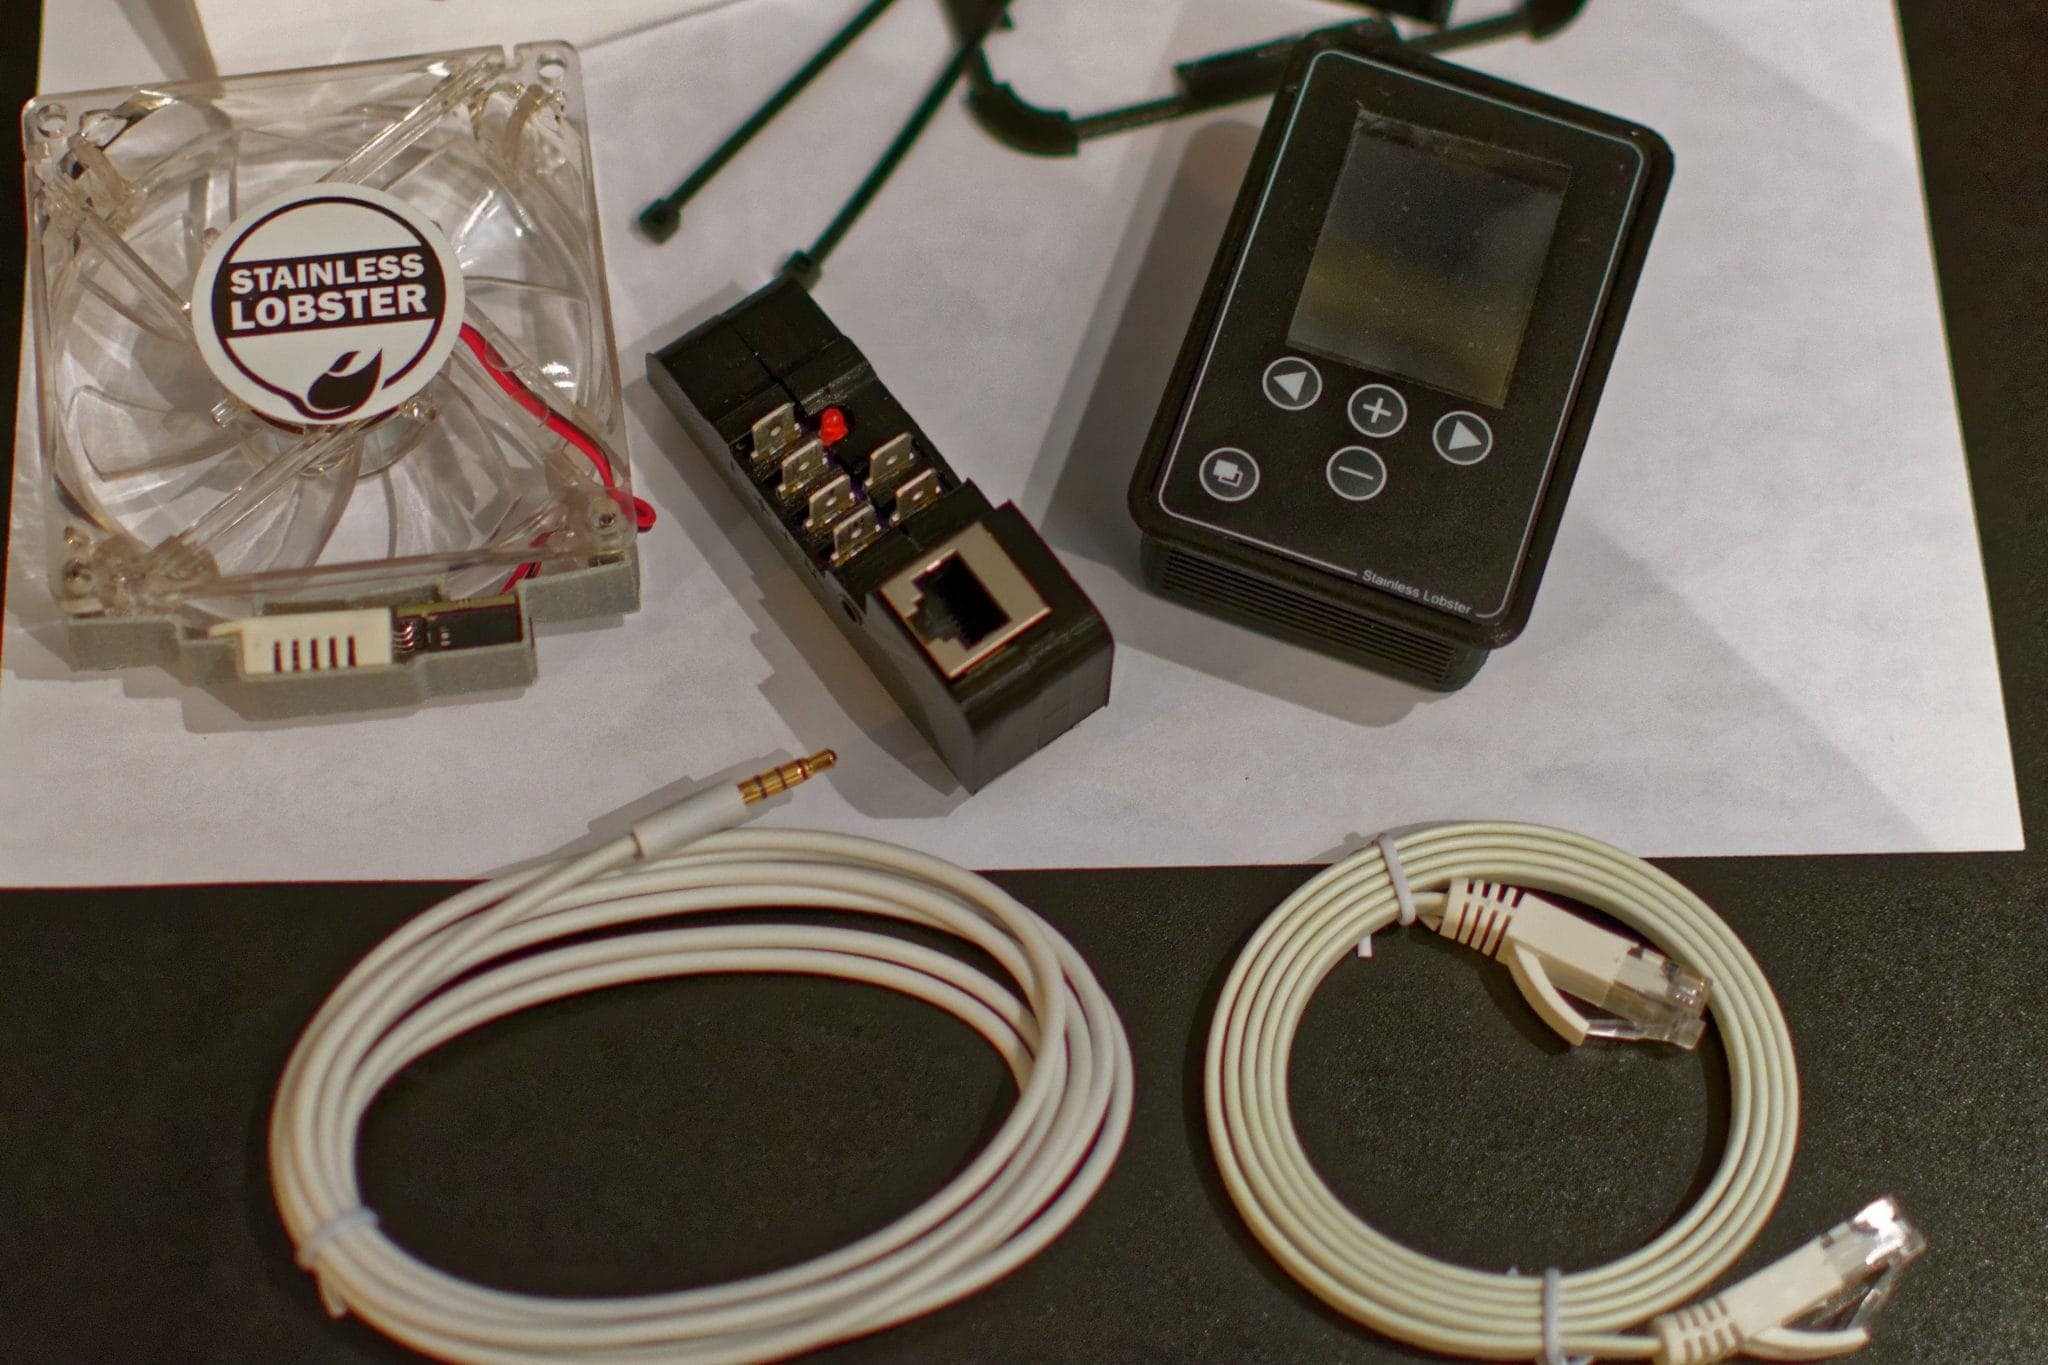
The unit also can be updated very easily by the end user. Uncover a USB port hidden on the control unit under a dust cap, connect it to your machine, run their updater, and you’re done.
Trends can also be used to identify problems with your compressor, leaking coolant, bad insulation, or other things that you might be able to proactively fix prior to a total failure.
Feedback
Stainless Lobster is a pretty new company, and as such you won’t find a ton of support documentation, videos, or other info on installation or usage. They obviously will be increasing this as their user base grows, but it would be nice to see more details on their support site.
Supporting more types of compressors and systems is going to be key to bringing this to more people in the market.
Allowing the data from the unit to be shared with other systems would be a great feature to add – whether that be via NMEA 2000 bus, or via wifi into SignalK – either would be fine with me. I would imagine adding a cheap wifi chip would be a quick way to do it.
Conclusions
The fridge has been woefully overlooked when it comes to standard instrumentation or technology on most boats. We have MFDs that show us tons of information about the water and where we’re going, radios that can do amazing things with AIS and Bluetooth, yet many of us are still using a twisty dial that has the accuracy of a 1970’s era home thermostat (if that!). It’s great to see technology making a difference here.
I have been using my Fridge Optimizer for a month now, and have been amazed at the battery savings I’m seeing during my tests. On average, I am using about 20 amp hours per day with the Fridge Optimizer. By my estimates, previous to the Optimizer, I was using between 50-65 amp hours. That’s a saving of at least 50%!
It’s easy to install, beautiful to interact with, and configurable to your specific needs and setup. Using off-the shelf components helps with maintenance, and the possibilities for using the data collected will help plan future maintenance and expansion.
Of course, the long term use will be interesting to see, especially during warmer months, but if the initial month is any indication, the Fridge Optimizer should still save me lots of battery while keeping things coold.
The visibility into what my fridge is doing with such detail is perfect to have in such a compact unit. Keeping the beer and food perfectly cold while sipping on the batteries is exactly what I want to keep the crew, and captain, happy!

