In the 3 years I have owned Grace, I have completed a lot of projects, one of the biggest being updating her power infrastructure. In the last 2 years, a problem has surfaced that I needed to correct before the next season – a deep list to starboard. In addition, my original design had some things I wanted to improve upon.
The List
Every boat at some point lists one way or another depending on people, equipment and design. The 2000-era Benetau line is no exception, and in fact I found out from the various owners groups online that my model is prone to a significant starboard list even with the boat totally empty. This seems like an unfortunate choice in Beneteau’s design, as the starboard lazarette in the cockpit is the only major storage area outside, and the single biggest storage area on the boat. You could easily fit four people in the space (not that we store people) and we routinely dump anything and everything in here.
For normal trips, we will have one or two 5 gallon diesel cans (full), two batteries for the Torqeedo outboard, spare steering gear, tools, safety gear, a bucket full of outdoor junk, folding chairs, and much more.
So after cramming this full of stuff, the list increases even more. On a relatively flat bottom stern boat, this creates some problems if it gets too high. I am also ultra-sensitive to any list because of my inner ear. Surprisingly, I get seasick very easily, and often have to wear a special electrical watch to counteract the effects. I have the same problem (more intense/worse) on airplanes, and have to do the same thing. Any sort of list heightens this when I am down below, even at the dock – I can tell instantly when I go below that something isn’t right. My body tries to compensate when I move around the cabin, and I’m constantly fighting it.
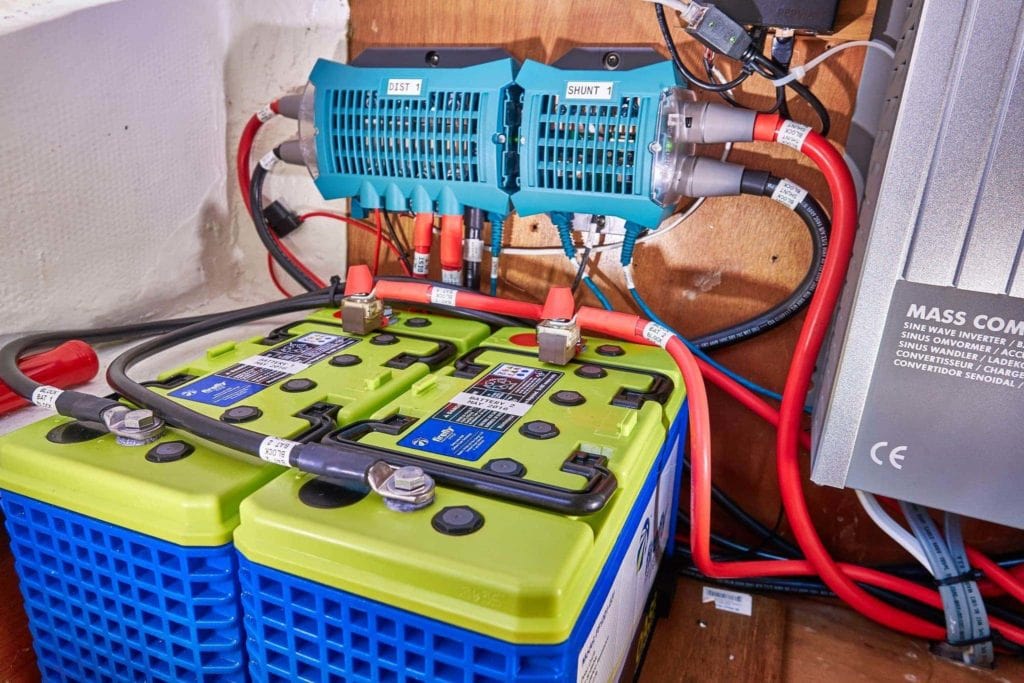
During the power upgrade from a couple of years ago, I replaced one battery in the lazarette with two slightly larger ones – 110 amp hour Firefly batteries. A third was in the engine room in the bay originally set aside for a starting battery. My boat didn’t really have room for batteries of any significant capacity anywhere else, and after some tests, it seemed like the list was manageable.
Grace also had higher power requirements than when we bought her. I wanted an inverter to deal with smaller loads on the AC side while away from the dock, and we had a lot of computing and network stuff that I had started adding. This necessitated a larger house bank. At the time, combining house and start, which I had done on Jammy, was an OK trade off for me if I got more overall amperage hours.
Many people in forums and elsewhere disagreed with the amount of amp hours I needed on Grace, saying things like “inverters are only worthwhile on a sailboat as an anchor” or “you live with the amperage hours you’re given” or even things like “that’s why I only sail her overnight off dock power for 1 night at a time”. These are great opinions for your boat, and I am happy to let you have your own opinion. However, that is not the only solution. Inverters come standard on even smaller sailboats nowadays. Many of them are super light, and double as a high amperage battery charger. And if you let your boat dictate not only where you can sail, but your comfort and joy while you are doing that, that is your choice. I would rather be able to sail longer, enjoy myself more, and that is why I am willing to work harder and design something different, and potentially give something up.
Everything worked well on Grace, but the list was starting to bother me. In several trips last year, it was so pronounced at times that I was worried about stability in bad conditions. Crossing the Strait of Juan de Fuca with 4-6′ rolling waves, and in other situations, the boat didn’t feel as stable as I would like.
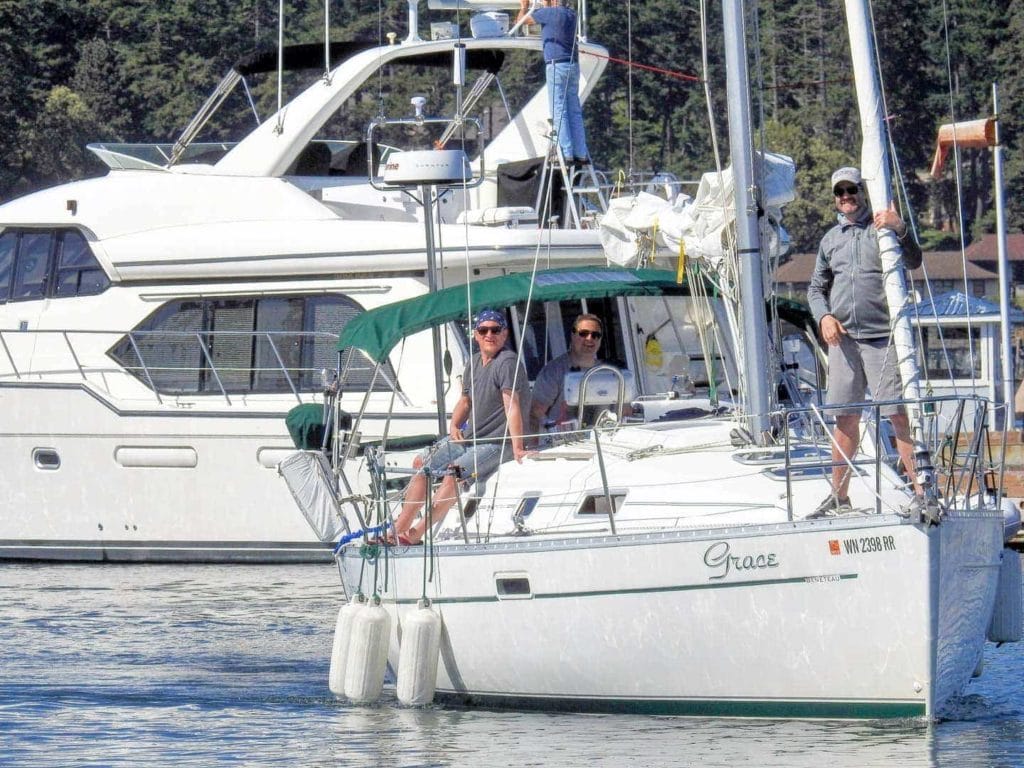
Grace arriving in Friday Harbor with a pronounced list, photo by Steve Roberts.
My home marina even called me and asked if I had a problem on board one day, or if it was a permanent list – they note these things in case they see a boat change. For them to notice was significant. After seeing some pictures of her as we were motoring in flat calm, I knew I had to do something – the list was really too much.
The Improvements
My original power system design eliminated a dedicated starting battery, which I had done on my previous boat Jammy as well. While this had worked well for the last few years, I was always worried about drawing the house battery bank (the only bank) down too low, and having to use my Noco jump starter to get things going. I wanted to see if I could add a small start battery back to the design to prevent this from being an issue. Also, having a start battery solves a ton of issues with charging a LiFePO4 bank via an alternator, so it almost could be a design requirement.
I have been wanting to add solar panels to my bimini to help with power usage while away from the dock. I had read a post from Patrick on S/V Violet Hour about their setup, and it had inspired me to consider doing something very similar on Grace. I wasn’t excited by any of the solar controller options MasterVolt had available, especially since they had only a few options that were MPPT and none that could be networked. Being that Grace used mostly MasterVolt, that brought other vendors or a different design to mind.
MasterVolt had also really not impressed me with their networking and monitoring solutions. They came out with a new version of the EasyView panel recently, which I had been testing, but it was still very rudimentary. Their ability to place this information on a NMEA 2000 network was also frustratingly complex. There was no remote access for this information other than piping it through SignalK or another tool. I wanted to see if other vendors had better solutions for this.
Investigation
So after a lot of thinking, design, and planning throughout the late fall and winter months, I decided to take the plunge into a lighter weight power system with some improvements. All indications pointed towards LiFePO4 batteries as being the only option that could get me the weight reduction, but at both a cost in terms of money and system complexity.
One thing I did not want to deal with is a home-build of LiFePO4 batteries. It seems you can save considerable amounts of money by doing it this way, but the extra work required to maintain and manage the individual cells, plus the potential for problems, seems like something I didn’t want to take on in addition to the complexity that I knew would be present anyhow.
After reviewing around 10 different vendors, their capabilities and limitations, cost, and implementation details, I found that there really is only one vendor out there that met my requirements – Victron.
One of the things to consider with a LiFePO4 setup is the amount of safeties and controls you need to put in place to protect the batteries and other systems. This plus the data I wanted on the system itself in terms of its health meant that I did not want to mix vendors for various parts. This type of battery and system is still very new to the marine world, and combining different vendors and types of equipment would definitely lead to finger pointing when there were problems, and problems no one has seen yet.
As an example, I really liked Lithionics Batteries and their Never Die BMS, but if I used them with my existing MasterVolt inverter/charger, I would have to carefully program it, and then put in monitoring devices in several new areas to ensure that I did not overcharge them, even with the Never Die BMS in place. Some of those devices would be standalone, and require more programming individually, and if I got it wrong…
Similarly, if I chose to use a Victron inverter/charger, but a different brand of batteries, I would be responsible for integrating the over and under charge wiring and controls into the Victron to ensure no damage was done. All vendors seem to provide ways of doing this through relays and other means, but the conditions of when those items stop/start and fully integrating them correctly would require significant time to program. In addition, if one of those technologies does not work, you could damage your LiFePO4 battery or something worse.
The biggest reason for choosing one vendor is the fact that they tested the components I would be using all connected together, and have guidance on almost all of the configuration. Given LiFePO4 batteries are expensive, and the market is still in adoption phase, I felt that this would reduce my risk of having any problems.
After a lot of investigation, I decided on a fully integrated Victron system for my design.
Design
Figuring out the design of the system took a considerable amount of time. While Victron has a bunch of example diagrams on their website and in their documentation, many of them are generic and don’t get into some of the control details. What I did know was my criteria:
- LiFePO4 battery technology – self balancing with safeties/controls
- 300 amp hours of house capacity
- Non LiFePO4 start battery
- Inverter / charger with at least 2000W of inverter capacity
- Single control point within inverter / charger for all inbound AC power from dock
- Support for charging via solar
- Support for charging via alternator
- Monitoring both on-boat and remote
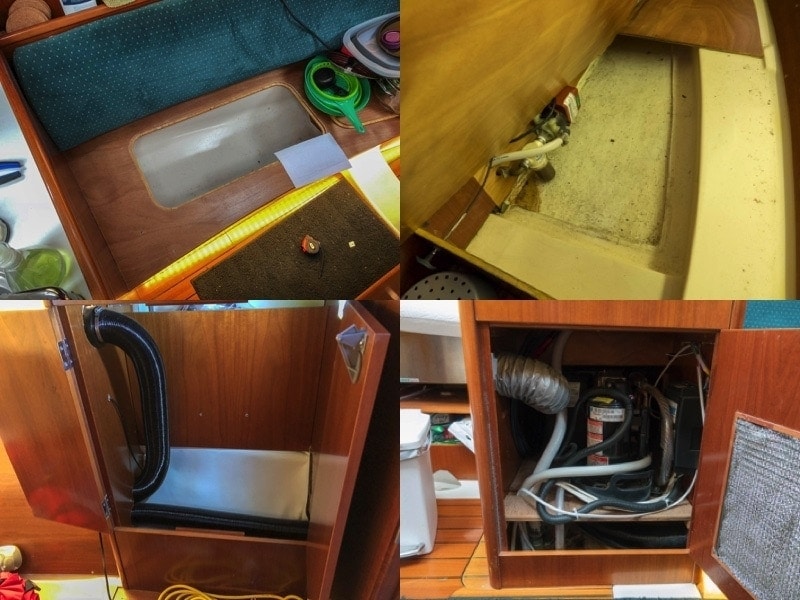
Four battery locations – under the settee, under the master bed, master bedroom cabinet, displacing the air conditioner
One of the single biggest deciding factors in the design was the size of the battery or batteries. Even though I was 99% sure I would choose Victron based on their integration and completeness, I was struggling finding a place for the batteries that didn’t just continue to perpetuate a list. I considered using Lithionics Batteries as they had tons of different sizes and amp hour configurations that I might be able to shoehorn in somewhere.
I looked everywhere throughout the boat for a good location for the battery. One great area was where the air conditioner is mounted, which if removed, could have fit the 300 amp hour Victron LiFePO4 battery, just barely. I still would have had to modify the drawer above, along with the dry goods storage area, and of course, lose the air conditioner. I discussed this with the crew, and they sounded on the edge of mutiny if I removed the air conditioner, so that idea was tabled.
The settee area was OK, but I would have had to split the battery up into smaller 90 amp hour versions, and put multiples in there, which would have required a lot more cabling and fusing. Same with under the master bunk.
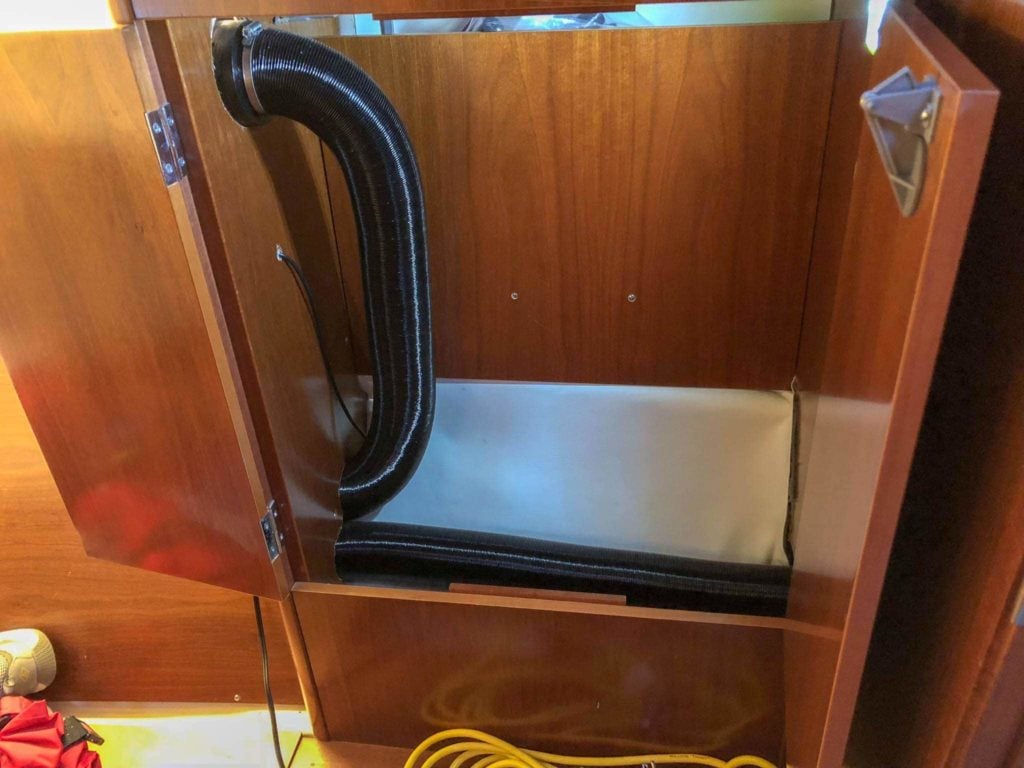
The best location turned out to be the storage cabinet in the master stateroom, which conveniently is located on the port side of the boat. Hopefully having the battery there would negate the list! It would require reinforcement and other modifications, but I was OK with losing storage here if it meant a better balanced boat with lots of power.
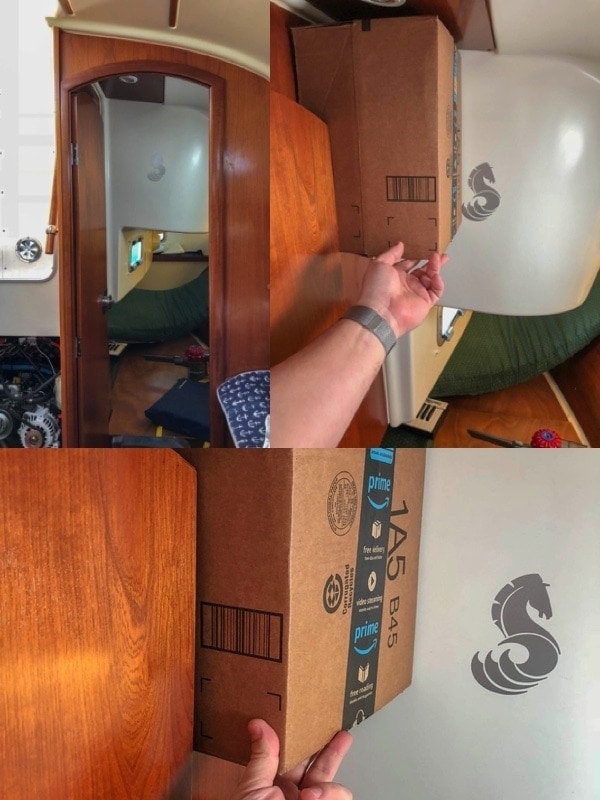
The other consideration in all of these locations was distance from the inverter and distribution busses. I tried locations near the cabinet inside the master stateroom for the inverter, but none of them really were optimal other than cable length to the batteries. Regardless of which inverter I chose, it would stick out into an area where I already bump my head too many times, and it would be noisy and generate heat where I sleep. Ultimately the best location for the inverter/charger was the lazarette, where it had been before.
To start figuring out my design, I jumped into Victron’s manuals, whitepapers, and also Victron Live, their living documentation with comments. I also found forum posts and other people’s designs, mostly for RVs and vans, and reviewed as much of their implementations as possible. Most of what was documented covered the high points such as the inverter, battery, charging sources, and the like, but didn’t cover specific areas like a battery management system and the control pieces around it.
To be fair, Victron has some of the most complete manuals, diagrams, white papers, and examples of anyone out there. Having had MasterVolt on my previous boat Jammy for years, and moving pieces of it over to Grace, I was very surprised at how much more information was available from Victron.

Still, even with all of this, I was missing some key pieces of information, mainly around how the battery management system worked, and did I have all of the right pieces and parts. Victron directed me to Peter Kennedy Yacht Services, a big distributor of Victron in the US. Peter himself answered all of my crazy questions and emails and reviewed my proposed diagram and design. Peter also setup a demo lithium battery system that was extremely helpful in designing mine.
I ended up with the following Victron components:
- MultiPlus 12v / 3000 W / 120 amp charge Inverter/Charger
- 300ah LiFePO4 smart battery
- BlueSolar MPPT 75/15 solar controller
- Color Control GX display
- BMV-712 smart battery gauge
- VE.Bus Battery Management System
- Digital Multi Control GX remote inverter panel
- Cyrix battery combiner for alternator charging
- Battery Protect 100 for DC Loads
- Battery Protect 65 for solar panel charge control
- Battery Protect 65 for Wallas heater
I went through many, many revisions of how things were going to connect, where they were going to be installed, and configuration options. One of the most valuable tools when planning things on the boat, which I’ve cited before, is OmniGraffle. For Windows users, it is similar to Visio, but with a lot better user experience and easier to use. It was extremely helpful in designing this system as I could vary how things were cross connected and easily see issues with the design.
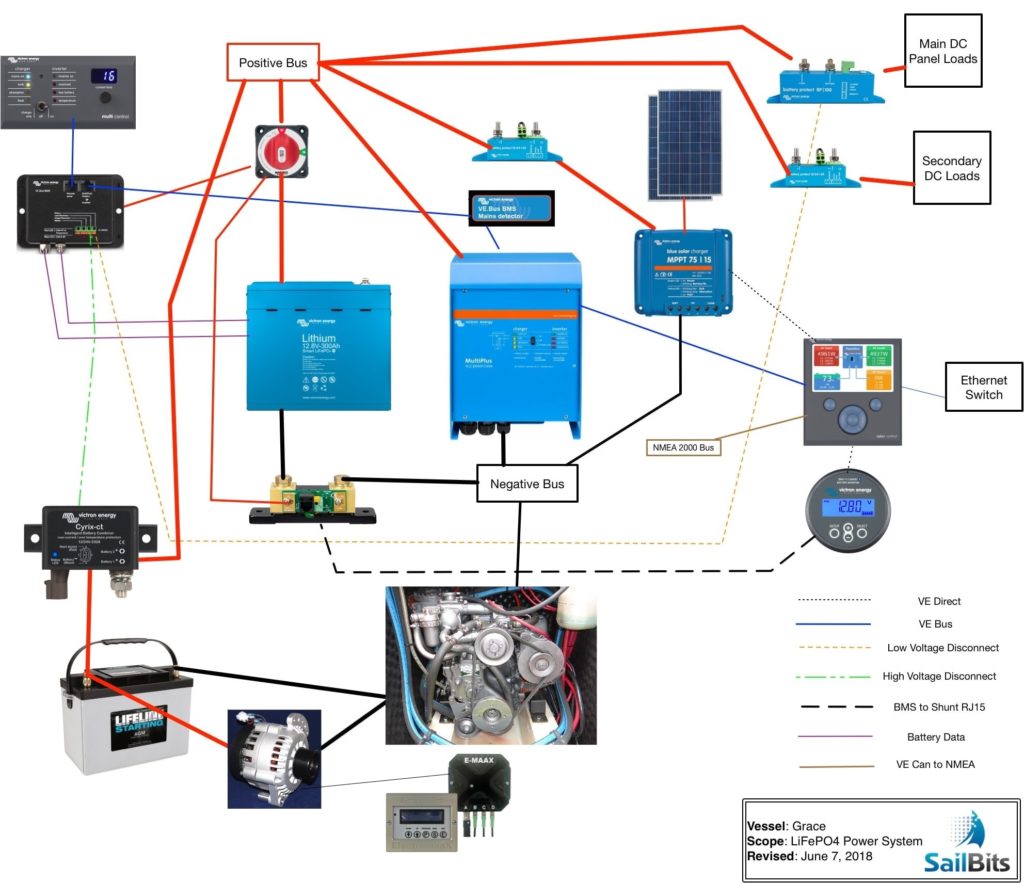
The whole system came together very well, and is represented above. I didn’t put every last connection on the diagram, but the important control and power pieces are there. Lets go through the design:
House Battery
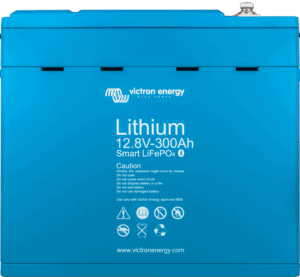
The central part of this is the 300ah 12v LiFePO4 Victron Smart battery. This simplifies fusing and wiring, but it does mean it is a single monolithic piece. This means that if this one battery dies somehow, the whole house system is unavailable. I’m OK with that since the likelihood of that should be pretty low given the amount of instrumentation and control is around it. I also looked at two smaller amp hour batteries, but overall they would have required quite a bit more room, and more wiring and complexity. For my needs, this seemed to be the best solution.
I really liked how Victron’s Battery Management system would connect directly to the battery, and that you can check on individual cells via an easy to use Bluetooth app on your phone.
Start Battery
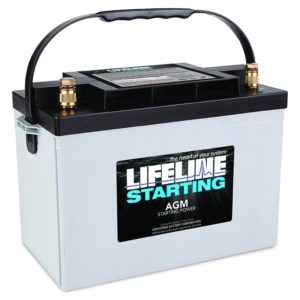
The start battery is a LifeLine AGM starting battery I had from another random project. It is more than enough for my 20HP Yanmar engine.
Control
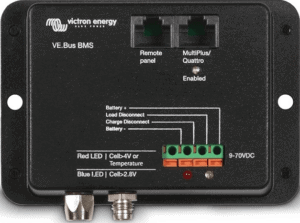
The VE.Bus BMS is the main part of the control system. It connects directly to the LiFePO4 battery and monitors its health constantly. It is responsible for dropping loads if the battery is too depleted, or stopping charge sources if the battery is full. The unit has two RJ45 ports – one connects to the inverter/charger and allows it to control it directly, while the other connects to the Digital Multi Control GX panel which I cover below. In addition, there is a set of power connectors, and two connectors for the low voltage and high voltage disconnect signals going out to the control devices/relays.
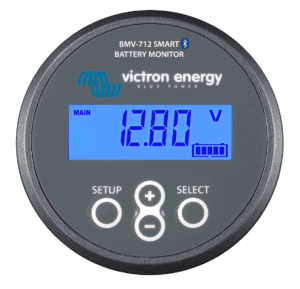
The second part of the control system is the BMV-712 battery monitor. This piece is critical with a LiFePO4 battery to ensure you are always aware of the amount of amp hours you have consumed. It consists of a shunt at the house battery, a gauge in the main panel, and a connection between it and the next part of the control system – the Color Control GX display. I also wanted it to monitor the voltage of my start battery. It has a ton of configuration options, and is one of the best battery gauges I have ever seen. You can also interact with it via Bluetooth which is helpful to configure it, as well as check on status of your batteries via your phone.
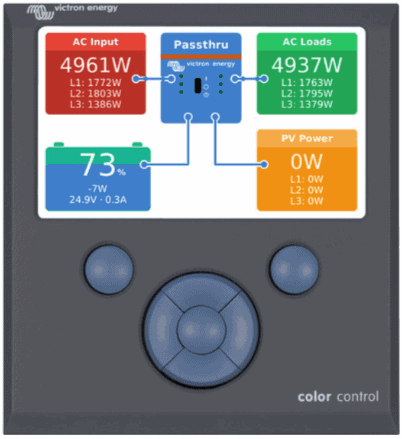
The most visible part of the control system is the Color Control GX. This is a beautiful panel that connects everything together in the Victron world. It has bus ports for VE.Direct, VE.Bus, VE.Can and more. You can configure each of the connected devices (to a certain level), setup alarms and monitoring pages, and set parameters of your Victron “system”, allowing for different behaviors depending on the pieces you have connected together.
One of the best parts about the CCGX is its ability to send your data out an internet connection to the Victron portal, or VRM. This allows you to see pretty much all of your data online from a web browser, or from one of Victron’s Android or iOS apps on your phone. You can even set things up to allow for remote control of the Color Control GX via the website, which is useful if you need to see more details or make a change remotely.
The Color Control GX will be the flagship centerpiece of the system, allowing for quick access to the health of the whole power system.
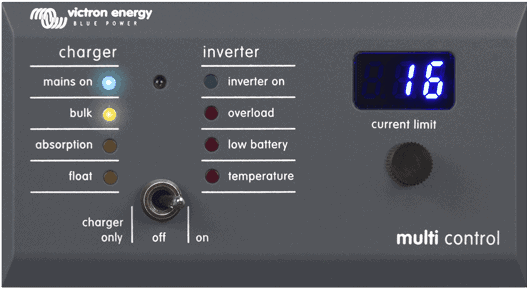
An additional part of the control system is the Digital Multi Control GX panel, which is essentially a carbon copy of the panel on the front of the inverter/charger. This piece is required, and is sort of a hack in my opinion, because if you want to change the input amperage available via AC power, you need this panel. Without this, you cannot change it with the current Victron setup – something that clearly sounds like a hold over from some of the different busses in use. Still, it is nice to have a panel that shows the inverter/charger status remotely, so I’m not complaining. In fact, I use it all the time to turn the inverter/charger off when we’re ready to leave the dock and I don’t want inverting to occur. This directly connects to the VE.Bus BMS.
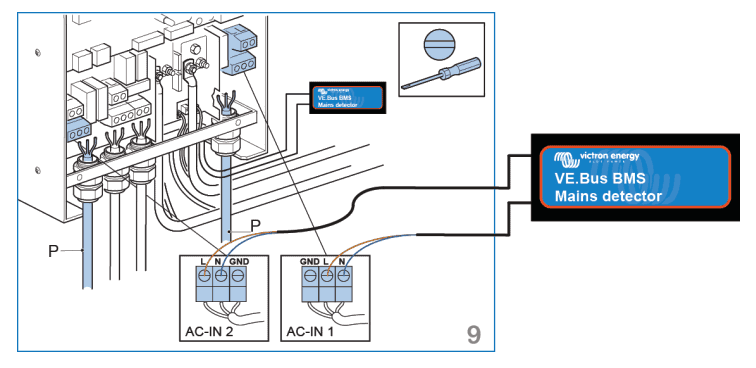
The final part of the control system is the sometimes overlooked VE.Bus Mains Detector that sits at the inverter/charger, and is connected to the VE.Bus network and VE.Bus BMS. This device allows the VE.Bus BMS to “wake up” the inverter/charger in the event that you completely deplete the LiFePO4 battery and it shuts everything off for safety. Once you reconnect to AC power, the inverter will still be commanded off by the VE.Bus BMS, but this device allows it to turn it back on once it senses AC power.
One thing I will mention is that the different types of busses available for Victron products is a source of a lot of confusion. You have at least three different similar types of busses – VE.Bus, VE.Direct, VE.Can – and some products support varying versions of some of these. The only device that has all of them is the Color Control GX, which is good since that is the central piece. However, it is clear that some of these products were built separately, and Victron is trying to unify them all. The result is different size and types of cables, confusion over which ones are necessary, and a complex setup in some cases. Victron is apparently moving towards VE.Bus for most things, with the Color Control GX using VE.Can to dump information onto a NMEA 2000 network, and potentially longer term improvements.
Charging
Charging can happen one of three ways – via the Inverter/Charger when connected to AC dock power, from the engine alternator, and from the solar panels.
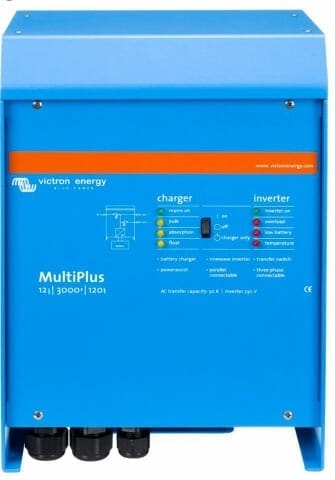
The MultiPlus 12-3000-120 Inverter/Charger can charge at 120AMPS while on AC power. It is connected to the VE.Bus BMS and controlled by it depending on the needed charge. It is a very effective and high power charger. Since Victron makes the battery and inverter/charger, there are only a handful of settings required to get it setup correctly, which is a nice change from other products I reviewed.
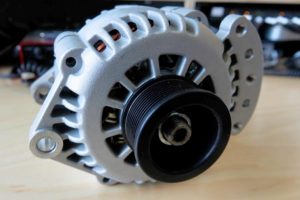
The engine alternator is a Electromaax Cruiser High Output model capable of 120AMPS. It is paired with an E-MAXX Pro regulator and display panel, and the engine belt system has been upgraded with their serpentine kit to provide for dust free charging, and allow for the 120AMP output. I will be delving into this product a bit more in a separate article. The start battery can be connected to the LiFePO4 battery during charging using the Cyrix relay. It watches for charge level voltages on the start battery terminal, and reads a voltage signal from the VE.Bus BMS, and will connect the two batteries together if criteria are met, and charging is appropriate.
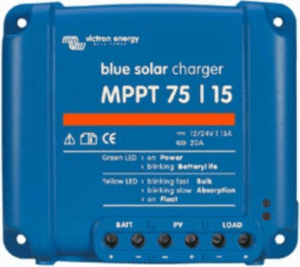
The solar panels are two 100W flexible panels mounted on my bimini, connected to the BlueSolar MPPT 75/15 solar controller. The solar controller is connected to the Color Control GX via VE.Direct, but it cannot command it off – another strange compatibility limitation, likely due to the bus type. As a result, I have a BatteryProtect 65 between the charging leads from the MPPT controller and the LiFePO4 bus. This allows the VE.Bus BMS to completely disconnect the solar panels in the event that the battery is being overcharged. The controller also has Bluetooth, and can be configured using the Victron app. You can also see a wealth of information on solar performance, charging, and historical data via Bluetooth.
Loads
There are three main DC power load sources – the Inverter inverting DC power to AC outlets throughout the boat, the main DC panel and loads, and the secondary loads including the Wallas heater, etc.
The inverter loads are controlled by the inverter itself, along with the VE.Bus BMS.
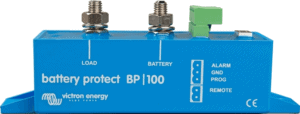
The main DC panel and loads can be disconnected in the event of a low voltage condition by a 100AMP BatteryProtect that is connected to the VE.Bus BMS.
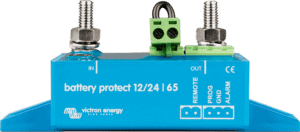
The secondary loads can be disconnected in the same way, but with a slightly smaller 65AMP BatteryProtect.
Charge & Load Limiting
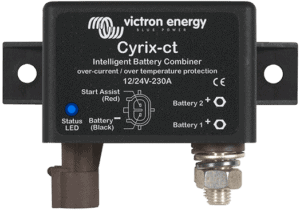
The control parts of the system are responsible for turning off loads or charging in the event of an issue. Those control systems include the BatteryProtects for the solar charger, DC loads, and secondary loads, as well as the Cyrix combiner for the start/alternator charging source. These devices sole purpose is to monitor voltage (in the case of the Cyrix) and disconnect their device if the VE.Bus BMS commands it to.
They are critical to ensuring the LiFePO4 battery is not overcharged or discharged too much. This is part of the complexity in a LiFePO4 system that is required, but I think this is something that even non-LiFePO4 battery bank setups should consider. I have worked on tons of folks’ battery systems, and many times they have drastically overcharged batteries with badly regulated alternators, or incorrectly configured chargers. People also discharge their batteries to frightening levels without understanding the implications – once voltage falls to a low enough level that stuff stops working, they consider it empty, which could potentially be damaging their batteries.
The Cyrix and BatteryProtect products can be configured to operate in standalone modes and monitor specific voltages, and take action when things fall below/above particular thresholds. I think it could be interesting to look into using these with traditional banks as well.
Inverting & AC Power Control
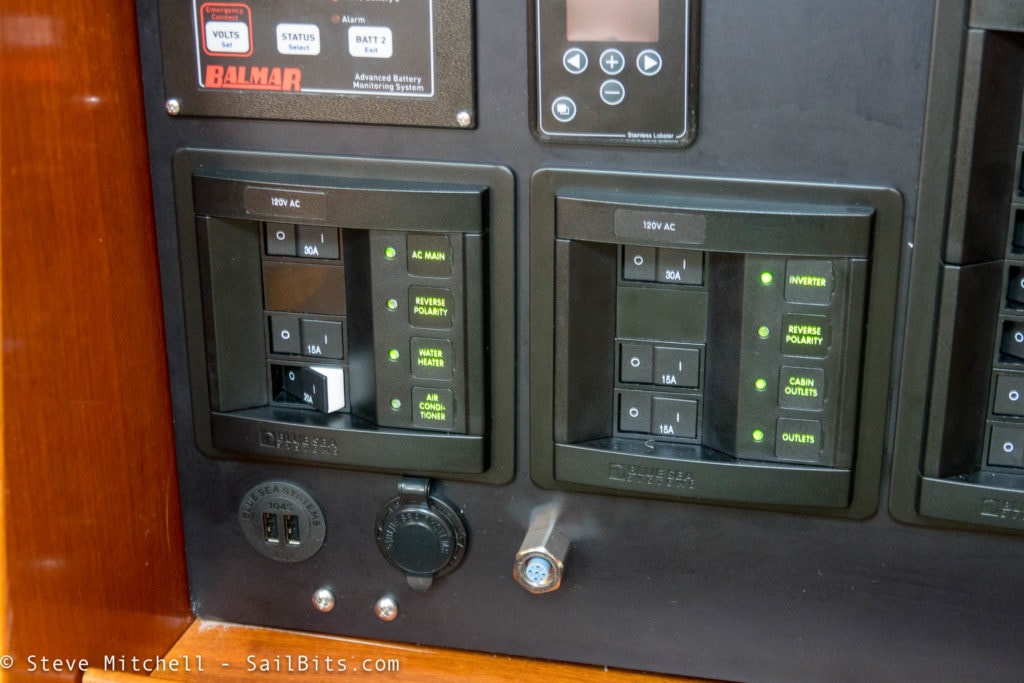
Grace’s AC items include two different 15AMP circuits for AC outlets, a water heater, and an air conditioner. The latter two devices are way too high to run away from the dock, and were classified to be used when dock AC power was available. One of my requirements was to have inverter power while away from the dock just for AC outlets throughout the boat, and the MultiPlus Inverter/Charger is perfectly suited for this.
The plan was to run AC power from the dock inlet plug to an ELCI breaker (new) and then into the MutiPlus Inverter/Charger. The MultiPlus model I chose has two AC outputs, one for inverted devices, and one only available when standard AC dock power is on. This allows a centrally controlling point for all AC power.
There are a couple of benefits in doing this. Most importantly, I can use the Digital Multi Control panel at the nav table and a Victron feature called PowerControl to dial in a particular AC dock amperage so I don’t trip the dock box circuit breaker. I had something similar with my MasterVolt setup, but it was never quite that easy to set. This configuration is perfect, as when we pull up to the dock, the air conditioner and water heater can kick on and suck a ton of AC power, and the charger gets whatever is leftover to charge the batteries, and we’re not tripping breakers.
In addition, if there is too much load on the AC power side, the inverter can source power from the batteries to augment the AC power available if you so choose. At the dock that would definitely be nice if needed. This feature is called PowerAssist.
The overall inverter power was slightly higher than I needed at 3000W, but this was the only inverter that (a) fit where I wanted to put it, and (b) had the multi AC links, load sharing and power control features all in one.
Careful Wiring for BMS and BMV
The VE.Bus BMS and BMV-712 battery monitor need to be wired in a way that they never get turned off even when the LiFePO4 battery reaches critically low levels. Both of them are critical to ensure you know the state of the LiFePO4 battery, and the BMS can see if charge is applied and command other things back on. If it gets shut down when voltage is low, nothing will come back on and you’ll be in a bit of a catch 22. However, if you intend on leaving the battery unattended for long periods of time and it won’t be powering any load, put everything into storage mode, disconnect the BMS and BMV. Even leaving the BMV and BMS connected in a deep discharge situation can be bad, as they will continue to drain the battery, which is death for LiFePO4 after a certain level.
This is sort of a contradiction if you think about it – they should always be connected, but in the event that you are in a bad situation with super low capacity left, they themselves could damage the battery over a long while, drawing a small amount of power.
For my design, I have a panel with fuses wired directly off the battery terminals so that even if I throw the battery switch, they aren’t disconnected. I have so much instrumentation and monitoring that I would always know when the battery was being severely discharged, and not be able to get to the boat within that same day and completely disable things if there was a critical long term outage of AC power. If I were leaving things for a long period of time, I would turn everything off, and pull the fuses for the BMV and BMS.
Order!
Once I was happy with the design, I placed my order through PKYS for all of the Victron components. I waited to order wire and other bits until everything came, and I could validate my placement and design.
Read about my installation and use of this system!

