When I first purchased Grace, she had no GPS, no chartplotter, and only a depth and wind sensor. Since then, as with Jammy, I’ve built several types of networks across her that gives me visibility into the various systems. I will be continuing to enhance the network over the next year to include more systems and deeper integration with things like SignalK and WiFi.
The current system has five major network types with more than 20 devices, and allows interconnectivity and communication between all, but with some limitations and challenges.
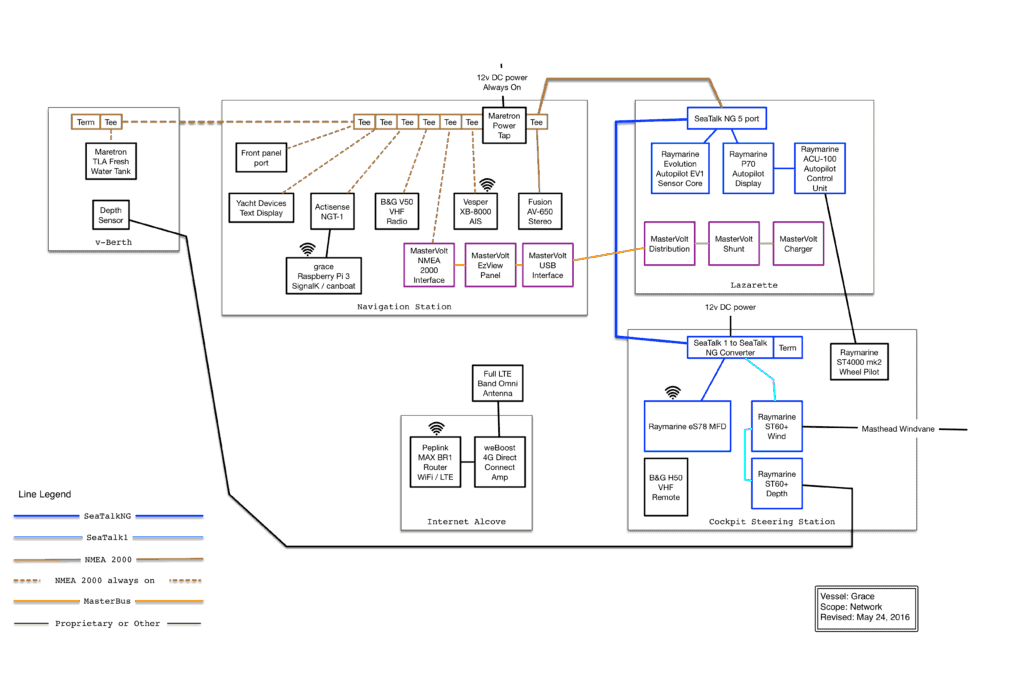
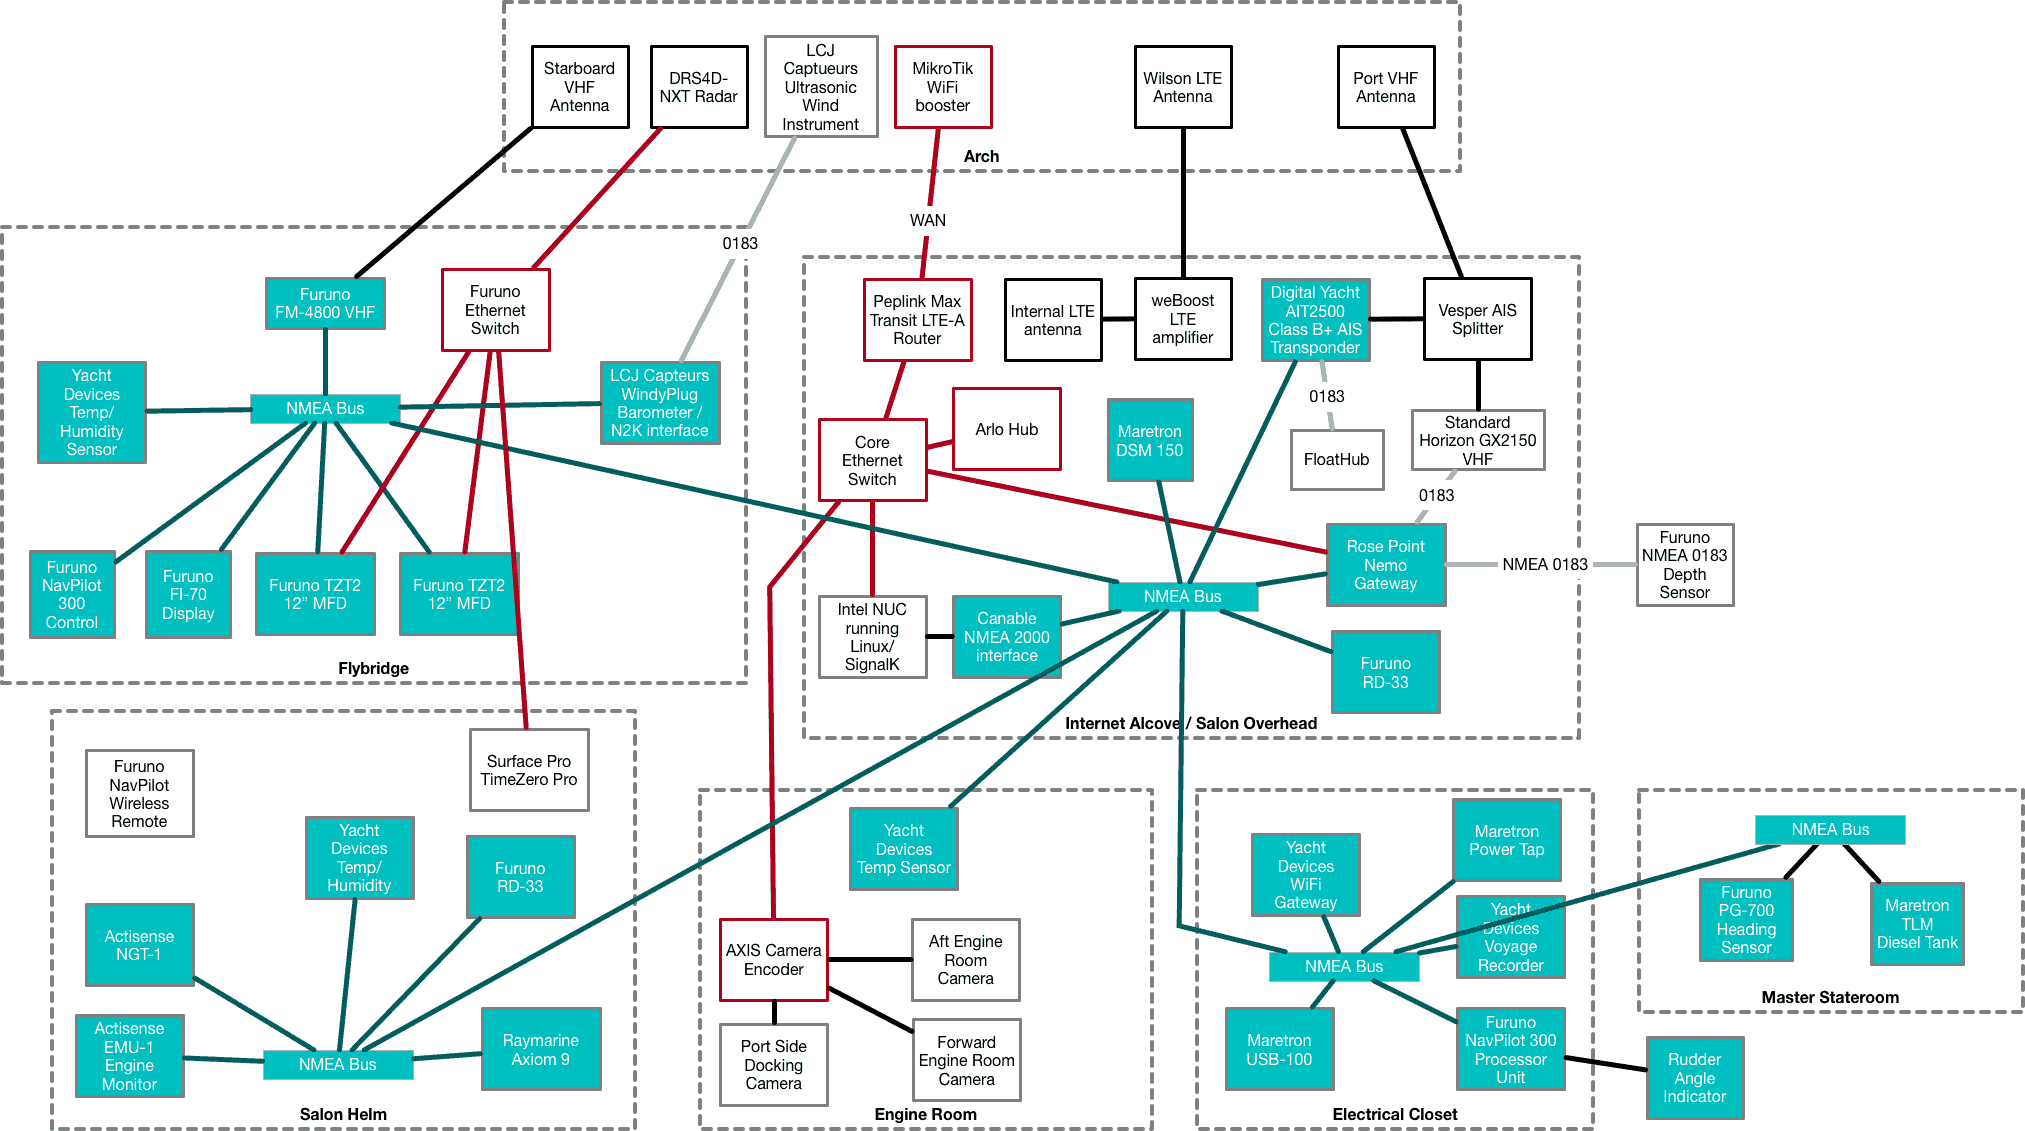
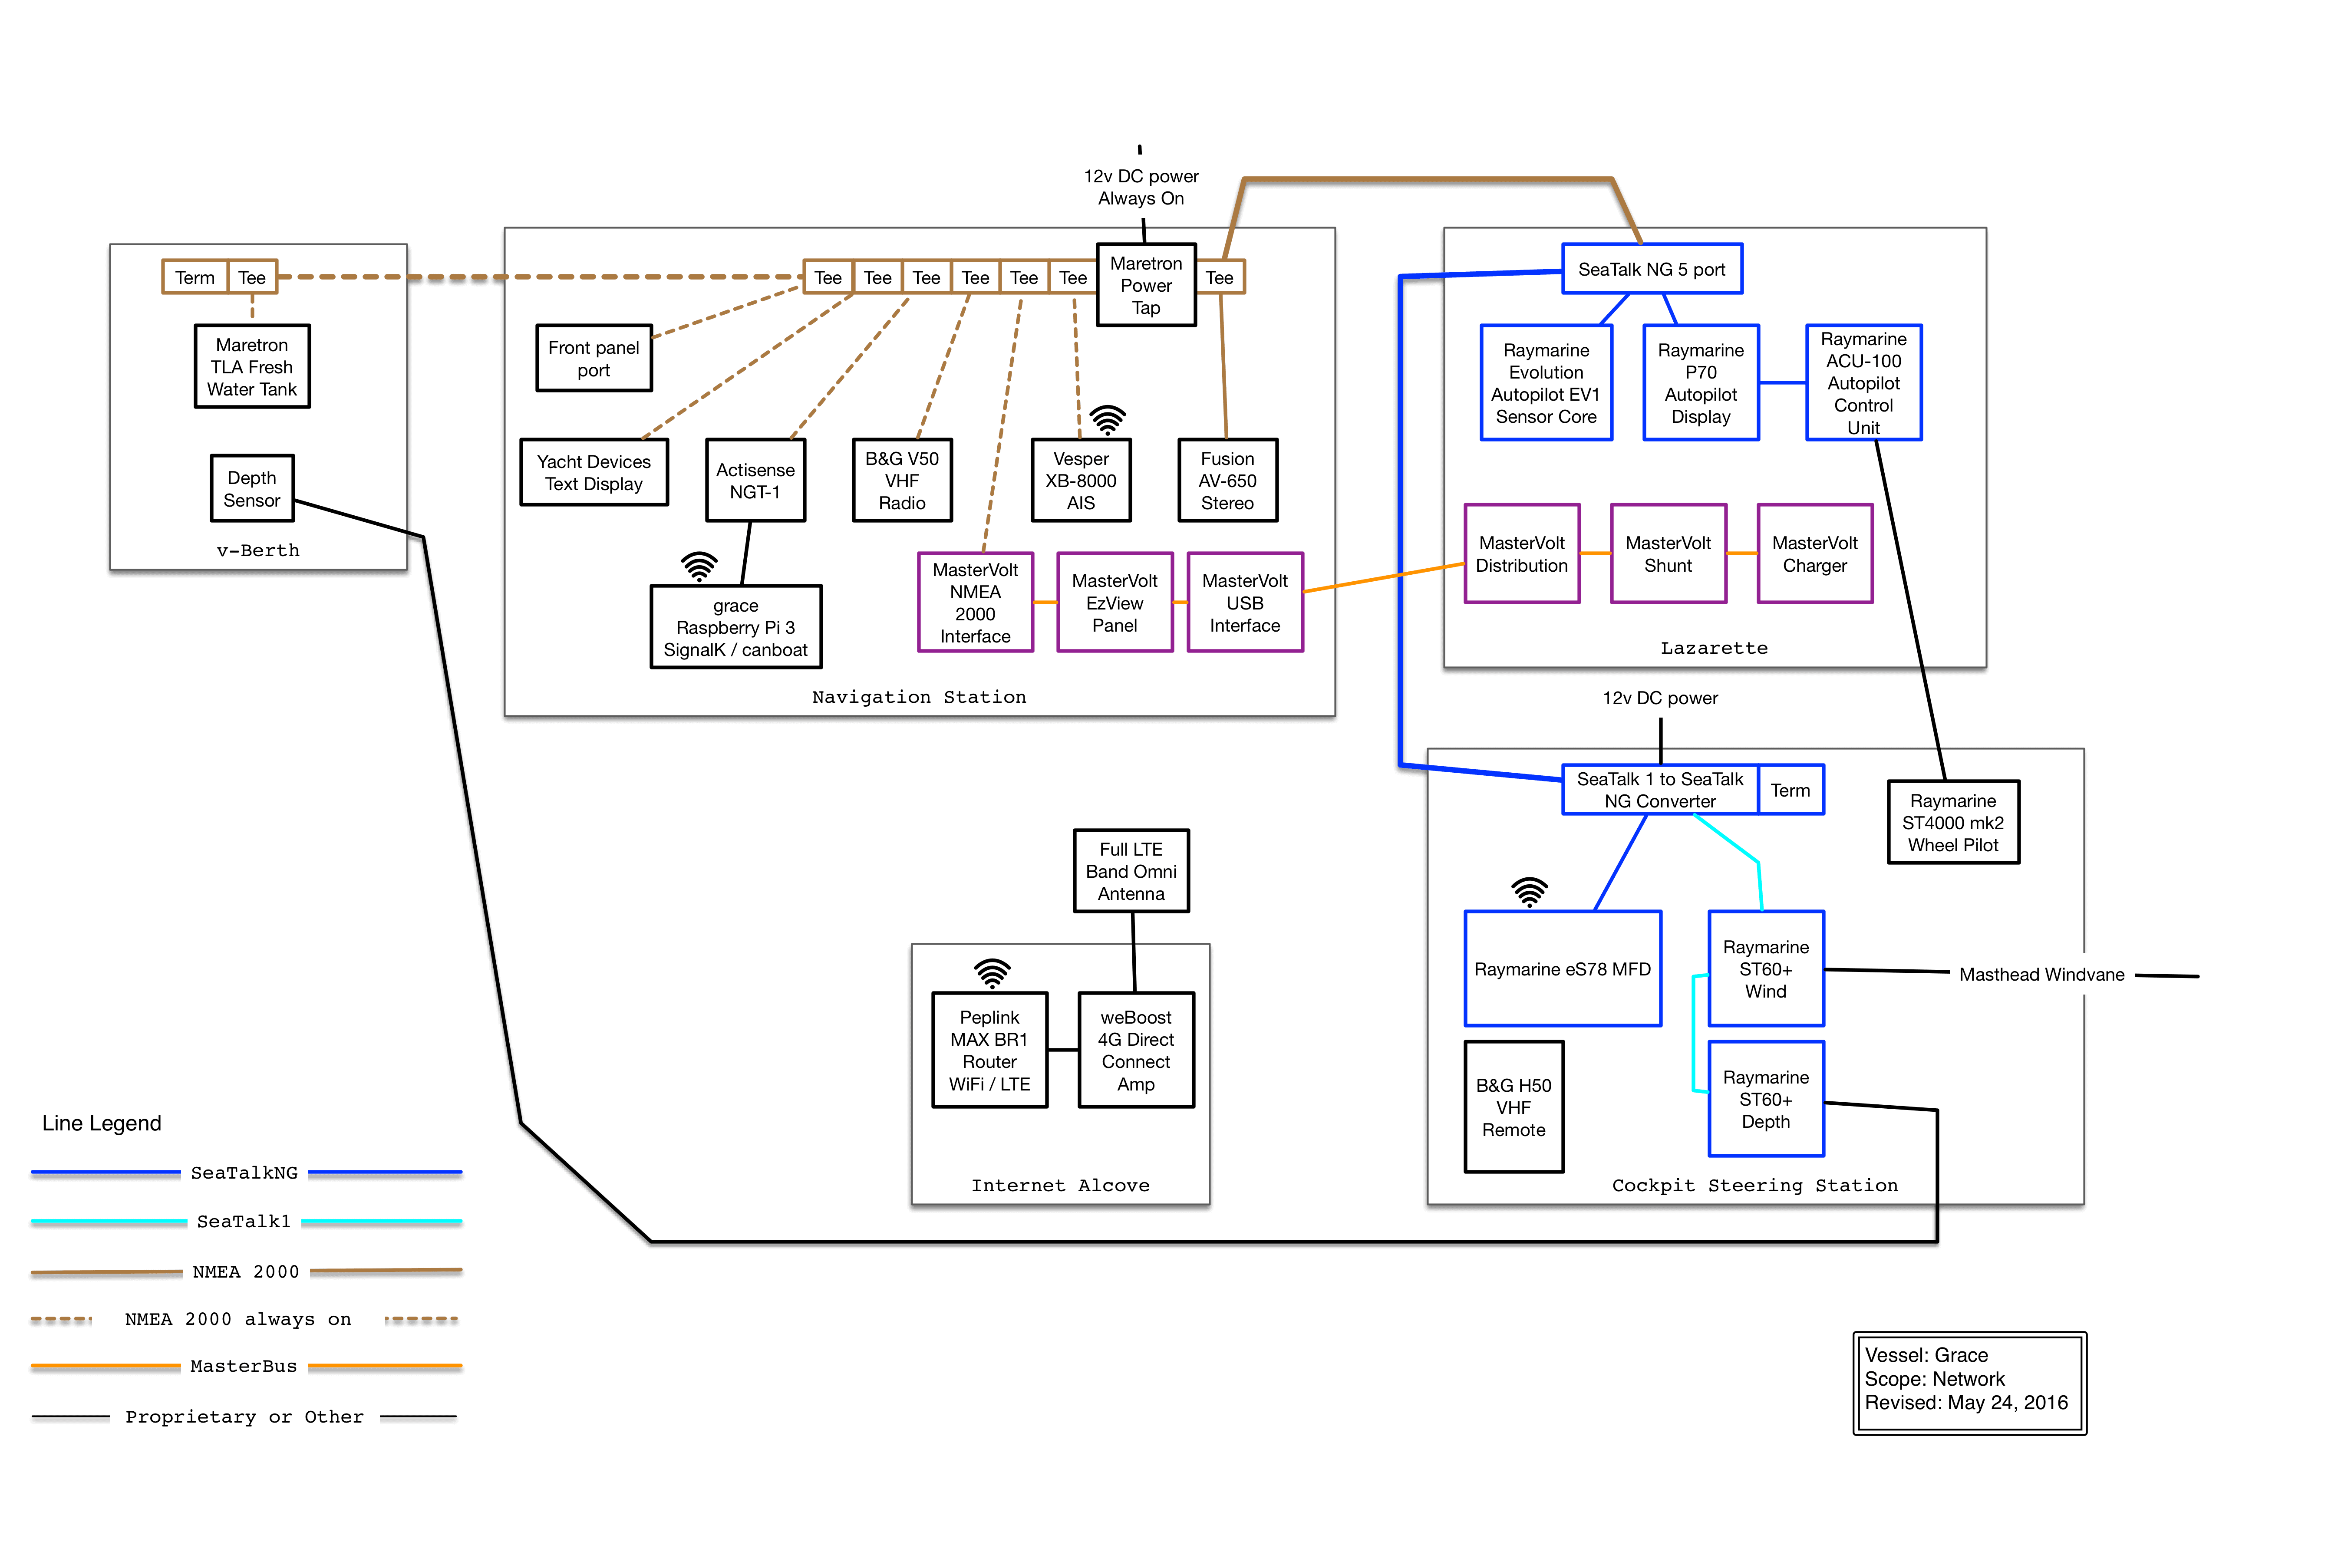
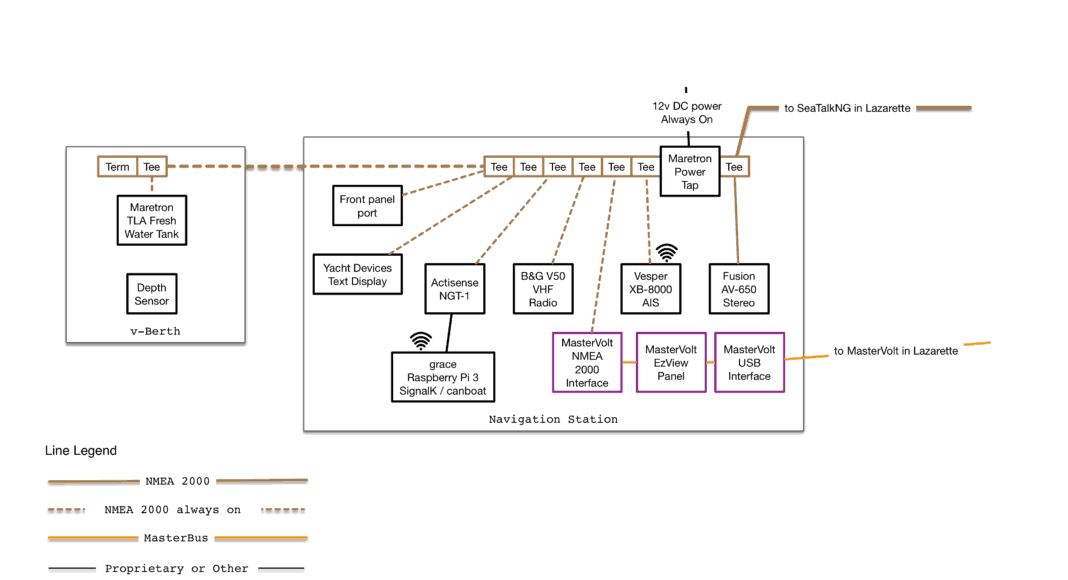
Grace’s Network as of May 2016
I’ve updated my network to add a few new items, and improved some others – you can check it out at Grace’s 2017 Network Update.
The Goal
There are several goals for having a network of this complexity on the boat:
- Know the state of critical systems from as many places as possible
- Allow device cross communication
- Eliminate proprietary single-view displays
- Use as many device features as possible
Given my background as a network and systems administrator, this project was fairly easy for me to setup and implement, and I enjoyed it a lot. Average boaters may not have as complicated of a network unless they have a super yacht. However, I believe the lessons I’ve learned regarding interconnectivity, limits, and configuration are useful for others.
The Networks
There are five major networks on Grace:
- SeaTalkNG – newly installed, necessary for eS78 chart plotter and Evolution Autopilot
- SeaTalk1 – legacy for Raymarine ST60+ depth / wind instruments
- NMEA 2000 – cross connected to SeaTalkNG network, necessary for N2K capable devices
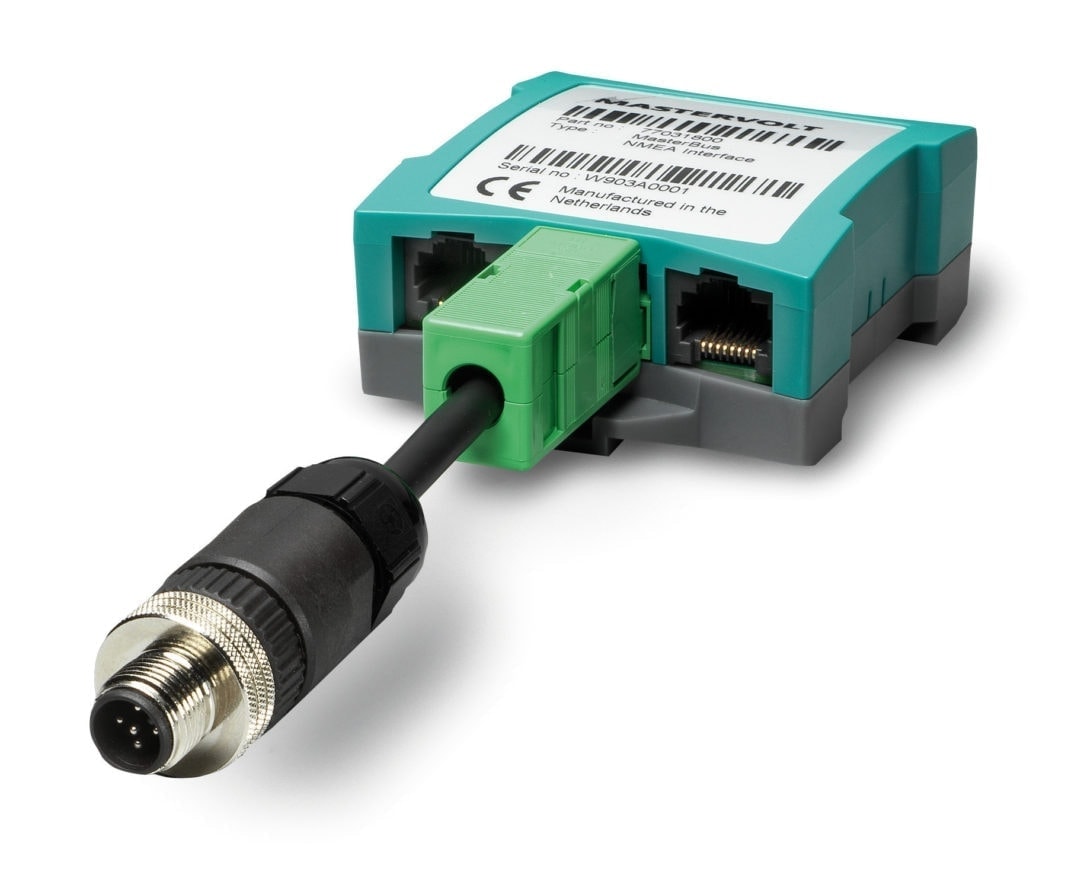
- MasterBus – specific to MasterVolt DC power system components
- WiFi – from the Pepwave router out to various devices
SeaTalk1
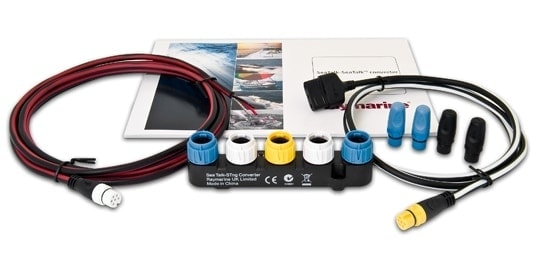
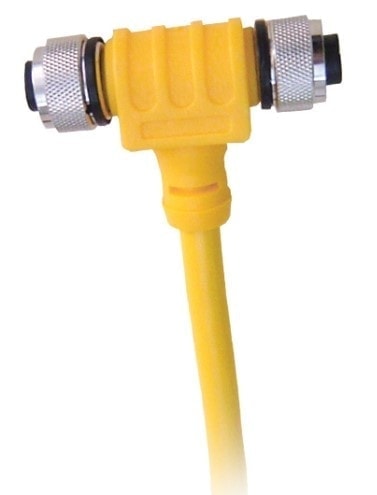
The SeaTalk1 network was necessary because of the existing Raymarine ST60+ depth and wind instruments. They work fine, and I don’t want to replace them until they have failed. To get these instruments onto my new SeaTalkNG/NMEA 2000 network, I needed the SeaTalk1 to SeaTalkNG converter kit available from Raymarine here.
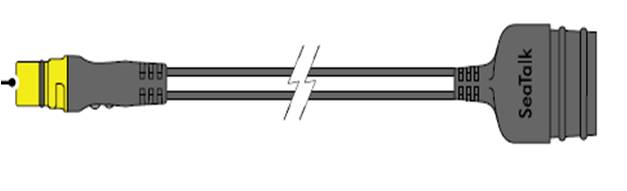
The key is the cable above, which connects to the back of the depth instrument, which in turn is connected to the wind instrument. This cable then connects to the converter block itself, to the yellow port, and converts the older protocol to something understandable on SeaTalkNG and NMEA 2000. The converter block itself has some sort of chip and logic inside of it to do the conversion, and only supports specific NMEA sentences both directions. It has its own firmware and has been updated several times via my Raymarine eS78 chart plotter.
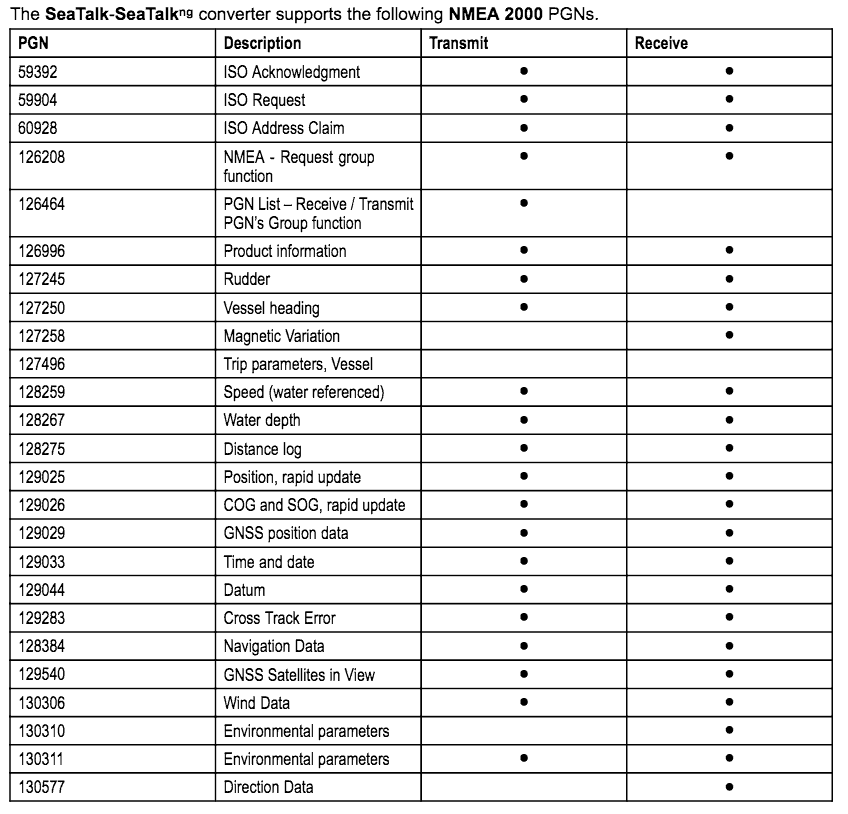
SeaTalk1 to SeaTalkNG converter supported NMEA 2000 PGNs
With all of this connected, depth & wind data is now present on the rest of the network, and the depth / wind instruments are also getting data from the NMEA 2000 network as well. You can see above the current list of PGN’s that are shared back and forth across the converter.
SeaTalkNG
I chose Raymarine instruments for Grace because she already had a Raymarine auto pilot, and wanted to have as much of an integrated system as possible. I struggled getting autopilot stuff to work with Jammy because of systems that were from different manufacturers.
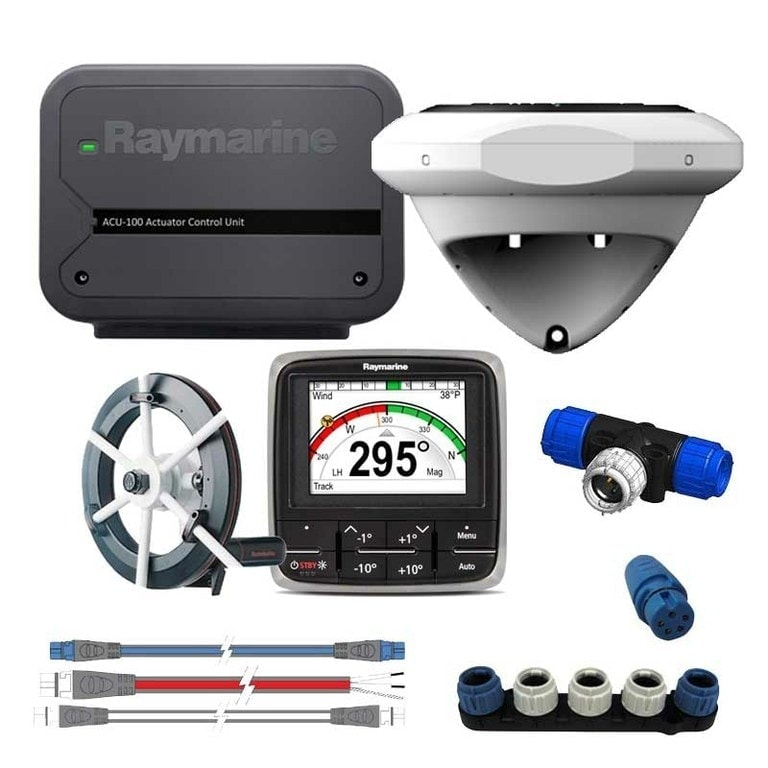
I ended up updating the autopilot to the new Evolution series EV-100 Sail package which included the EV1 Sensor Core, ACU-100 control unit, and p70 display. It also came with a cabling kit which included enough lengths to get started, but I had to add some longer spur and backbone cables.
My existing wheel pilot motor was getting old, but it was identical in size to this new mk2 version, so swapping it out was super easy, and required no drilling or cutting. Within a few hours of work, I had a more modern autopilot that was more accurate than the existing one, and that interfaced with other Raymarine devices better.
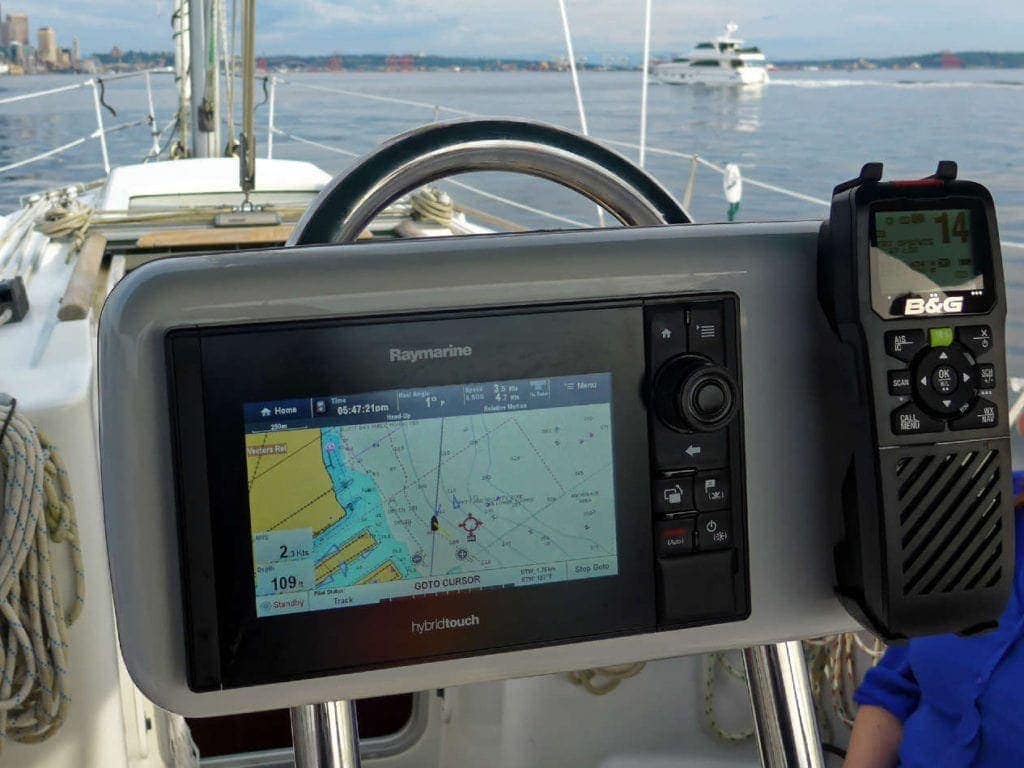
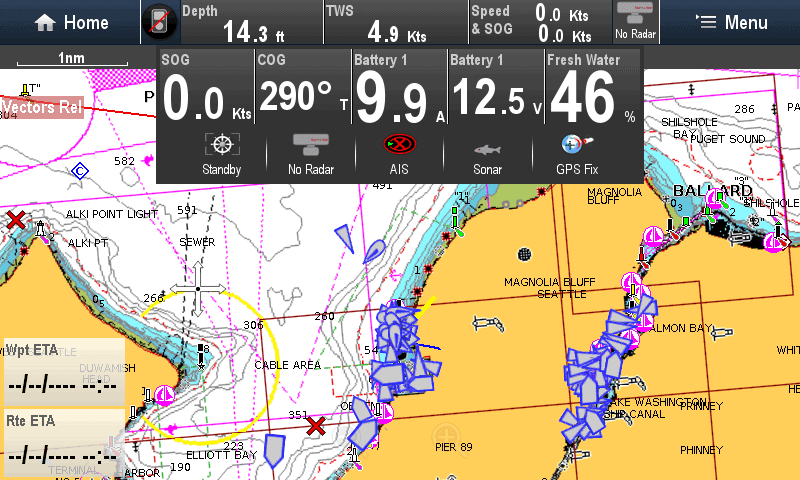
I chose an eS series chart plotter as my primary interface in the cockpit after looking at the full Raymarine line. The key decision factors were interface control and power consumption / size. The eS78 can be used both by touchscreen or via a wheel, which is a great way of mixing the technologies. I find that both work in different situations, and I would never want to be with just one – sometimes touch mode is frustrating.
I have updated to a Raymarine Axiom MFD and have more details about it in my Raymarine Axiom and Lighthouse reviews.
This completed the Raymarine portion of the network, other than a SeaTalkNG to NMEA 2000 cable that I made and connected to the NMEA 2000 backbone cable heading to the Navigation Station down below. Making one of these is as simple as lopping the end off of a SeaTalkNG spur or drop cable and adding the correct NMEA 2000 end. I bought my NMEA 2000 cable ends in bulk online – they are made by Maretron, and easy to install.
NMEA 2000
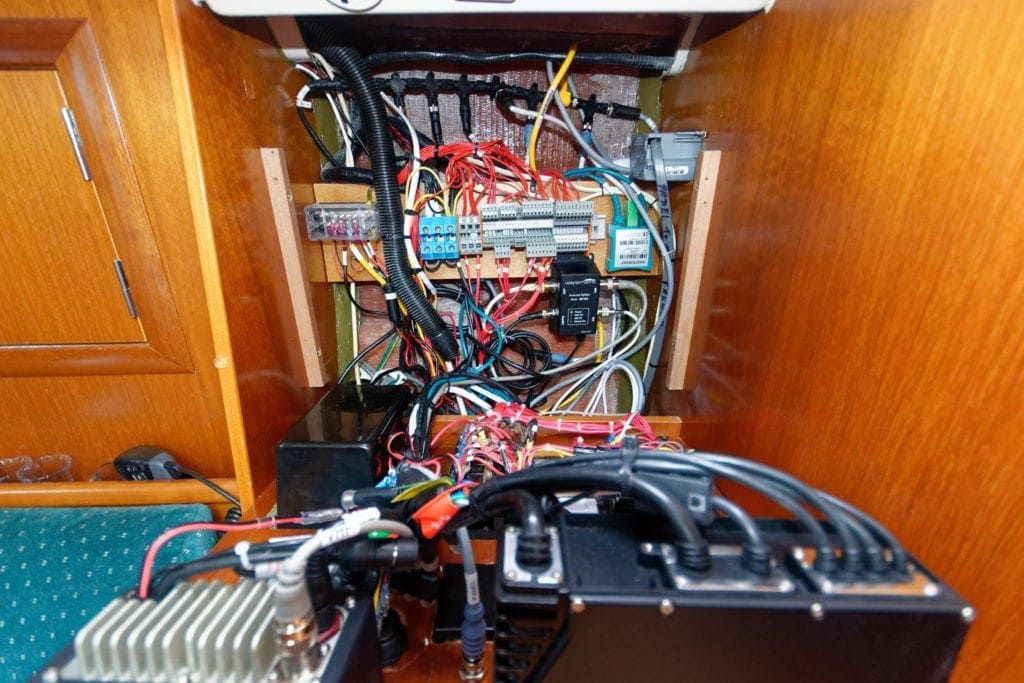
The NMEA 2000 network is primarily behind the Navigation Station, since so many devices are mounted there. In addition, it runs forward to the v-berth for the Maretron tank adapter.
This part of the network is pretty standard – NMEA 2000 taps with drop cables to the individual devices. I am considering installing an Actisense QNB-1 as I had on Jammy to reduce the overall space usage and consolidate some of the cabling.
Most of the devices here are connected to share data to the rest of the network or be controlled remotely. I go into detail on each of them below.
Fusion Radio

The Raymarine eS78 has a great system for controlling Fusion radio products. Crew members will routinely reach over while we’re underway and flip to the Fusion screen to change songs, volume, etc. It is great to be able to skip songs, turn up the volume in one of our two zones, or quickly pause it if there’s something going on. With the R17 release of Raymarine’s software, there is even more control available – more on this in a future post.
B&G VHF Radio

The B&G VHF radio is connected so it can get coordinates from one of the GPS sources on the network, and send AIS data onto the network for others to consume. It is also supposed to forward DSC emergency call and I’ve seen it work once, but I’m not 100% sure if it’s all working together in harmony.
Vesper XB-8000 AIS

The Vesper XB-8000 Class B AIS transponder shares AIS data it’s seeing via the VHF antenna, and also dropping it’s GPS data from a dedicated antenna onto the network for others to use.
My on board Raspberry Pi 3 linux system also connects to the Vesper via a TCP port and submits the AIS data to various AIS sharing sites as covered in Services.
Other apps and systems also use this same TCP port to connect to for data over WiFi such as Coastal Explorer, SeaNavUS, iNavX, NMEAremote, and many others.
Yacht Devices Text Display
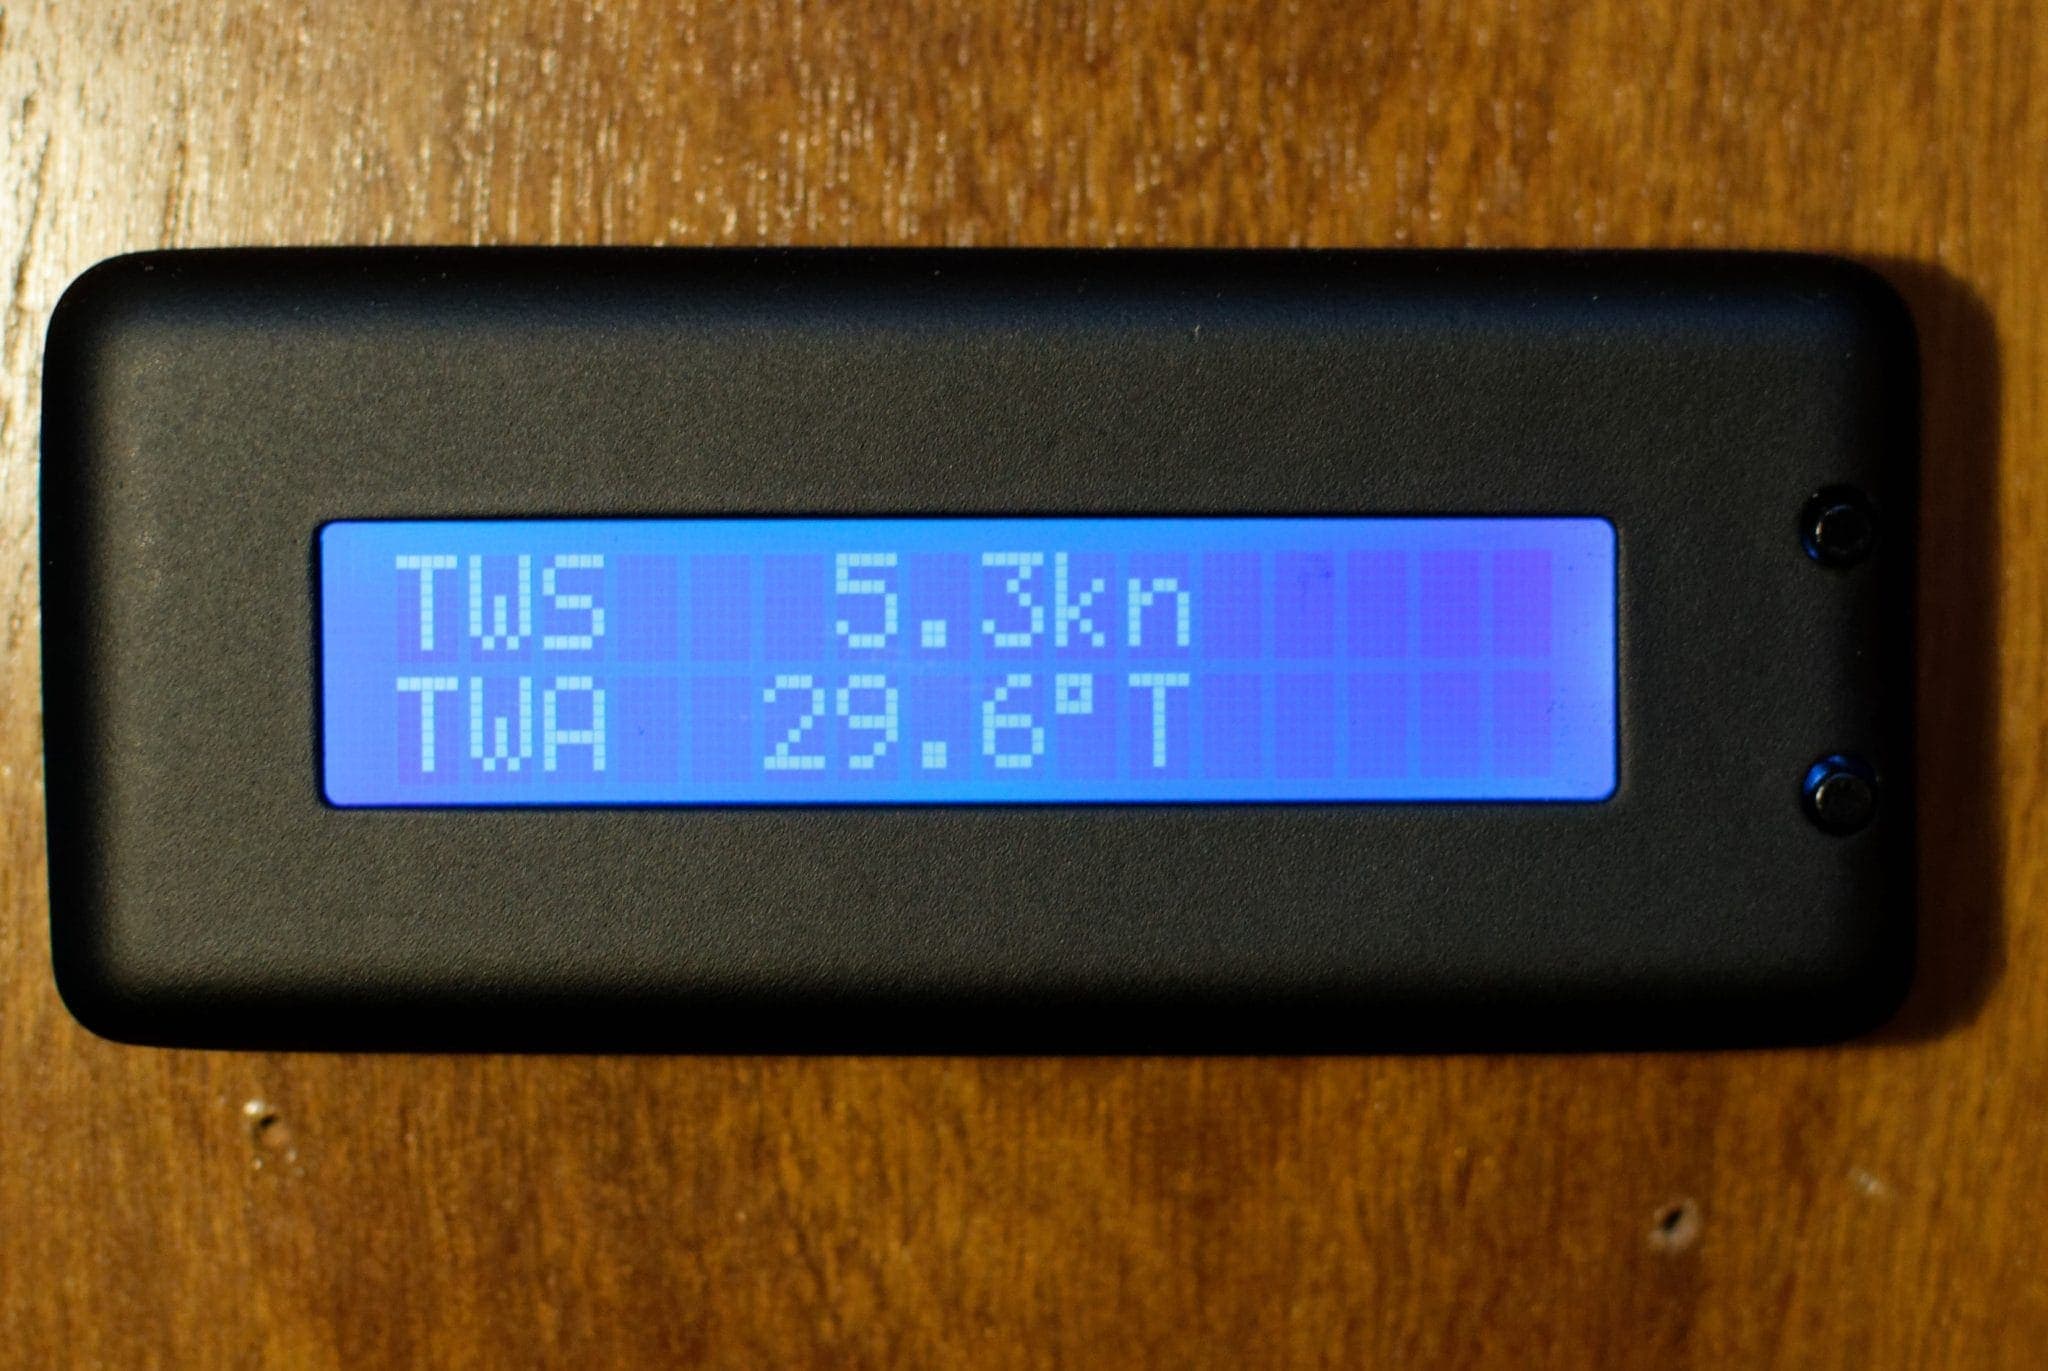
This is a fairly new addition to the network, and I am going to be writing more about it soon. It is great for showing a couple pieces of data all of the time at the Nav station. I can see it clearly from most of the salon, and can quickly glance over to see the depth, wind and other details without having to use my phone, go up above, or some other means. It sips power, and can display a number of helpful bits of info.
Actisense NGT-1 & SignalK
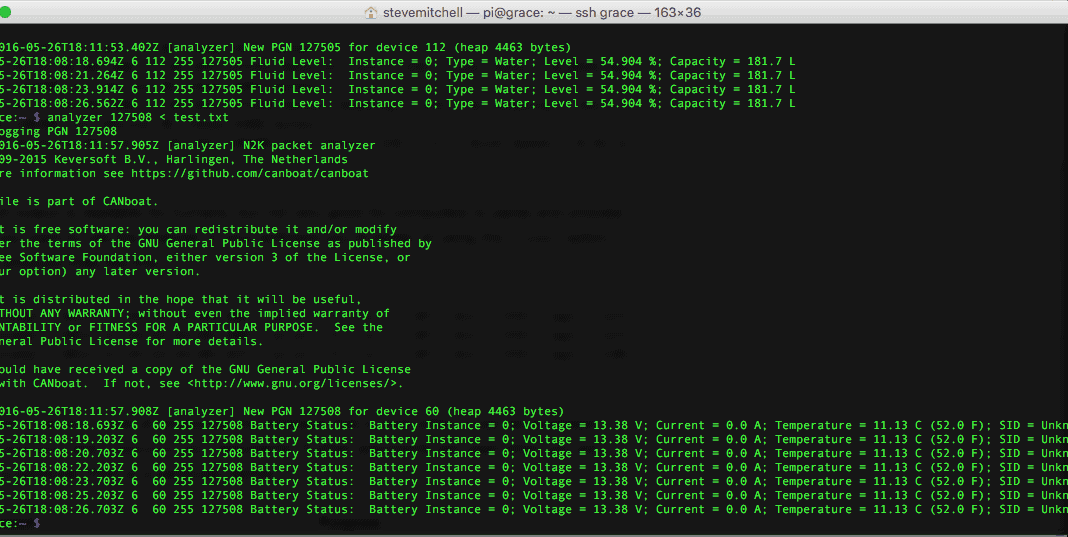
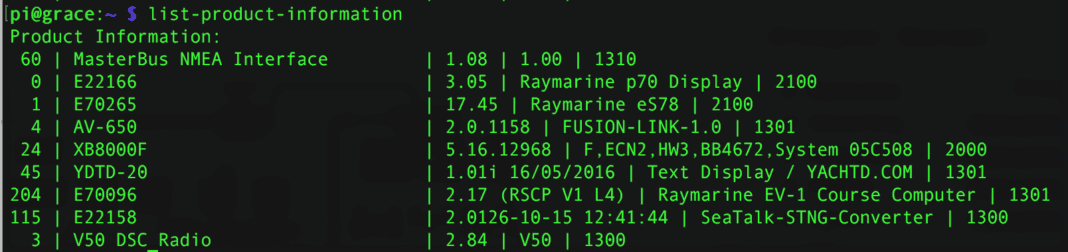
One of the most used parts of the network is my Raspberry Pi 3 Linux machine connected to the NMEA 2000 network via an Actisense NGT-1 USB to NMEA 2000 adapter. From anywhere in the world, I can VPN in and access any of the data on the network.
I have been testing SignalK on this system for quite some time, but I also routinely use Kees Verruijt’s canboat software to look at raw data on the bus, or make it available to other systems using n2kd.
This system will grow into being a key player on the network through SignalK and other custom scripts I’ve written. Examples include sending emails when bad conditions happen, interact with other non NMEA systems on the boat, and log data remotely about system performance.
Maretron Tank Adapter

I wrote about this device when I installed it on Jammy, and after running out of water three times on various trips this last year, I decided it was time to install one on Grace. I can see the tank levels in multiple places, but the most useful is on the Raymarine chart plotter both while filling the tank, and to keep tabs on water in general.
MasterBus
MasterVolt has a proprietary CAT5 cabled network between all of its devices called MasterBus. I have a charger, shunt, fuse/distribution block, display, NMEA 2000 and USB interface devices on the MasterBus network. These devices communicate amongst themselves over MasterBus, and allow me to configure them from the display panel or via USB.
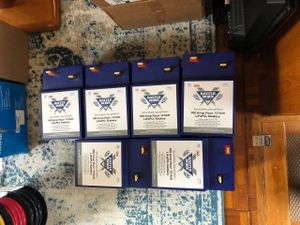
I chose MasterVolt because I wanted something very integrated and configurable. I am also using Firefly batteries, which require very specific charging profiles, something MasterVolt can provide. A dedicated article on my MasterVolt & Firefly experience is forthcoming.
The biggest challenge was programming the above NMEA 2000 to MasterBus interface so that the data from the MasterBus side would be sent over to the NMEA 2000 network and show up on various displays. More on that in the article referenced above.
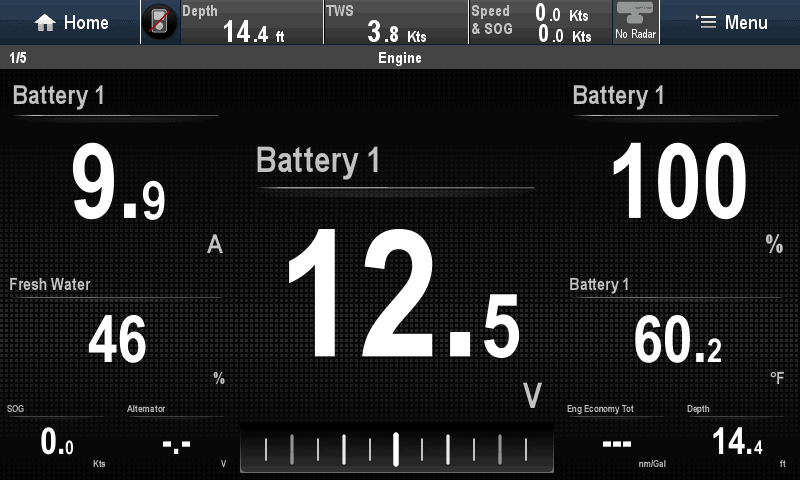
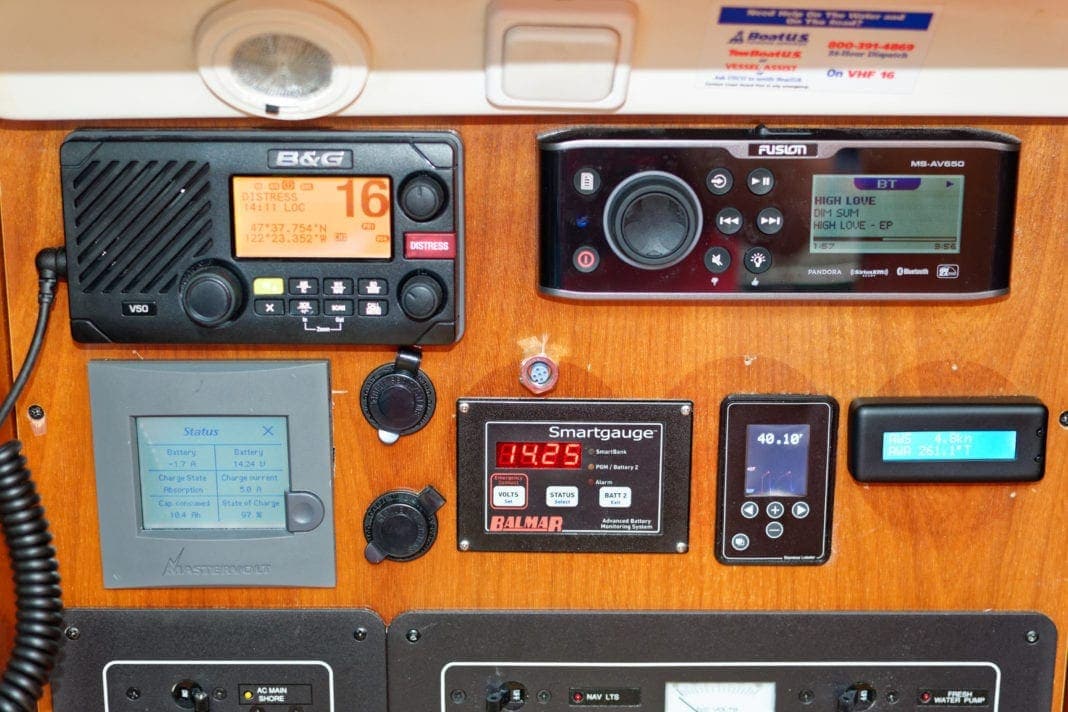
Even with the challenges, having the details on the battery bank are invaluable while driving outside at the cockpit station, or on a mobile device. This way I can keep an eye on things in case a crew member turns something on that could put the battery bank at risk, and also check on the charge state, battery temperature, and more.
WiFi
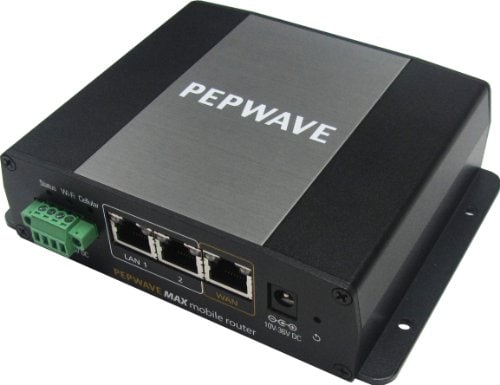
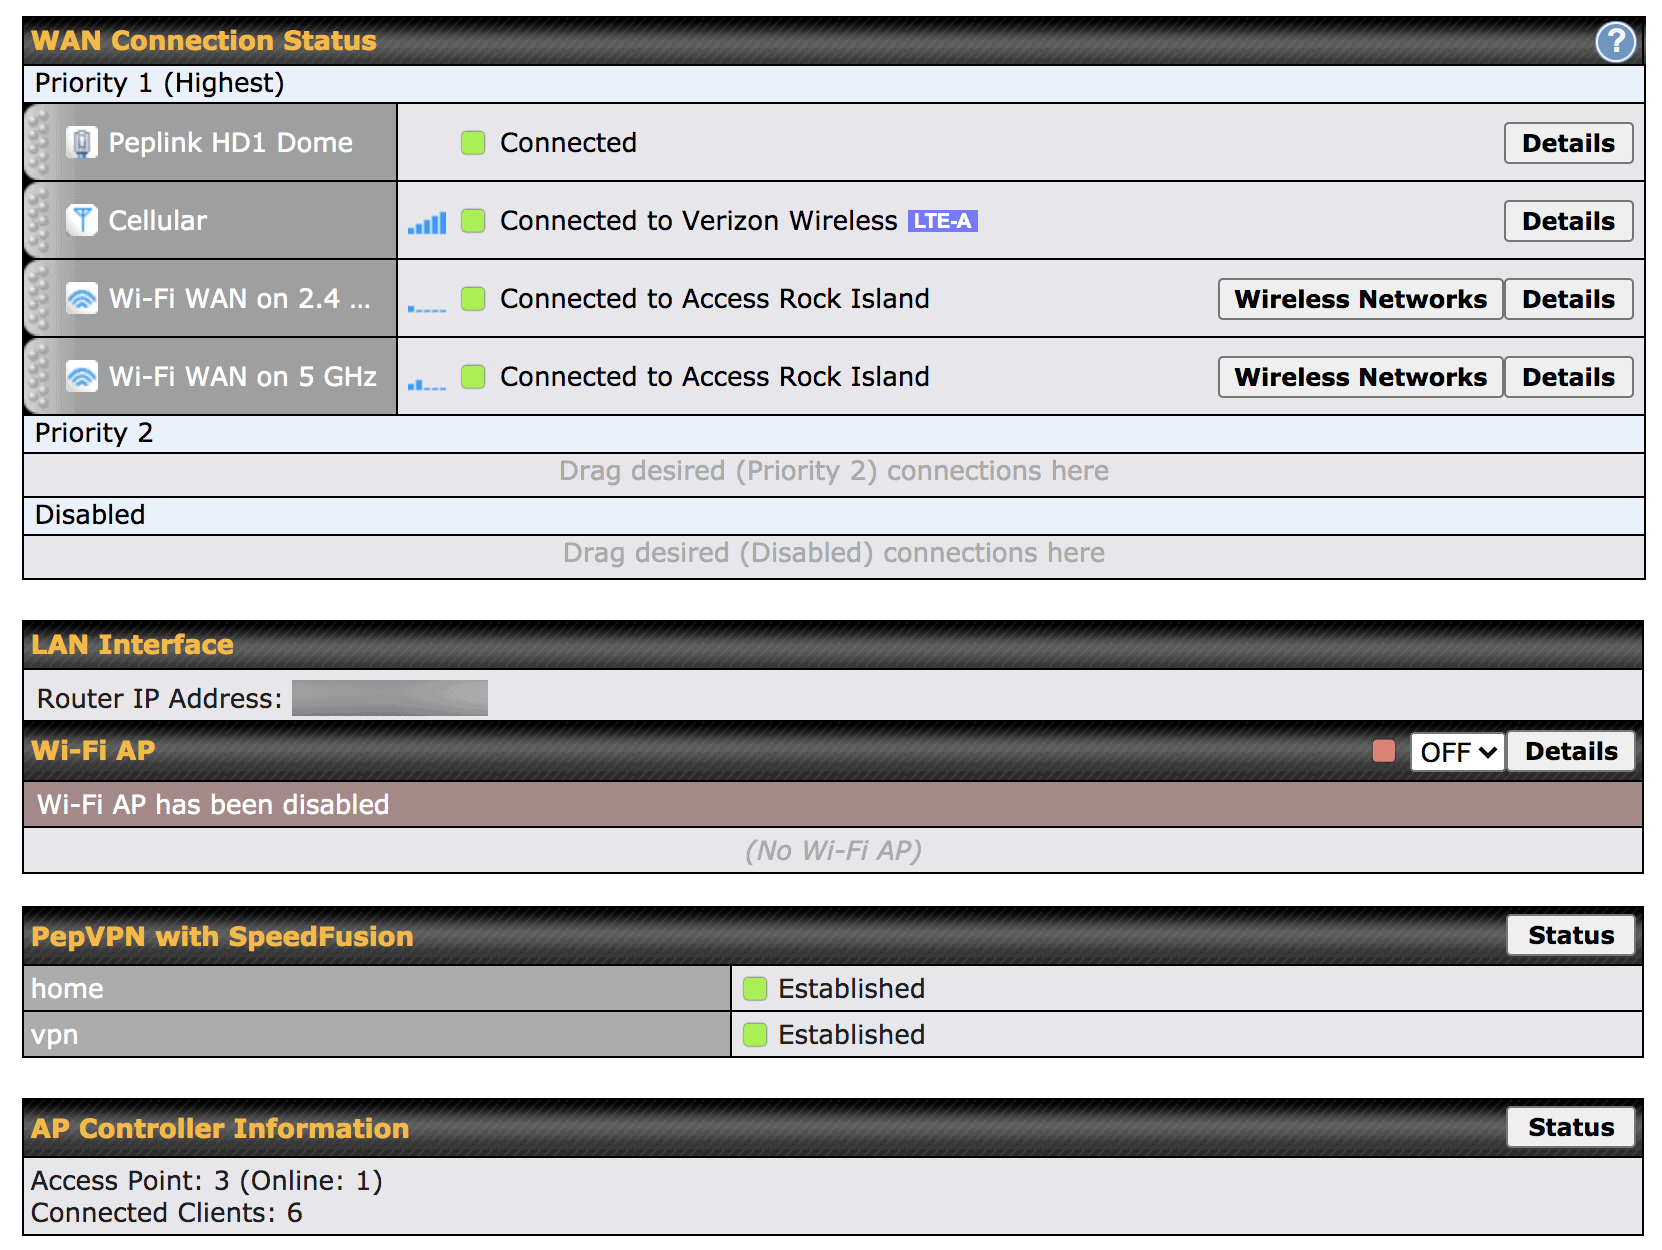
The final network is provided by my Peplink MAX BR1 router. It broadcasts two WiFi networks across the entire boat to allow wireless connectivity to devices, as well as access to other sites, and the Internet. It uses an external LTE antenna and amplifier for Internet connectivity.
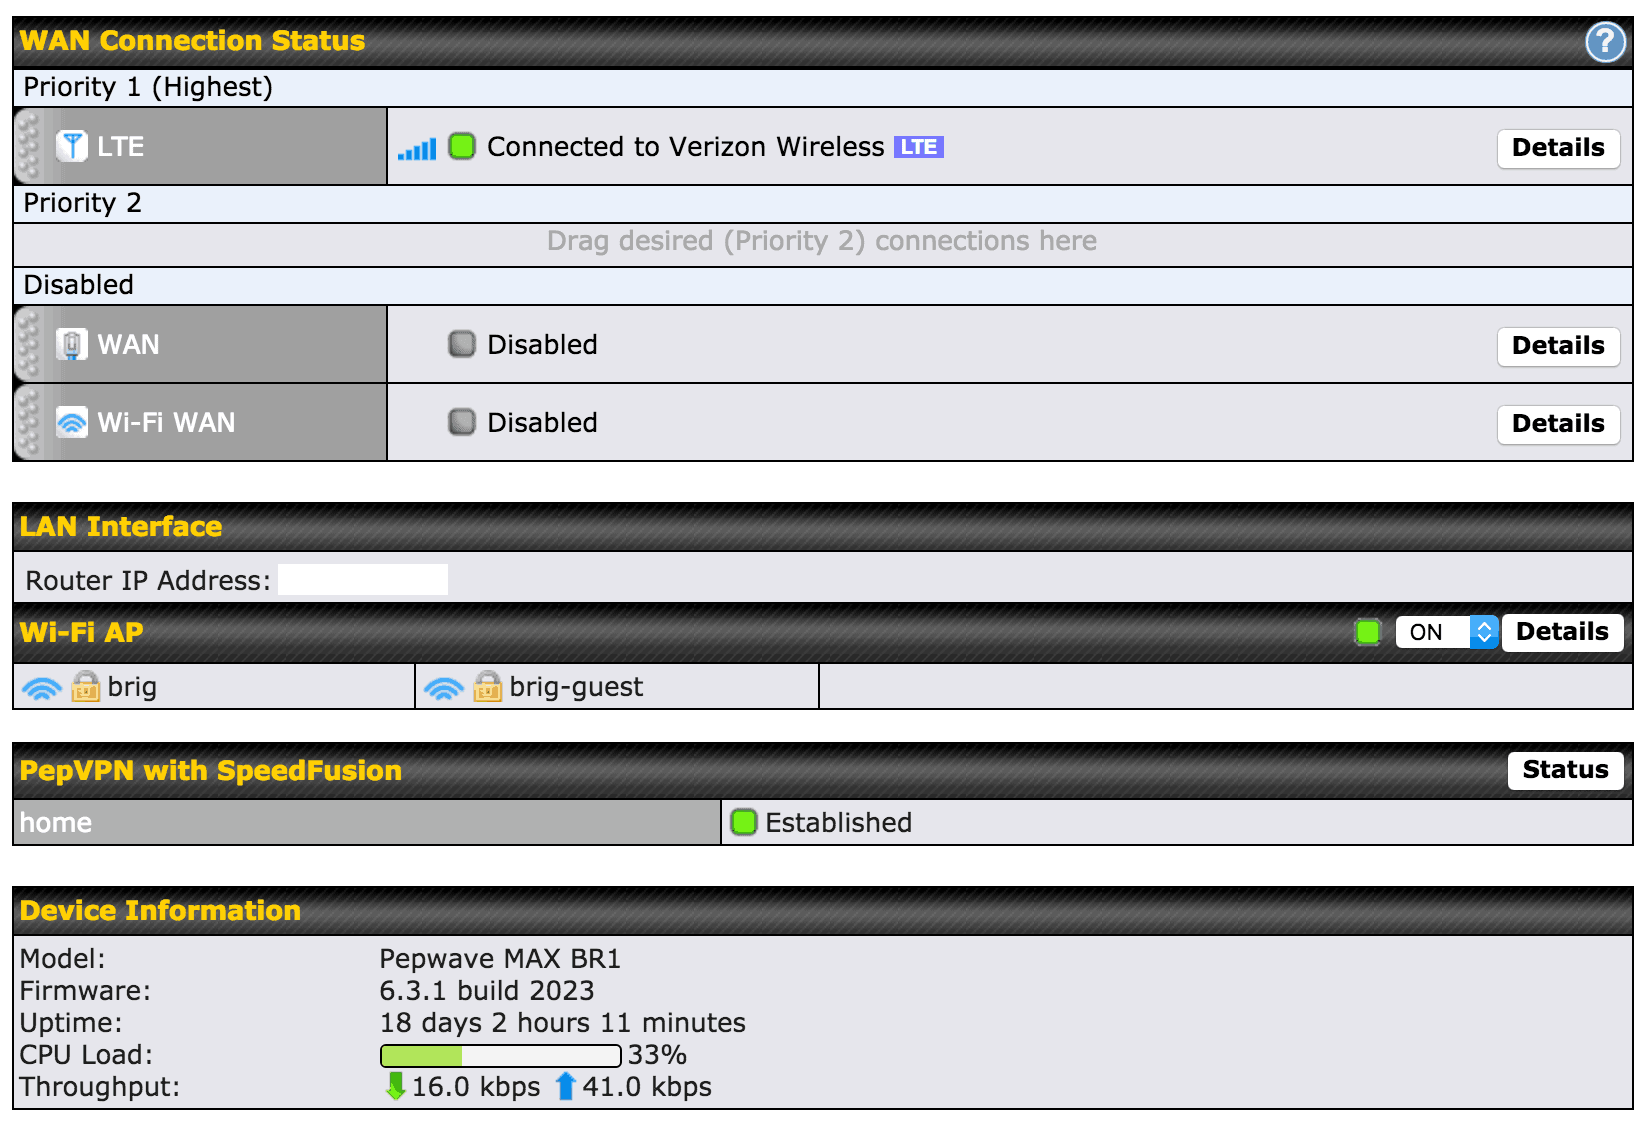
There are two WiFi networks – one for secure devices (named brig above) such as my computer, the Raspberry Pi 3, Raymarine chart plotter, Vesper AIS, etc. This network is also connected via VPN to my house so I can access boat data easily.
There’s also a guest network (brig-guest) where visitors can connect and surf the ‘net, as well as access local resources such as SignalK through a firewall rule I’ve configured on the Pepwave. This allows guests to use their own apps and consume network data such as GPS location, wind, etc. without accessing the more sensitive parts of my network.
The Peplink has proven to be the most reliable, configurable, and powerful device I’ve used on the boat for Internet and local WiFi in over 10 years. I plan on writing a more detailed review on how I have it setup soon.
The Power
I also chose to do something I had on Jammy which was somewhat unique – two different power sources on the whole bus. This allows me to leave a portion of the bus on all of the time (everything to the left of the Maretron Power Tap in the Navigation Station box in the main diagram at the top of the post) so I can access it remotely when away from the boat, and record long term stats. The rest of the bus (everything to the right of the Power Tap) only comes on when the Instrument circuit is turned on, usually when we’re sailing / motoring.
To do this, I connected only one half of the power wires for the Power Tap, and wired those to an always-on circuit. The other side of the bus is powered by the SeaTalkNG 5 port connector block in the cockpit station.
The Limits
As with any complicated tech, there are some limits to be aware of.
Bridging technologies – make sure that any proprietary network technologies have some sort of bridge, either to NMEA 2000 / 0183, or WiFi access of some sorts. For instance, my Balmar Smartgauge and Stainless Lobster Fridge Optimizer are both non-networked, and the data they contain is definitely something I’d love to have on my network.
Supported Data – many display devices may not support all of the data on a NMEA 2000 network. Make sure you check that your chart plotter supports the NMEA PGN’s you are trying to display. I was surprised to find a very limited amount of PGN’s supported by my Raymarine eS78 chart plotter when it comes to power devices. It does not display any data from my charger or AC power source monitoring, available via the MasterVolt to NMEA 2000 converter. I’m hoping they will add it in the future.
Interconnectivity – getting all of this stuff to play nice together is also sometimes a problem. Conflicting PGN’s or device ID’s is common, and sometimes manufacturers don’t provide an easy way of changing this. In many cases, you have to have special privileges on their equipment, which they are not very willing to give out to an end-user.
The Result
The end result is that from anywhere, both on the boat and remotely via my phone, I can see the status of every critical system. I have become used to this visibility from Jammy’s network, and I plan on continuing to add and enhance things over time.
I believe having this visibility allows me to relax more while out on the water, and also be more aware of my boat’s health. While I have a networking background, it doesn’t take that to put a network like this on your boat – the biggest challenge is the interconnectivity, and hopefully my documentation will help someone in the future wanting to overcome some of those limitations.